[NOTE: This post has been updated and completely rewritten from an original publication in 2017.]
You hopefully know by now that the Facebook pixel is important — it’s really freaking important. It’s the Facebook pixelThe Facebook pixel helps advertisers track events that occur on their website and reach people who performed those events with ads. More that allows you to create powerful audiences for ad targeting, run dynamic ads, track conversionsA conversion is counted whenever a website visitor performs an action that fires a standard event, custom event, or custom conversion. Examples of conversions include purchases, leads, content views, add to cart, and registrations. More, and optimize for conversions.
Some marketers remain slow to add the pixel — or add it correctly. The most common reason is intimidation. They assume the process is complicated and overly technical.
While the pixel can get technical (particularly related to standard and custom eventsConversion events tracked by the pixel, app SDK, or API that are outside of standard events. These tend to be created to fit the publisher's needs when a pre-defined standard event will not. More), it is extremely simple to apply it for its core utility.
Let’s take a closer look at three different methods that allow you to install the pixel easily and properly today…
Create Your Pixel
It’s possible that you don’t have a pixel yet. If so, go to Events Manager by finding it in your Business Tools menu at the top left in Business Manager…
On the left, click to Connect Data Sources (you may first need to hover over the green circle with a white + in it).
Select “Web” and click “Get Started.”
Select “Facebook Pixel” and click “Connect.”
Name your pixel. You can also enter the URL of your website to check and see if it was set up before.
Now click “Continue Pixel Setup”…
Locate Your Pixel for Manual Install
If you just created your pixel and clicked “Continue Pixel Setup” in the step above, click to “Install Code Manually.”
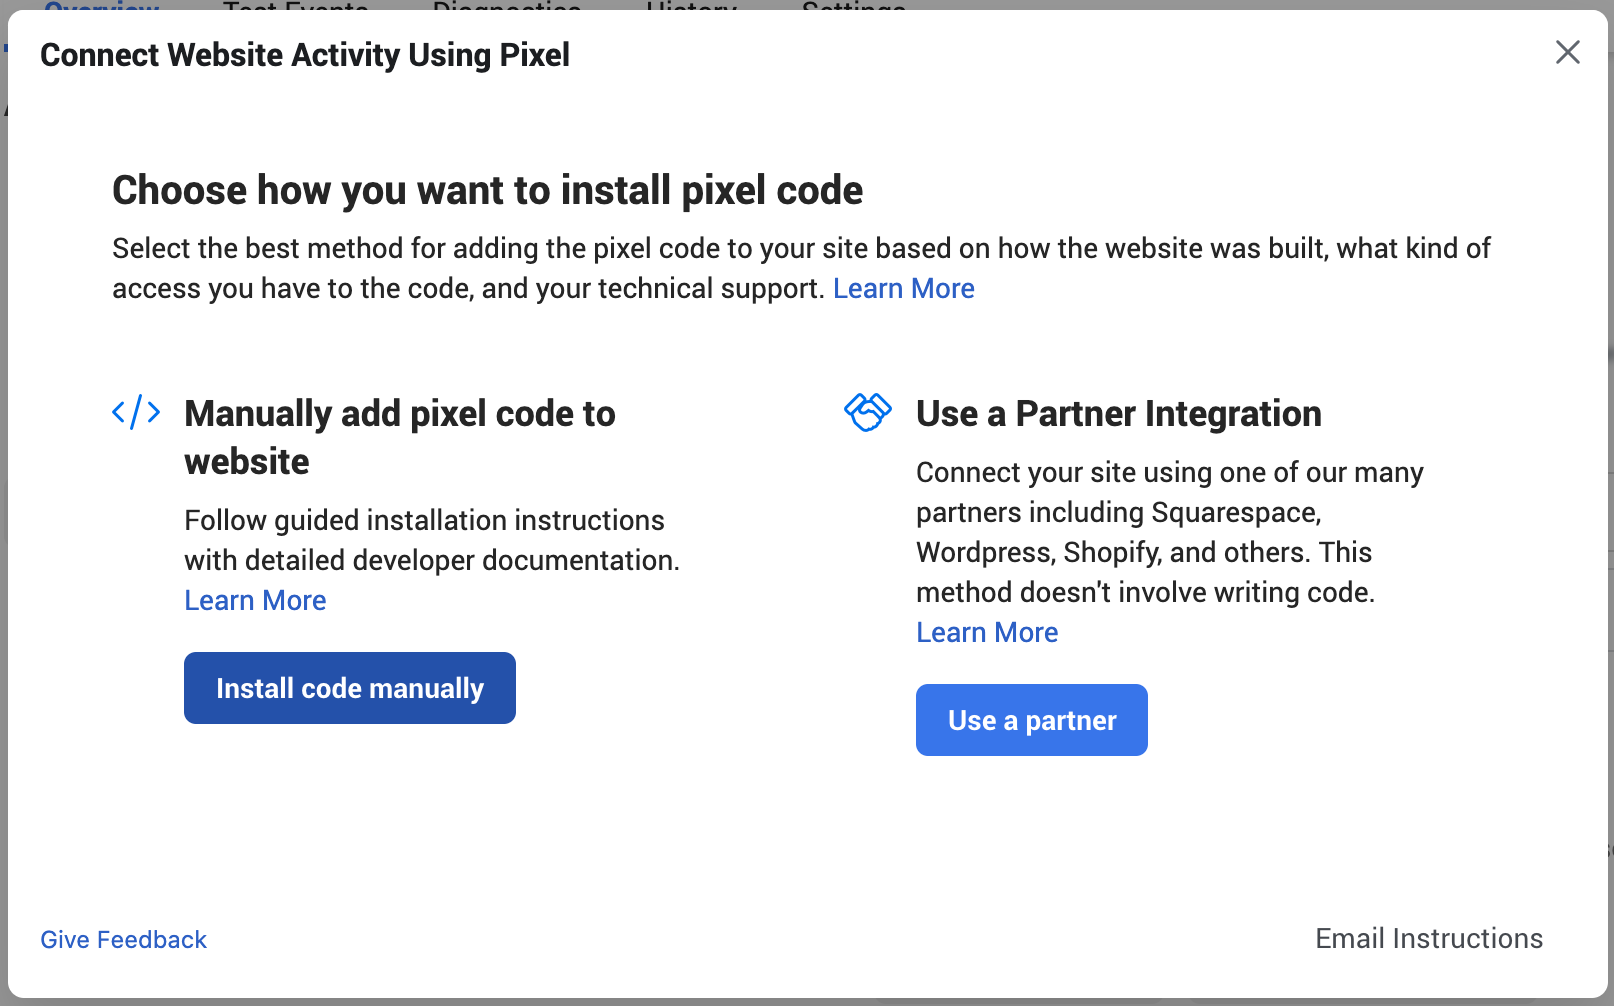
Now, click the green button to copy your code.
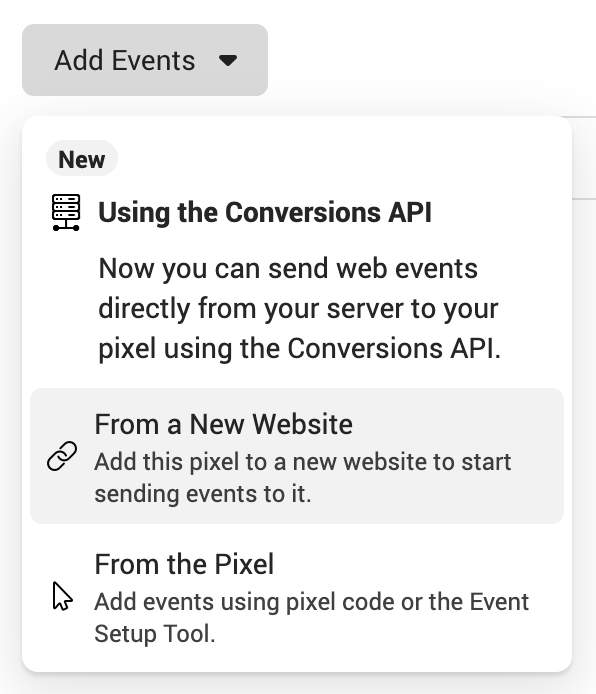
If you previously created your pixel and tried to install it at another time, click the Add Events drop-down and select “From a New Website.”
For more details, read this post on finding your pixel or watch the video below.
1. Install Your Code Manually with Google Tag Manager
First, know that there are a million and one ways to install your pixel code manually. The goal: Add the base pixel code immediately before the closing HEAD tag on every page of your website.
This can be done with WordPress plugins, creative programming, and sometimes within theme settings. I’ve done it these ways before. But I’ve since graduated to Google Tag Manager (I’ll need to cover more about why in a separate post).
If you choose to use Google Tag Manager, follow these two primary steps…
1. Create a Tag.
Name your tag something like “Facebook Pixel – Base Code.”
Use the Custom HTML tag type and paste your base pixel code (found in the prior step) here.
2. Select Your Trigger
In the Triggering section below your tag, edit and select the “All Pages” Page View trigger.
Save your new tag and publish your changes.
2. Use a Partner Integration
Instead of installing the code manually, choose the option to “use a partner.”
There are a whole bunch of options to choose from…
I’m not going to go into every integration, for obvious reasons. But, let’s look at Shopify, a popular option, as an example.
I recommend turning on Advanced Matching.
Select your Online Store in Shopify.
Within your Shopify preferences, paste your Facebook Pixel ID.
Note that this isn’t your entire pixel code, but rather the numeric value that represents your Pixel ID within the code.
Once you’re done, verify your connection.
If you get a green dot, you’re good!
3. Use the Facebook WordPress Plugin
One of the integration options is WordPress. I assume this will be another likely choice for many. So let’s walk through it, too.
First, I recommend turning on Advanced Matching.
Download the Facebook WordPress plugin.
Install and activate your plugin as you normally would.
Enter your Pixel ID (see the Shopify example if you need it) and turn on Advanced Matching.
Then verify your pixel.
If you get a green dot, you’re good to go. We won’t worry about adding events for now. That will be another post!
Learn More About the Facebook Pixel
Want to master the Facebook pixel? Take your learning a step further with the Facebook Pixel Masterclass, a video series covering advanced topics related to the pixel. We’ll go into detail related to pixel eventsPixel events allow you to track specific actions on your website that can be used for reporting, targeting, and optimization. More, custom conversionsCustom conversions let you create rules for events or URLs so that you can better track and optimize for specific actions with Facebook ads. More, tracking, optimizationThe Performance Goal is chosen within the ad set and determines optimization and delivery. How you optimize impacts who sees your ad. Meta will show your ad to people most likely to perform your desired action. More, and targeting.
Or, if you aren’t ready for the advanced topics, check out my Facebook Pixel Basics free video series (this is also included within Facebook Pixel Masterclass). You can register by clicking the link below…
It includes eight lessons covering what the pixel is, why it’s important, how it works, how to add it to your website, and how to test that it’s working.
Enjoy!


