[NOTE: This post has been updated and completely rewritten from an original publication.]
The power of Facebook ads is found within the targeting. And targeting those who are closest to your business using Facebook website custom audiences is one of the best and most effective ways to do it.
I don’t care how perfect the ad copy, imagery, bidding, and optimization are, it’s imperative that you target the people most likely to perform your desired action.
Who are those people? In many cases, they are those who have visited your website.
Those who have the most success with Facebook ads have mastered remarketing. The purpose of this post is to help you master it, too.
What is Website Retargeting on Facebook?
Website retargeting — also known as remarketing — is the process of running ads that target people who have previously visited your website. In this case, we’re speaking specifically about using Facebook ads.
You can only run ads targeting people who have visited a website you control. You’ll need to place a snippet of code (also called a “pixel”) on your website that essentially allows you to claim those pages.
Whenever that pixel is fired, Facebook is notified that a user has visited a page of that site. Facebook will then refer to rules an advertiser has created to determine whether that user should fall within a specific audience to be targeted with an ad.
Advertisers create rules that help bucket website visitors into specific audiences based on the specific actions they’ve performed and when those actions occurred. This then allows advertisers to create ads that are perfectly crafted based on a user’s activity on the advertiser’s website.
How to Install the Pixel
All of this is possible thanks to the Facebook pixel. The base pixel is unique to your ad account, and it should be placed on every page of your website prior to the closing HEAD tag.
There are countless methods for adding that pixel to every page of your website.
1. Partner Integration
Facebook has multiple partners that help integrate the pixel for you.
2. Facebook WordPress Plugin
If you have a self-hosted WordPress website, you may want to try out Facebook’s own plugin.
3. Google Tag Manager
Google Tag Manager is what I use.
I won’t reinvent the wheel here since I’ve already written extensively about how to install the base pixel code (read that linked post), and the focus of this post is creating website custom audiences. But, it’s important that you don’t skip this step.
Add Pixel Events
To get the most out of website custom audiences, you need more than just the base pixel code on every page of your website — you need to utilize pixel events, too.
Pixel events are how you define conversions and other critical actions that are occurring on your website. By using pixel events, Facebook not only knows that someone visited, but that they performed an important action. This information can be used in ad optimization, conversion tracking, and — of course — targeting.
Once again, I’ve written about this elsewhere, but let me help you get this done…
1. E-Commerce Partner Integration
If you use Shopify, for example, many of these events are already being created for you. Here’s a list of partners that may help with this process.
2. Use the Event Setup Tool
The Event Setup Tool has the potential to be great. No code and streamlined. Yet, as I write this, it’s flawed. Maybe it’s good enough for your purposes.
3. Create Pixel Events Manually
I create my events manually, and I use the Pixel Event Generator to provide the code that I need to use.
However you do it, it’s important that you utilize events and parameters for a multitude of reasons, but it will become clearer when you set up website custom audiences based on pixel events.
Create a Website Custom Audience: Basics
Go to Audiences within the Business Tools menu.
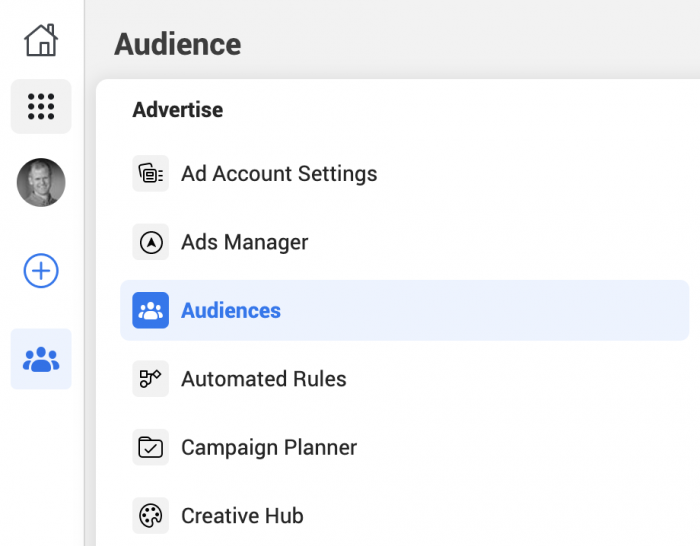
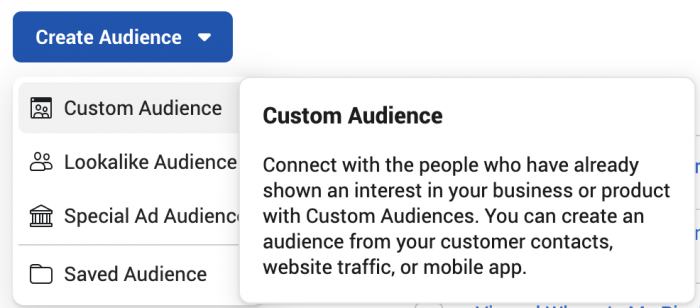
Click “Create Audience” and select “Custom Audience.”
Select “Website” as your source.
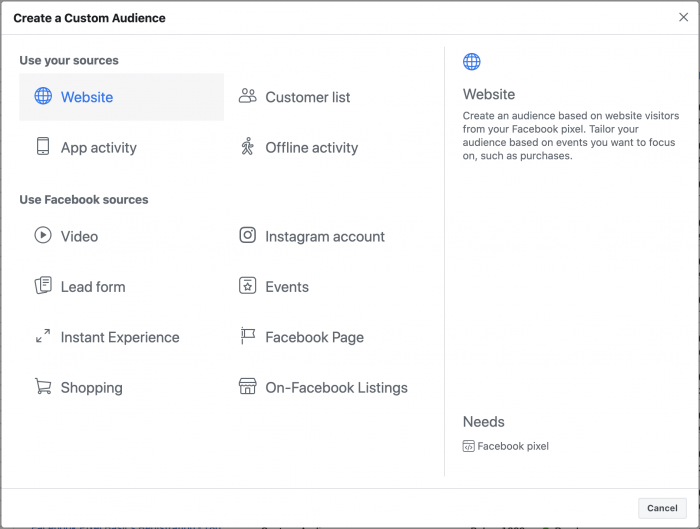
It will look like this…
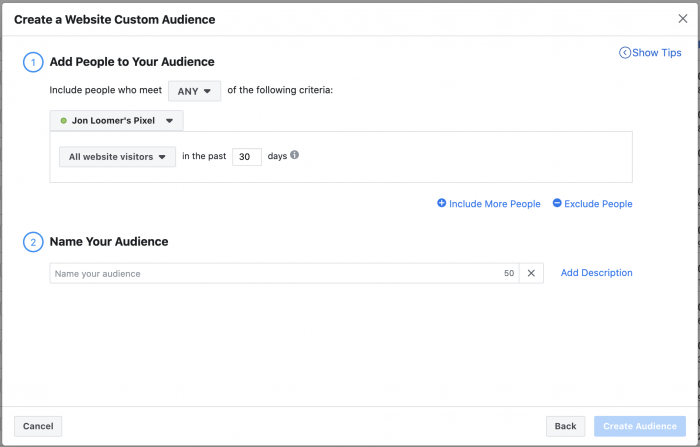
You can include people who meet ANY or ALL of the conditions you set (“ANY” is set by default).
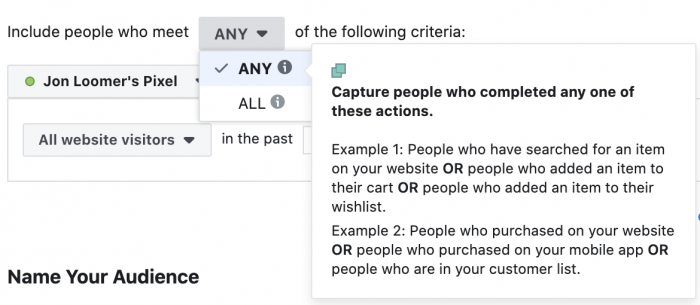
This will only matter if you add multiple conditions later (more on this in a minute). In most cases, just stick with the default here.
If you have multiple pixels, make sure that the right one is selected.

You’ll be able to create an audience of all website visitors, people who visit specific web pages, visitors by time spent, and from your events.
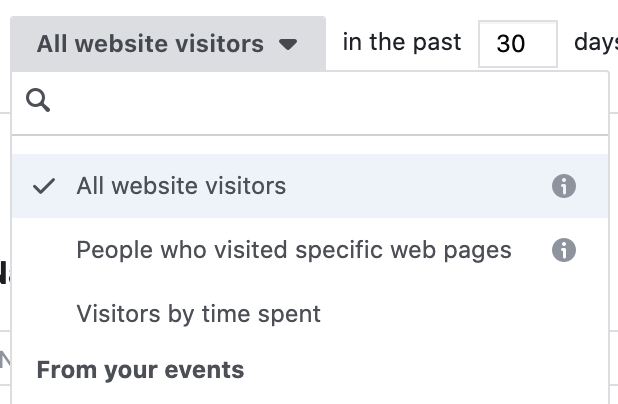
We’ll get into the details of all of these in a moment. All website visitors is the default.
You’ll need to determine the time window for when and how long someone is in your audience.
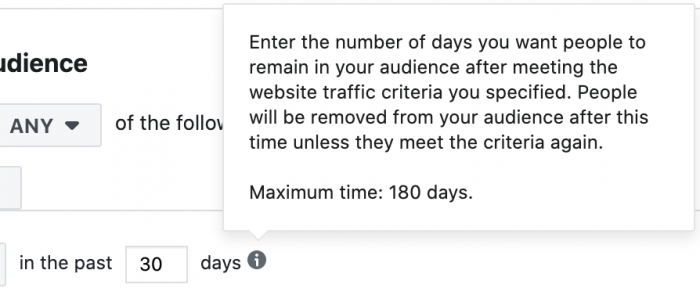
By default, this duration is set to 30 days, but it can be anywhere from 1 to 180 days. While 1 day will be the most relevant, it will also generate the smallest audience; a 180-day duration will include less relevant visitors, but it will also generate more targeting volume. Know that this is a rolling window that updates dynamically.
You can choose to include more people or exclude people (if you left the default at “ANY” at the top).

This allows you to create more conditions and refine the audience.
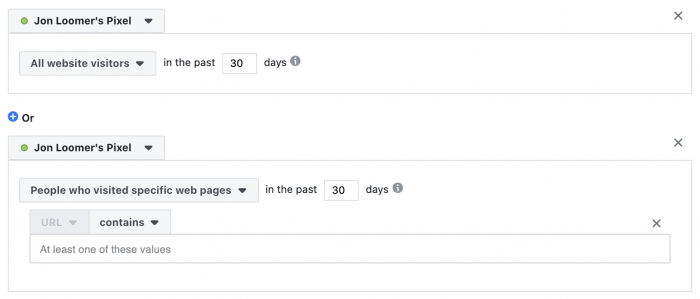
I rarely, if ever use this. Instead of including and excluding people in the same audience, I’ll create simple audiences based on a single rule so that I can choose to either target or exclude that audience in the ad set.
When you’re done, name your audience and (optionally) add a description. Then click the “Create Audience” button at the bottom.

Website Custom Audience: All Website Visitors
The default, and likely most used, audience is for all website visitors.

This is the audience that websites with less traffic will use most often to get volume, rather than isolating visitors to specific pages. It doesn’t matter what they did or how long they were on your website to be included in this audience.
There is certainly value to an audience like this, but understand that it includes EVERYONE — your most valuable customers, accidental clicks, and everything in between.
Website Custom Audience: People Who Visited Specific Web Pages
This is a multi-purpose audience that has so many uses that we can’t list them all here.
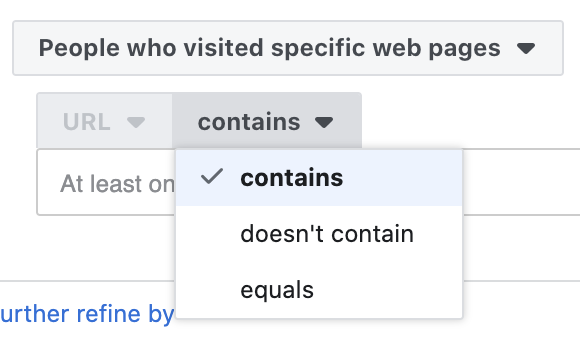
Whenever I write a new blog post (like this one), I create a website custom audience for that page.

I can then exclude that audience when promoting that particular blog post. I can also target that audience when promoting a related product.
Whenever I publish a new free opt-in, I create a website custom audience for the confirmation page the user is redirected to after submitting their contact info.

I can then exclude people who already registered when promoting that opt-in, and I can target those who opted in when promoting an up-sell.
I’d recommend creating an audience of people who visited important landing pages. You can then target them with a special offer (excluding those who already converted).

You can create an audience of people who visited any page of your website that includes a keyword within the URL.

This has the potential for picking up multiple pages — a category of content — that will create more volume. You can then target those people when promoting a related product or related content.
These ideas are just scratching the surface for this audience type, but it should provide some inspiration and direction.
Website Custom Audience: Visitors by Time Spent
Visitors by Time Spent helps you remove your lower quality visitors from an audience.

You can create an audience of your top 5%, 10%, or 25% visitors in terms of time spent on your website.
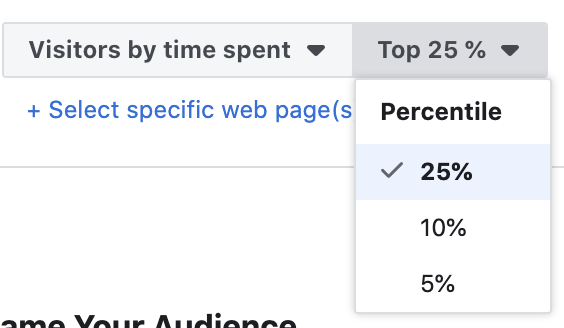
If you want, you can further filter by pages visited.

While this approach is great for isolating valuable visitors, know that it’s also slicing your audience into a much smaller fraction. It may not be ideal for websites with light traffic. Or you may simply want to use a longer duration and lower budget.
Website Custom Audience: From Your Events
This one is a whole lot of fun, and it’s a big perk to utilizing events with parameters.
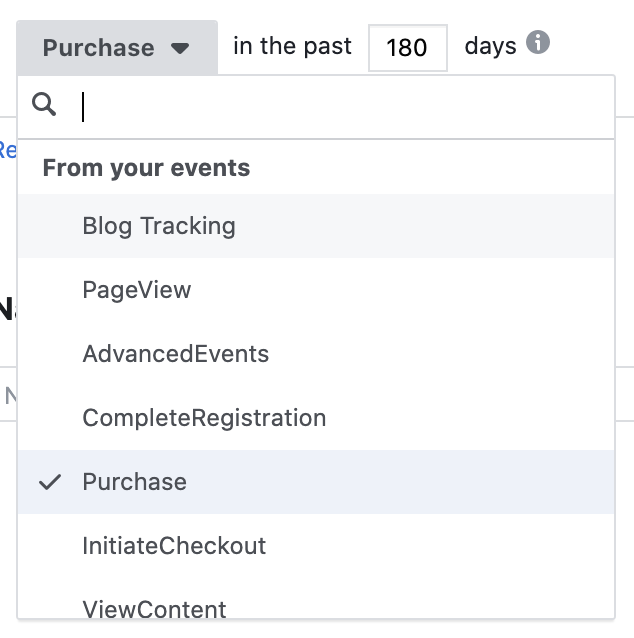
The events that appear as options will be those that have been receiving activity on your website.
Once you select an event, you can click the “Refine by” link.
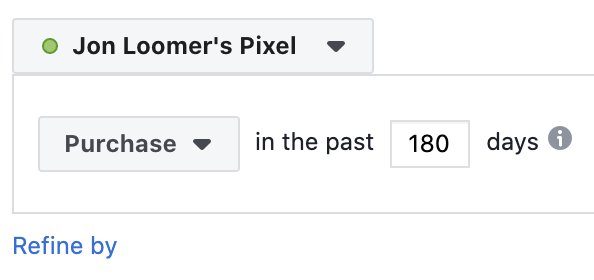
This will allow you to refine by URL/Parameter, Aggregated Value, or Device.
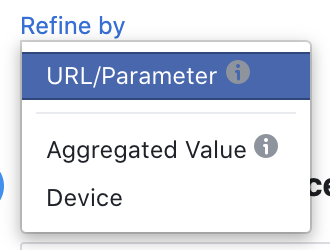
At this point, you’re only limited by your own creativity and the events you have on your website. But, here are a few examples of audiences you could create…
All purchases during the past 180 days. These people may be likely to purchase again, or this may be a good source for a lookalike audience.
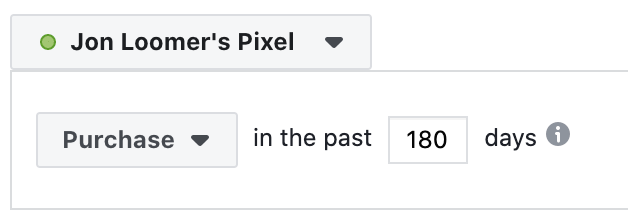
All registrations during the past 180 days.

All people who viewed 4 or more pages during the past 180 days (high-quality visitors).
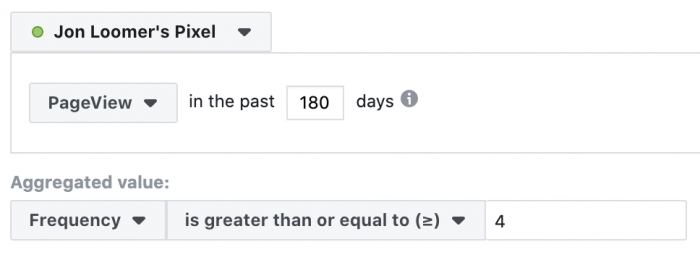
All people who completed 2 or more purchases during the past 180 days.
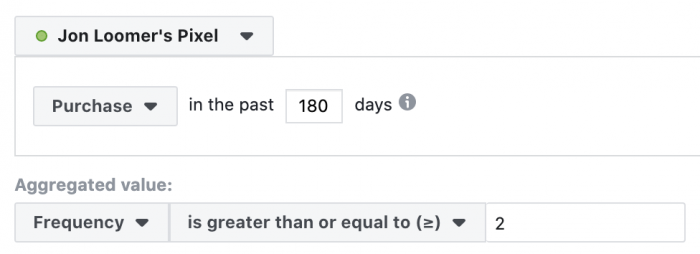
All people who spent $500 or more in aggregate on my website during the past 180 days.

Everyone who scrolled at least 50% on a blog post during the past 180 days.
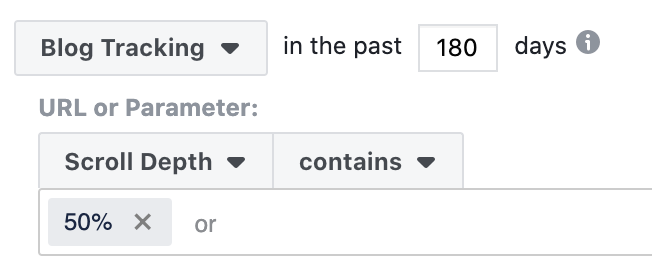
Scroll depth is actually a custom event that I’m using on my website, along with time on page to help track, optimize for, and target high-quality website visitors.
How to Target or Exclude a Website Custom Audience
When creating an ad set, you can target a website custom audience by entering it in the custom audience text box.
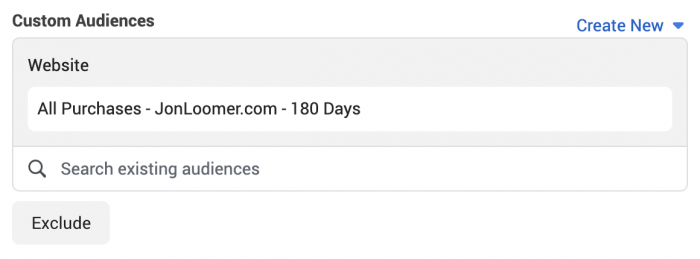
You can also click the “Exclude” button and exclude one or multiple custom audiences.
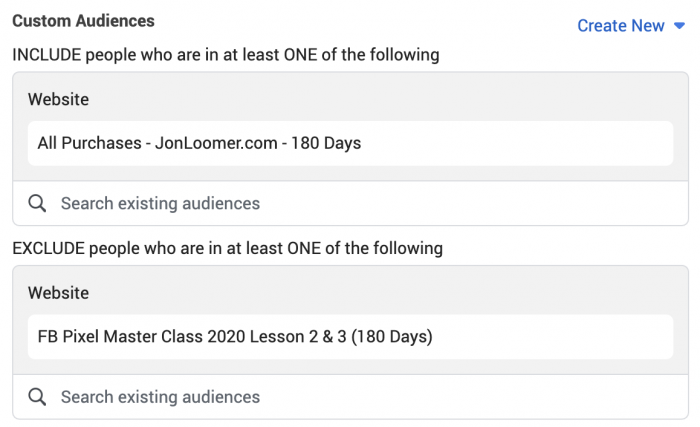
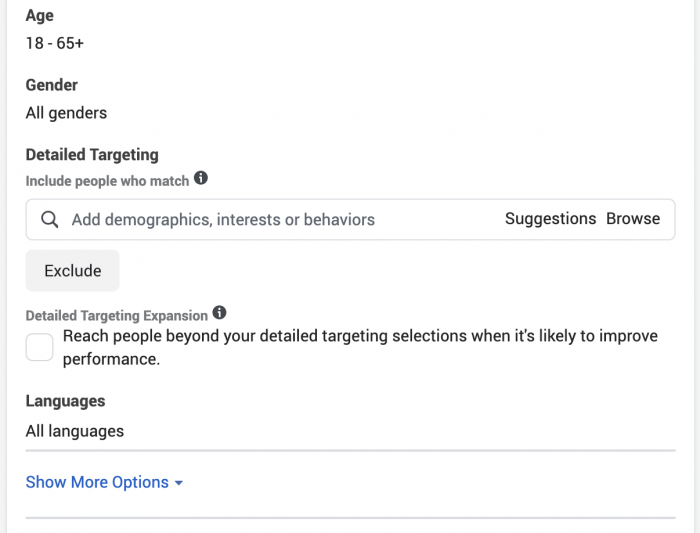
When using custom audiences, be careful about how you do any other targeting and filtering in the audience targeting. For example, you may want to select a handful of countries or even go Worldwide, depending on the size of the audience you’re targeting.

I would leave all other targeting at the defaults unless you have a specific reason not to.
Dynamic Ads
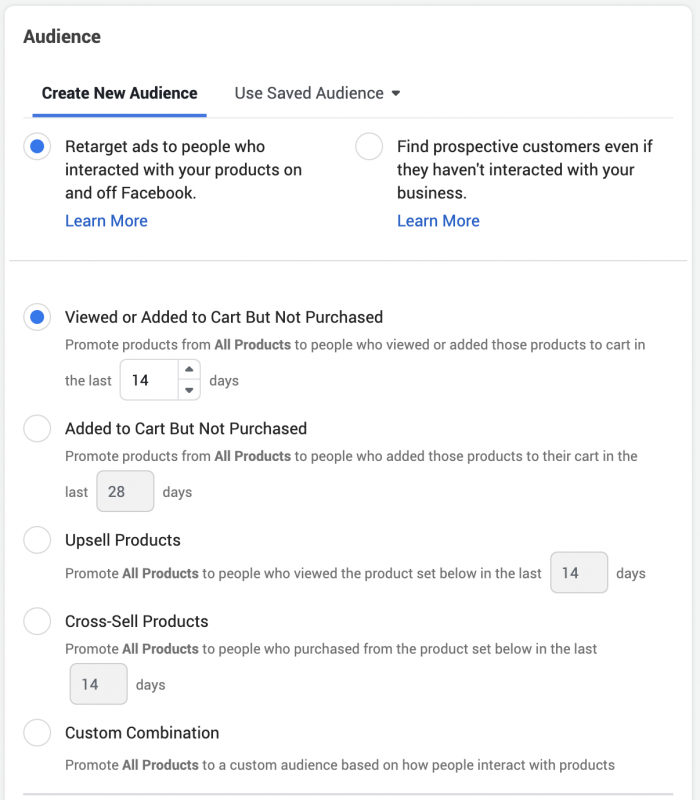
When you hear the term “remarketing,” you may also think of dynamic ads. Well, that’s another complex topic in itself. But, know that much of the targeting and excluding that occurs there is done dynamically — not because you created audiences, but because you set up the proper pixel events.
A Note on Reach Optimization
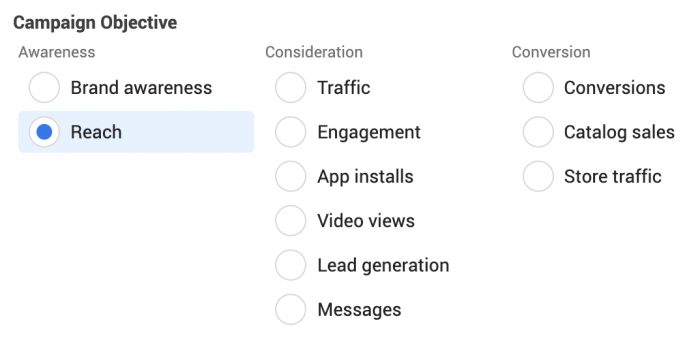
When I create hyper-targeted (and small) audiences that I want to target, I often won’t optimize for conversions. When you do that, Facebook optimizes to show to only certain people in that audience. But these super small audiences are relevant, and I want to reach everyone.
That’s why, when we’re talking about hyper-targeted audiences in the hundreds of people, I’ll use the Reach objective.
I will then optimize for Reach and utilize frequency capping.
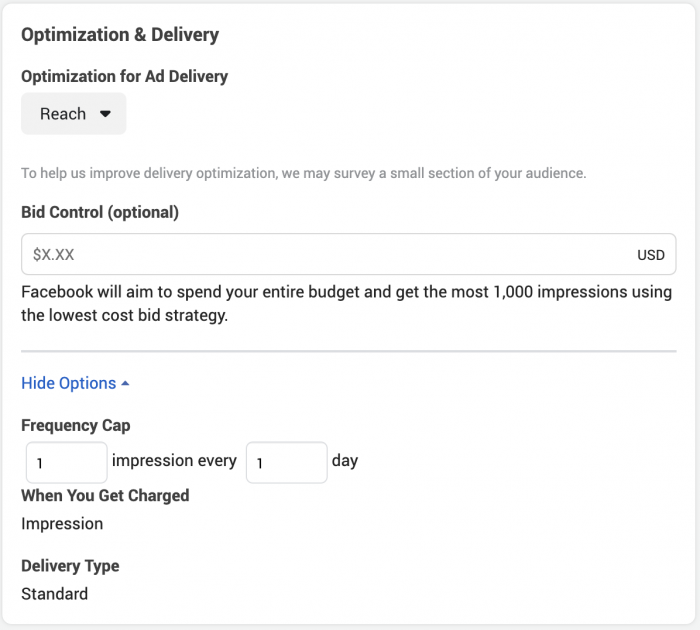
Reach optimization isn’t magic, and it shouldn’t be used in very many cases. But this is a time when I find it useful.
How Should You Use Remarketing?
I hope I provided plenty of ideas and inspiration within this post about how you can use website custom audiences for remarketing. Know that there isn’t a right or wrong path. The audiences you can create are often unique to your website, products, and events that you’ve created.
Remarketing is a go-to strategy for me. I use it for driving traffic, re-engagement, building my email list, and selling products. It may not be the primary audience I target in all of these cases, but they are certainly in the targeting mix — and I also use these audiences regularly for exclusion purposes.
What other ways do you use remarketing?
Learn More About the Facebook Pixel
Want to master the Facebook pixel? Take your learning a step further with the Facebook Pixel Masterclass, a video series covering advanced topics related to the pixel. We’ll go into detail related to pixel events, custom conversions, tracking, optimization, and targeting.
Or, if you aren’t ready for the advanced topics, check out my Facebook Pixel Basics free video series (this is also included within Facebook Pixel Masterclass). You can register by clicking the link below…
It includes eight lessons covering what the pixel is, why it’s important, how it works, how to add it to your website, and how to test that it’s working.
Enjoy!

