Any screenshots and details of functionality may no longer be relevant. Below are some related posts that are more current:
- How Many Active Ad Sets Should You Have in a Meta Ads Campaign? (Jun 23, 2026)
- Age, Gender, and Placement Restrictions (Jun 14, 2026)
- Common Audience Segments Failures (Jun 7, 2026)
Now that all advertisers have access to Custom Audiences via the self-serve ad tool and Power Editor, it’s time to start talking more about some creative ways to use them.
If you haven’t heard of Custom Audiences before, this is how you can target your customers in Facebook ads, whether they are Fans or not already.
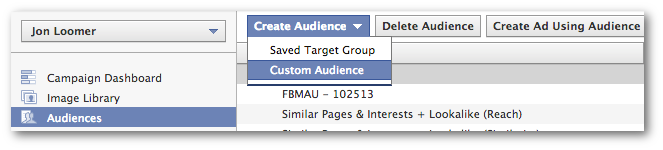
To create a Custom Audience in Power Editor, click on “Audiences” on the left and then click “Create Audience” and select “Custom Audience.”
Then name and describe your audience. You’ll want it to be something descriptive so you’ll know what it is later.
Finally, you’ll upload your file that has your list of customers on it. This should be either a CSV or TXT file. If it’s an email list, make sure it’s only one column and only has valid email addresses in it.
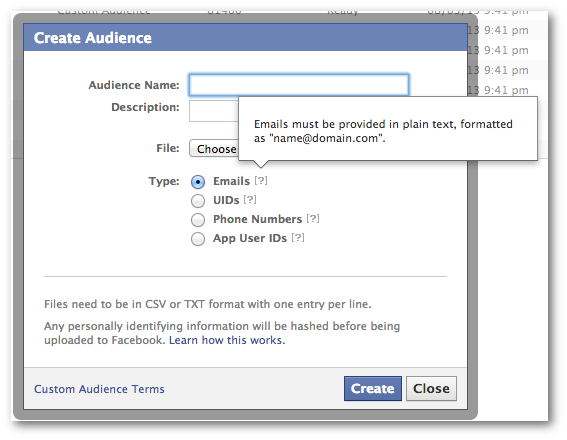
It will take Facebook up to an hour to generate a list of Facebook users who are also on your email list. Expect anywhere from 30-70% of those email addresses to match up to Facebook users.
Once you have that list, what are you going to do with it? Here are four suggestions…
1. Increase Page Likes
This is a layup. Once you upload your email list and Facebook says it’s ready, this should be the first thing you do.
Until now, you’ve probably been stressing over which interests, ages, countries and other targeting options you need to use when targeting your ideal audience. This one’s easy.
You already know the people on your email list have interest in your content. Now you just need to be sure that you get as many of them as possible to like your Page — if they don’t like it already.
Within the Audience step of ad creation within Power Editor, you only need to do two things:
- Exclude current Fans from targeting
- Add your email list to targeting
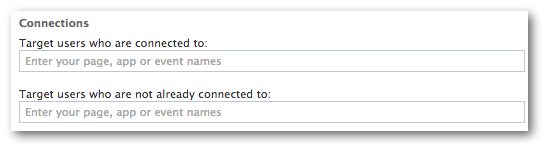
To exclude your current Fans, go to the bottom where you’ll see Connections. Here, you’ll want to enter your Page name within the text box for “Target users who are not already connected to…”
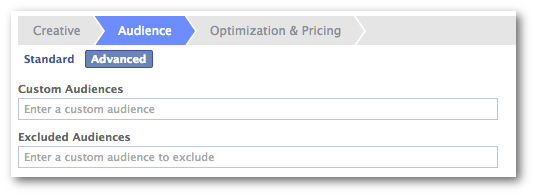
Then click the “Advanced” link within the Audience step and enter the name of the Custom Audience you created that represents your email list within the first Custom Audiences text box.
To clarify what you just did: You are now targeting everyone on your email list who is not currently a Fan of your Page. You want those people!
The only concern left is choosing what type of ad to create. Personally, I’d recommend a Page Like Sponsored Story as well as a standard Page Like ad that drives users to a landing tab where you offer something of value in exchange for a Like.
Keep in mind that the Sponsored Story will have a smaller audience because you’ll only reach Facebook users on your email list who aren’t currently Fans but have friends who are Fans of your Page.
2. Extend the Reach of Your Posts
This is one I’m doing more and more of lately.
When you publish a post to your Page, you’ll likely reach anywhere from 10-16% of your Fans organically. If you’re like me, you want to reach more of them so you’ll promote a post (through Power Editor — don’t click the Boost Post button!) that targets your Fans only in the News Feed.
You may also target non-Fans who have specific interests similar to your niche. But you have to treat that group carefully since many Facebook users don’t like seeing content from Pages they don’t like in their feed.
But you could instead reach non-Fans who are on your email list. These are people who have already expressed interest in your content, so they’re bound to embrace seeing you in their News Feed.
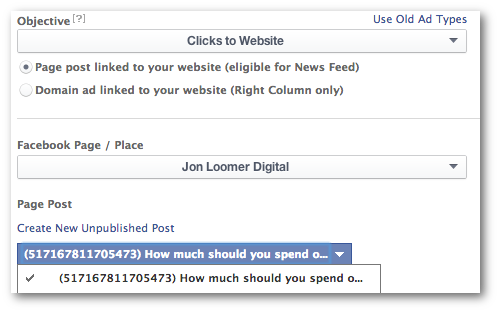
First, let’s promote a post. Thanks to the new Objective flow, there are now two different ways to do the same thing.
Objective: Select “Clicks to website” and “Page post linked to your website.” Then select the post you want to promote.
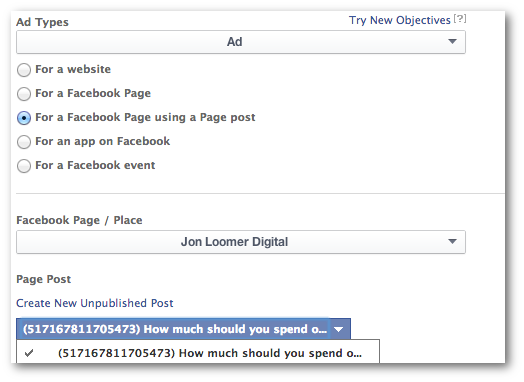
Old Ad Types: Select “Ad” and “For a Facebook Page using a Page post.” Then select the post you want to promote.
What you do next is the same for either ad creation flow.
Now do exactly what you did in example #1 to target non-Fans who are also on your email list.
The result: You’ll reach more people who are interested in seeing your content. You should also expect to get some of these people to like your Page when your post is shown in their News Feeds.
3. Sell or Upgrade a Product
I’ve found that current Fans are overwhelmingly more likely to buy from me than well targeted non-Fans (this is why I talk about creating a Facebook sales funnel). So you should target this group when selling a product.
The method is just like what you did in step #2 where you promote a post to non-Fans who are on your email list. One addition is that you should also track conversions. You do this by clicking “Track conversions on my website for this ad” and select the pixel that applies to this promotion (if you need help on Conversion Tracking, see my tutorial).
Another opportunity is for upgrades. Hopefully, you have customer lists that are segmented based on their action: newsletter sign-up, opt-in and specific product purchase.
Let’s assume you have a list of people who purchased Widget 1.0. You are now announcing the release of Widget 2.0. If you’re a smart marketer, you’re going to send an email to those who bought Widget 1.0 to let them know of the release.
But you should also target these people in Facebook ads. This allows you to craft copy and imagery around the people you are targeting. For example, the copy should assume that the user who is seeing the ad already owns Widget 1.0. Let them know it’s time to upgrade!
You would target these users by creating a Custom Audience that is for the list of people who purchased Widget 1.0 only. Then enter that audience in your targeting as described earlier.
4. Target Users Similar to Your Subscribers
This goes a bit beyond Custom Audiences, but let’s assume you have a modest-sized email list. You want to target a larger group of people to perform any of the three steps suggested above. You can do this by creating Lookalike Audiences.
While you aren’t specifically targeting your email list in this case, you are using that email list to target other Facebook users like them.
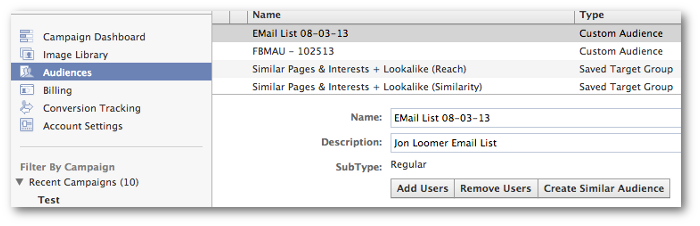
To create a Lookalike Audience, click on the name of your Custom Audience within “Audiences” on the left of Power Editor. Then click “Create Similar Audience.”
Then select a country and whether you want to optimize for Similarity (top 1% of Facebook users) or Greater Reach (top 5%).
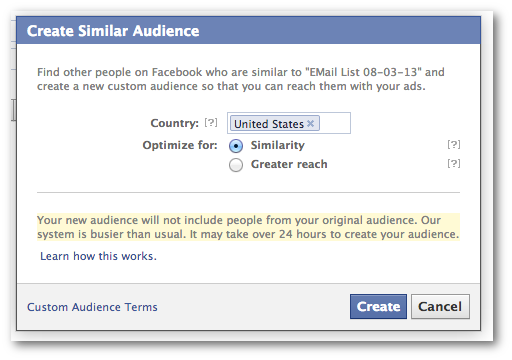
It will take up to 24 hours for Facebook to generate this list (possibly longer).
Now when you create an ad to get Page Likes, extend the Reach of your posts or sell a product, you can create a variation that targets users who are similar to those on your email list.
Your Turn
Do you have any other creative examples of using Custom Audiences? Let me know in the comments below!


