Facebook Analytics is a terrific tool that not enough marketers are using. Andrew Foxwell documented a few of the benefits recently. But, how do you get the most out of it?
In this post, I’m going to provide a few examples of some powerful Facebook Analytics reports and how it all comes back to the Facebook pixelThe Facebook pixel helps advertisers track events that occur on their website and reach people who performed those events with ads. More and Events. Ultimately, I’ll help you understand how to get those Events set up so that you can start getting the most out of Facebook Analytics today.
Let’s dive in…
Examples of Facebook Analytics Reports
Andrew provided a couple of examples in his post of reports that you can create with Facebook Analytics. Let’s detail a few more ways you can use it.
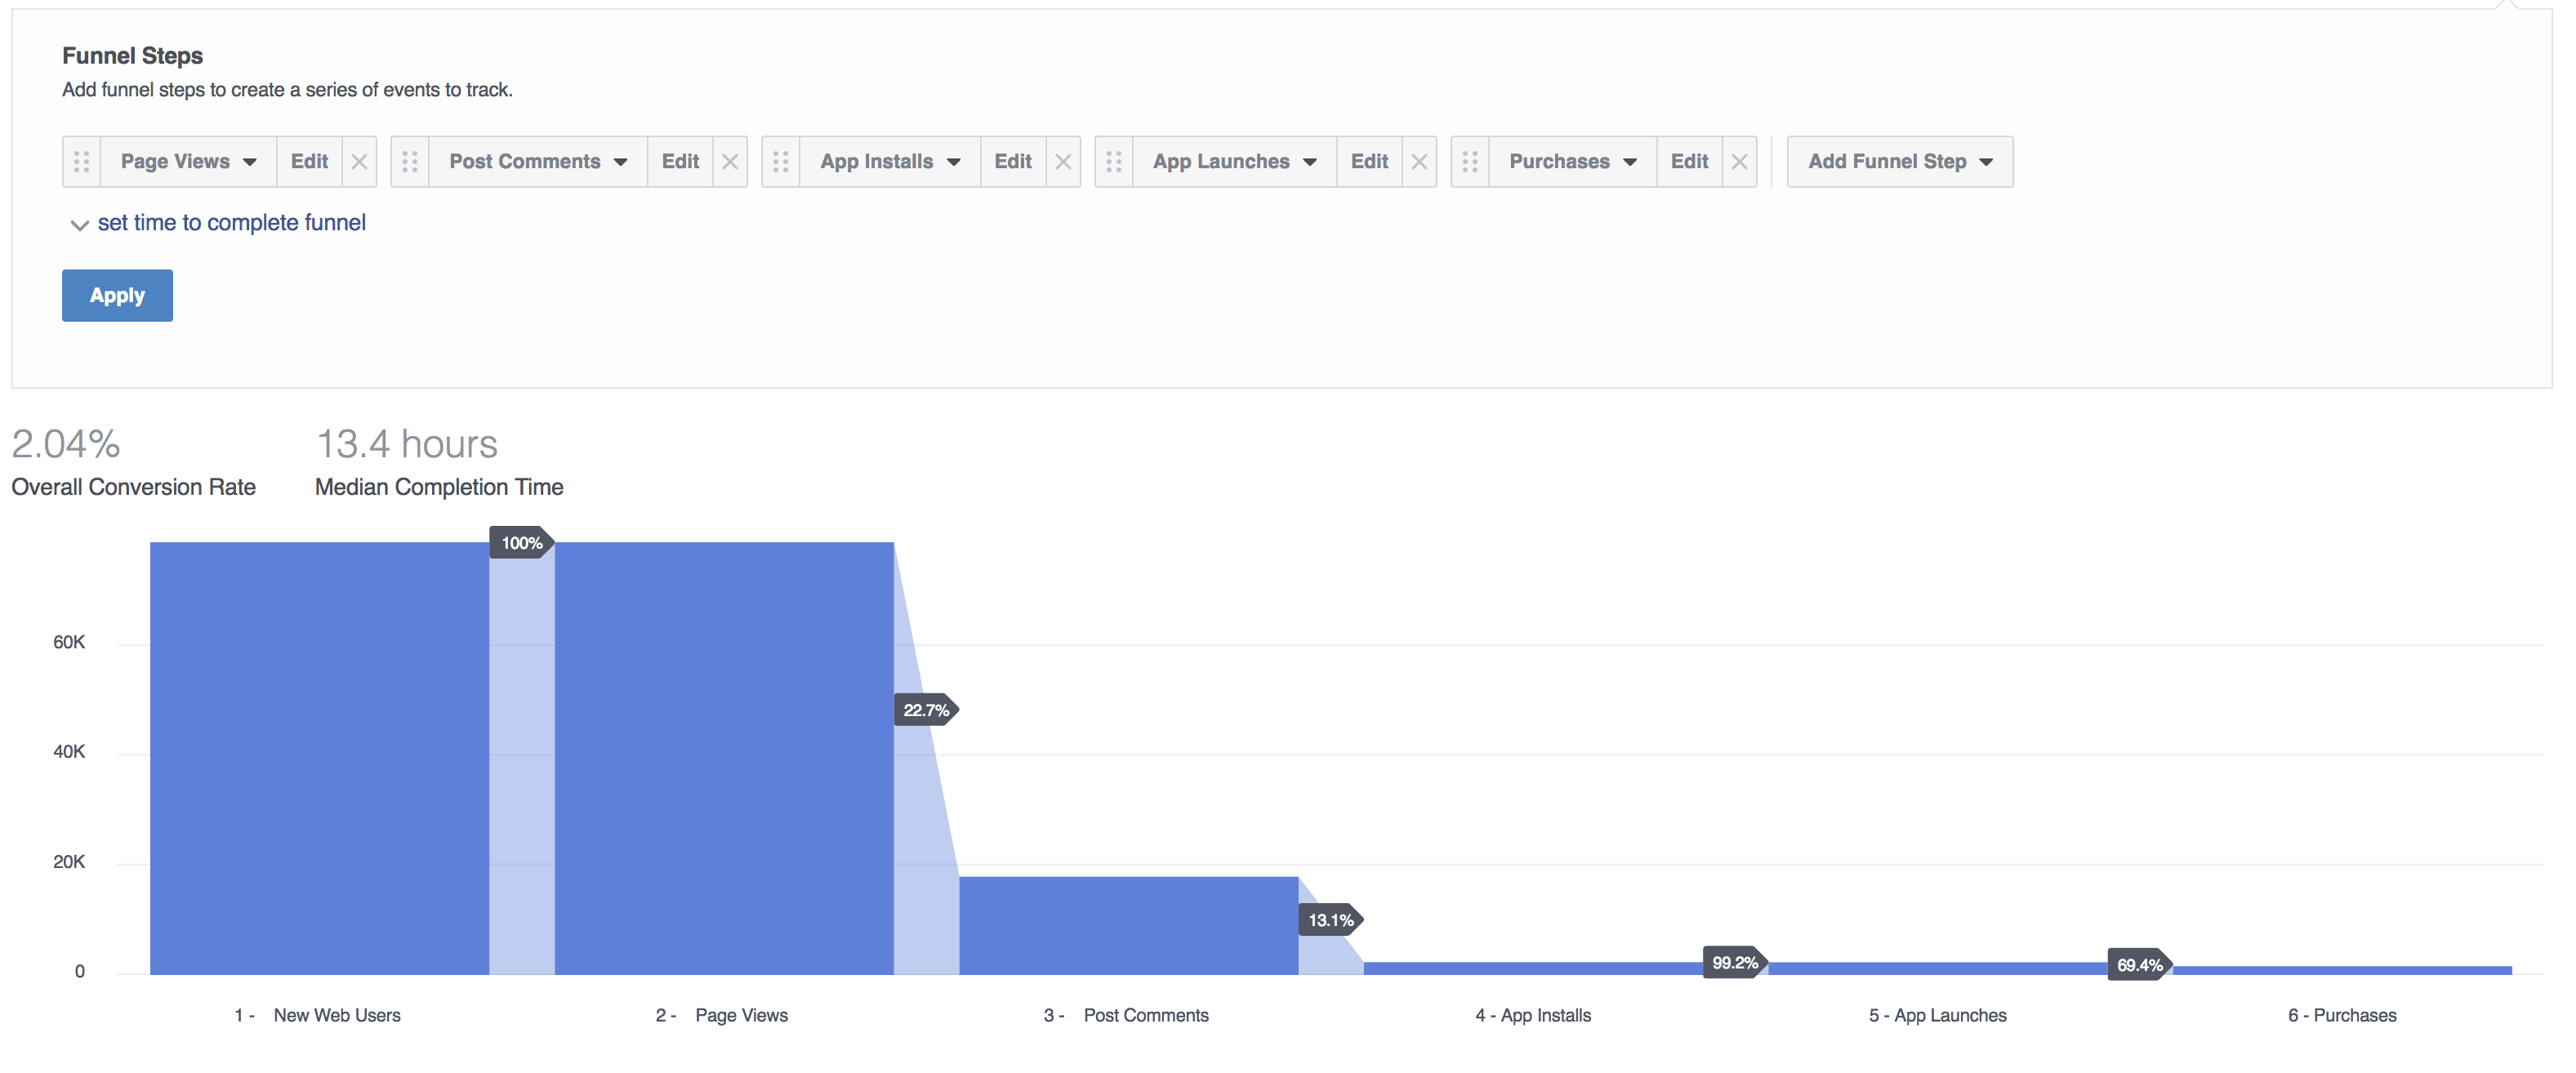
Here’s an example of a funnel from a Facebook post comment all the way through a website purchase…
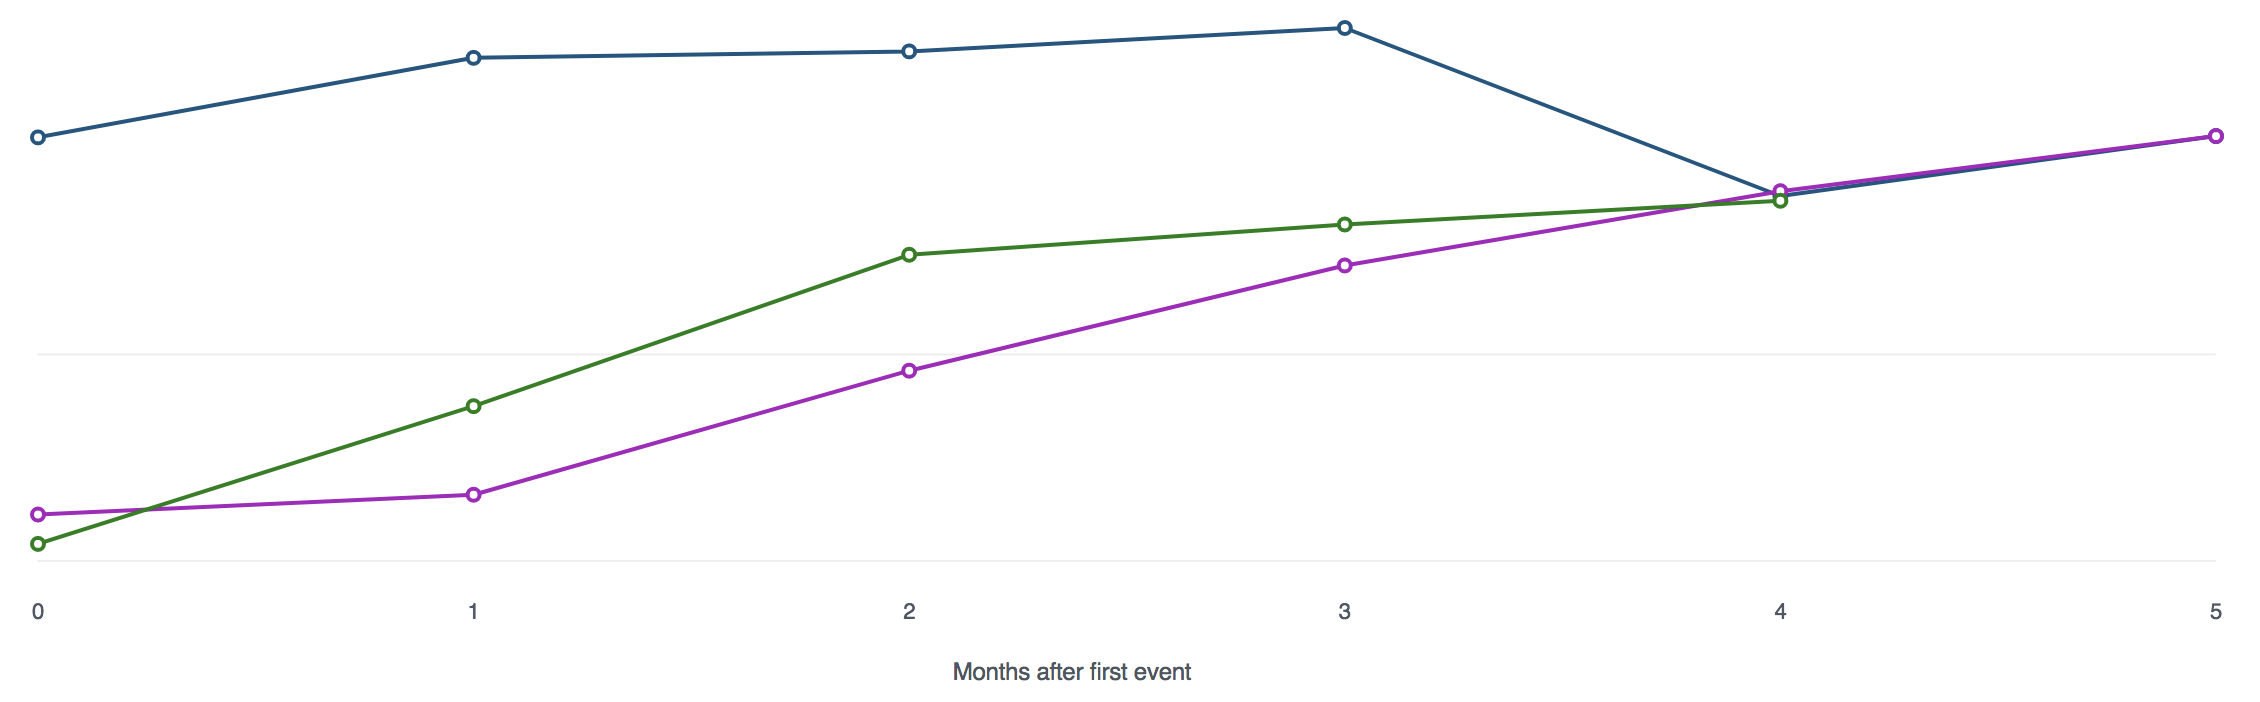
Maybe you want to know how much a typical visitor is worth. Well, here’s a look at Customer Lifetime Value over time…
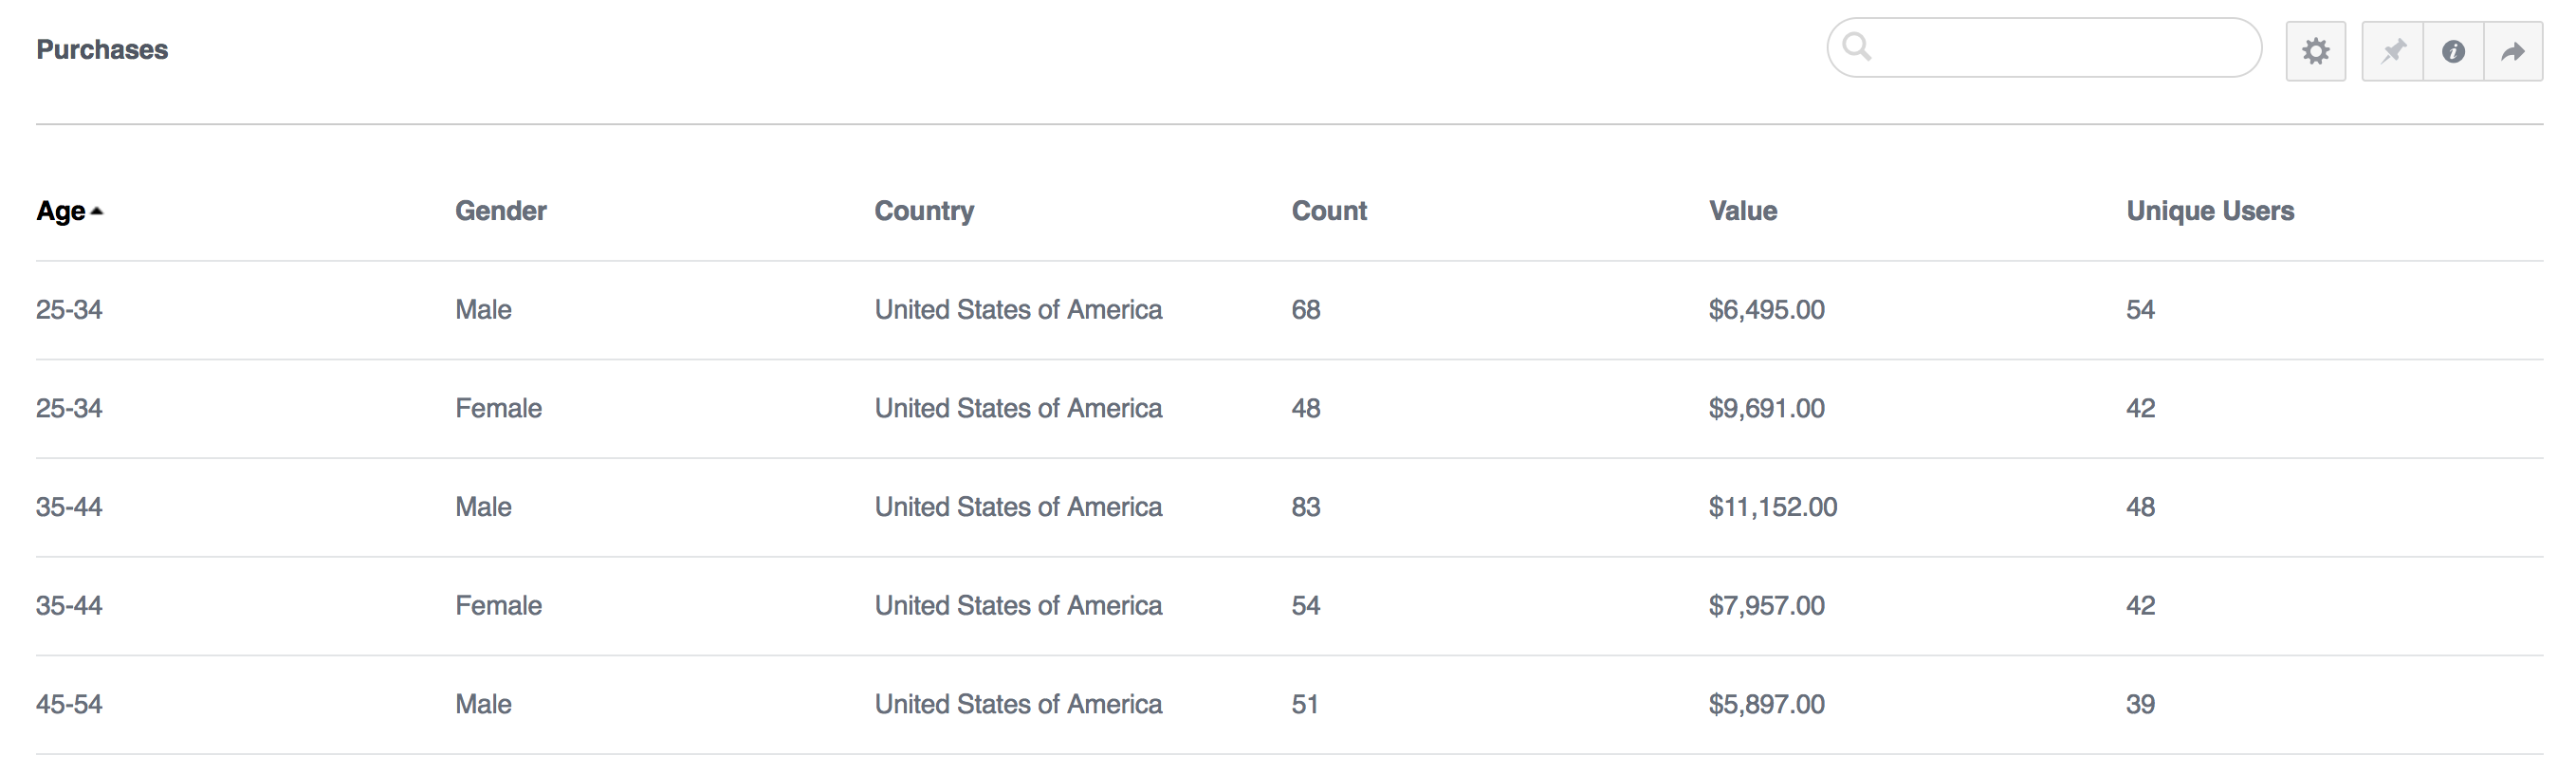
You could also look at a breakdownBreakdown is a way to get insights into your ad performance related to time, delivery, action, or dynamic creative element. More of age, gender, and country by purchase value…
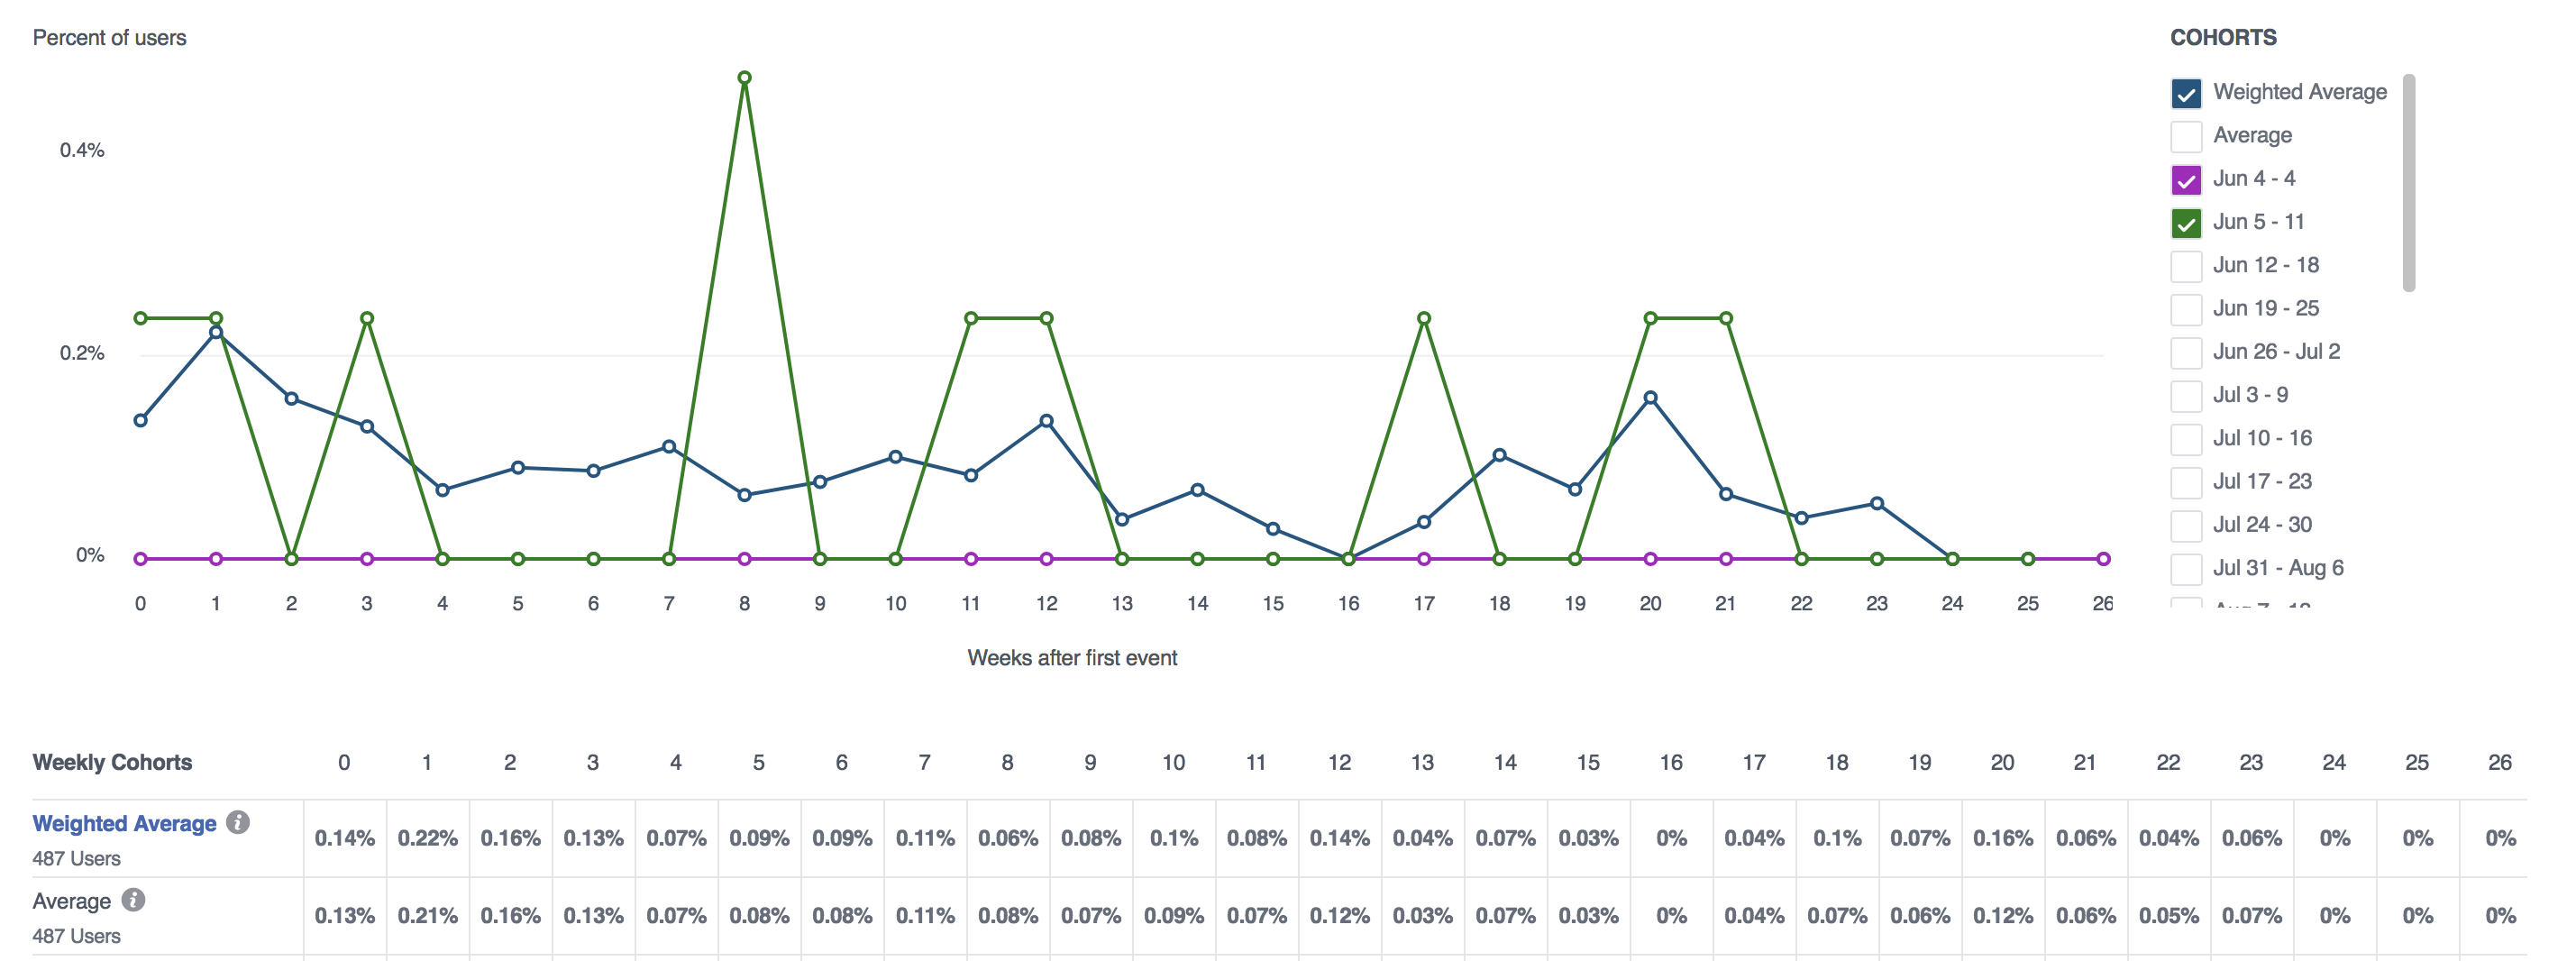
Go ahead and create a cohort of those who registered and then eventually purchased a product…
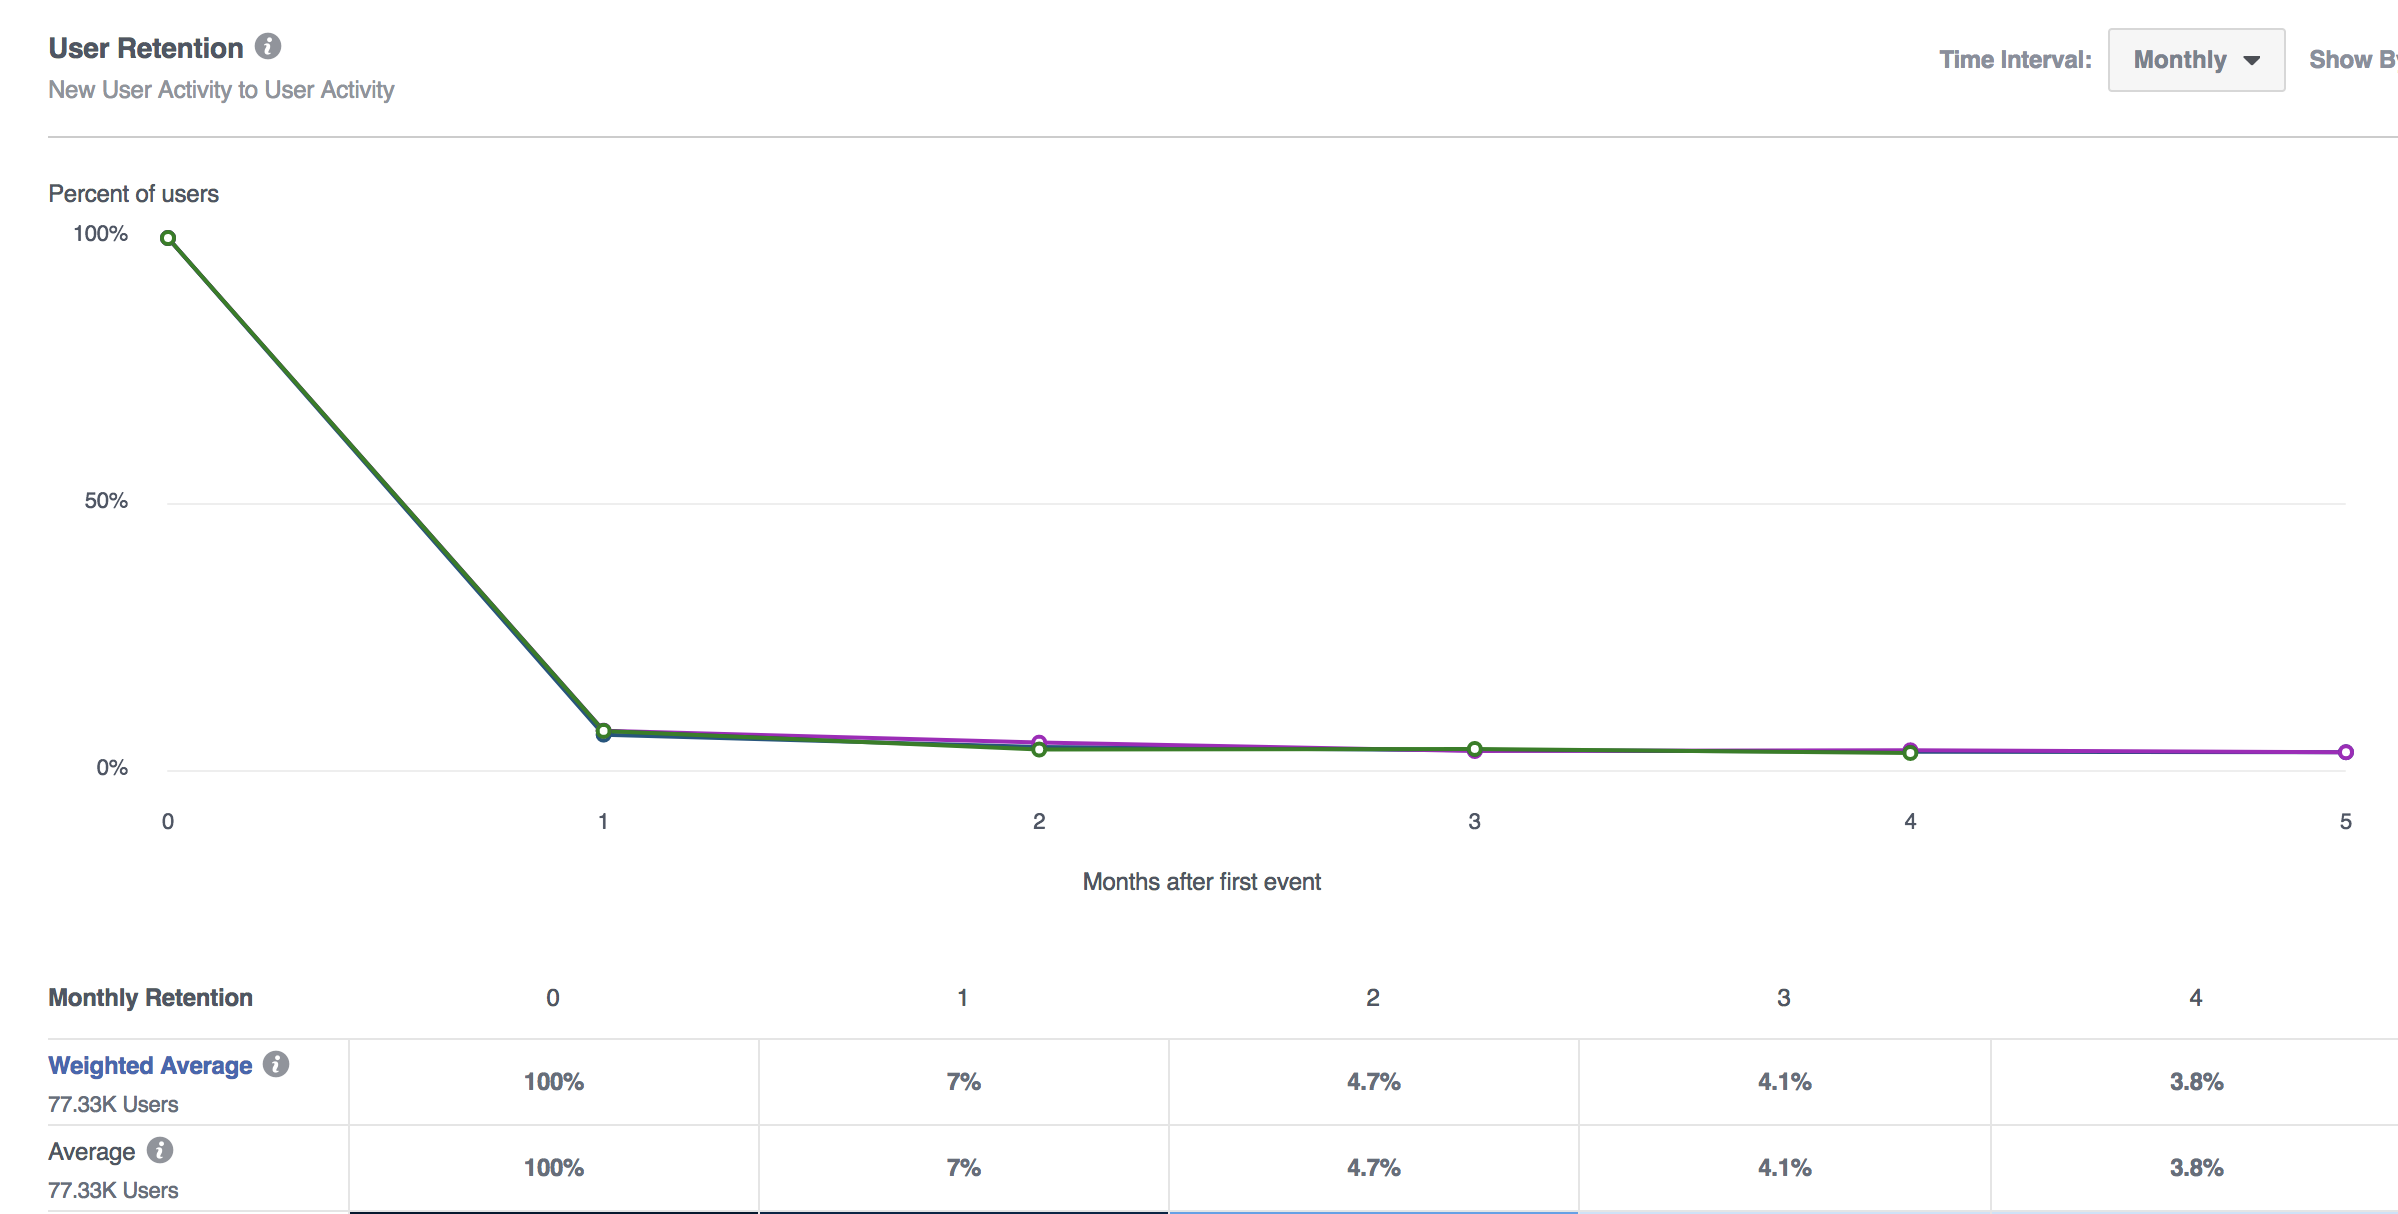
Not sure how long people stick around? Here’s a look at user retention following the initial interaction…
Who are your best customers? Well, run a breakdown of the demographics of those who make a purchase to view info based on age, gender, country, city, language, and more…

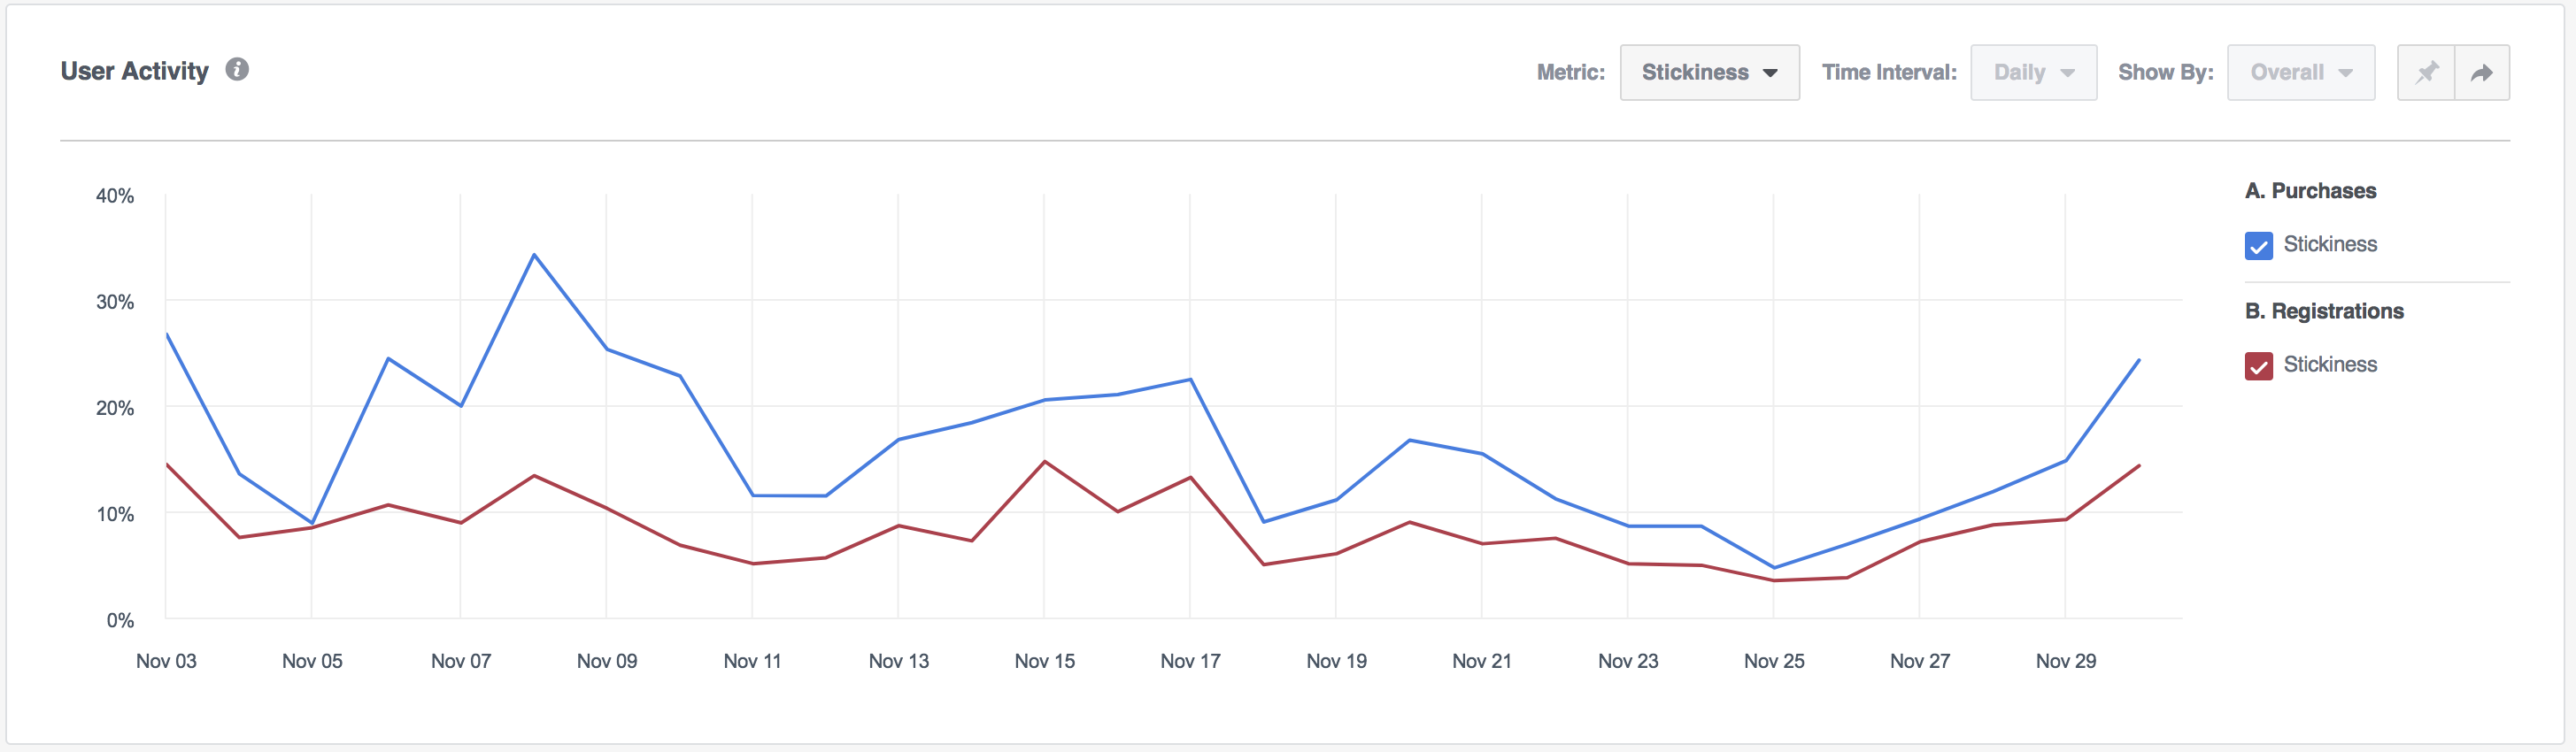
Here’s a comparison of the stickiness between those who registered for something and those who made a purchase…
Amazed yet? Well, this is just a sampling. You can add limitless segments and variables to find every possible needle in the haystack.
Facebook Analytics, The Pixel, and Events
At this point, you might be thinking… “Wow. Amazing. But creepy. How in the world does Facebook know all of this?”
I have one word for you: Events.
When people think of Facebook Events, they usually do so in connection with Facebook ads. Events are snippets of code (added outside of the Facebook pixel) that help Facebook identify when a specific “event” occurs.
For example, you create a “Purchase” Event. That code is added to the confirmation page signifying a purchase has completed. That page loads. Facebook knows that a purchase happened.
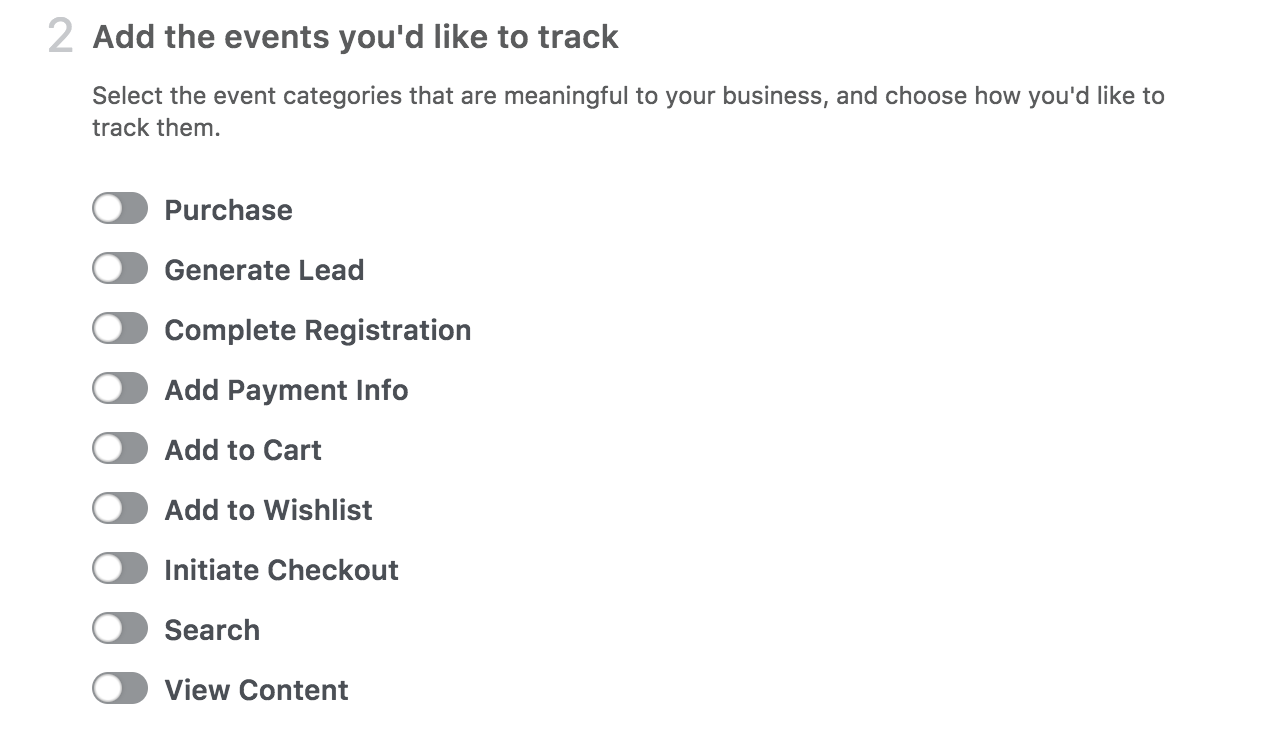
Events that you can create:
- Purchase
- Generate Lead
- Complete Registration
- Add Payment Info
- Add to Cart
- Add to Wishlist
- Initiate Checkout
- Search
- View Content
In each case, you can add parameters (conversion value, currency, content ID, etc.) to provide more details. For example, the purchase was for Product X and the value is $100.
Typically, you’ve added the Facebook pixel and Events for your advertising. This allows Facebook to track how many conversionsA conversion is counted whenever a website visitor performs an action that fires a standard event, custom event, or custom conversion. Examples of conversions include purchases, leads, content views, add to cart, and registrations. More occurred (was the campaignThe campaign is the foundation of your Facebook ad. This is where you'll set an advertising objective, which defines what you want your ad to achieve. More effective?). It also allows Facebook to optimize for a particular conversion.
But we haven’t been able to use this for organic activity. Paid engagement may make up a small percentage of your traffic, registrations, and purchases. Facebook Analytics, of course, doesn’t care whether the activity was paid or organic.
Making more sense? Yeah, you need to take advantage of Events.
Set Up Facebook Events
Hopefully, you now see how important it is that you add Events to utilize the powerful data within Facebook Analytics. Let’s do that!
If you haven’t installed the Facebook pixel on your website yet, there are numerous ways to do it (click that link for a few). At the moment, I use the Pixel Caffeine WordPress plugin (it’s free). Do whatever is best for you.
Just installing the pixel, though, isn’t enough — at least if you want to take advantage of Facebook Analytics. As mentioned above, you also need to be sure to use Events.
To utilize Events, you’ll need to inject code (in addition to the base Facebook pixel code that should already be on your website). As a result, when someone loads a page with an Event code on it, Facebook can report that the Event has occurred.
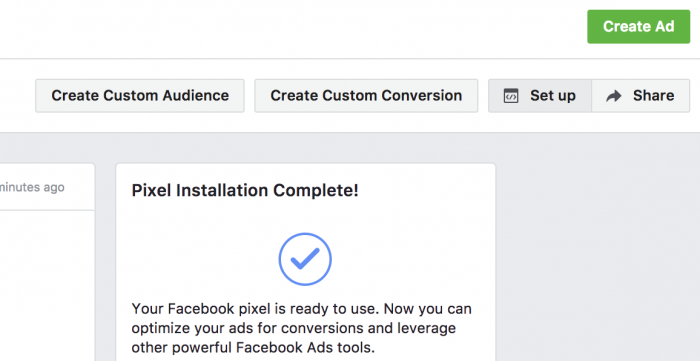
While viewing your pixel, click the “Set Up” button at the far right.
If you use an integration or tag manager (Google Tag Manager, Shopify, WooCommerce, etc.), great. Click that option for instructions on how to get everything set up.
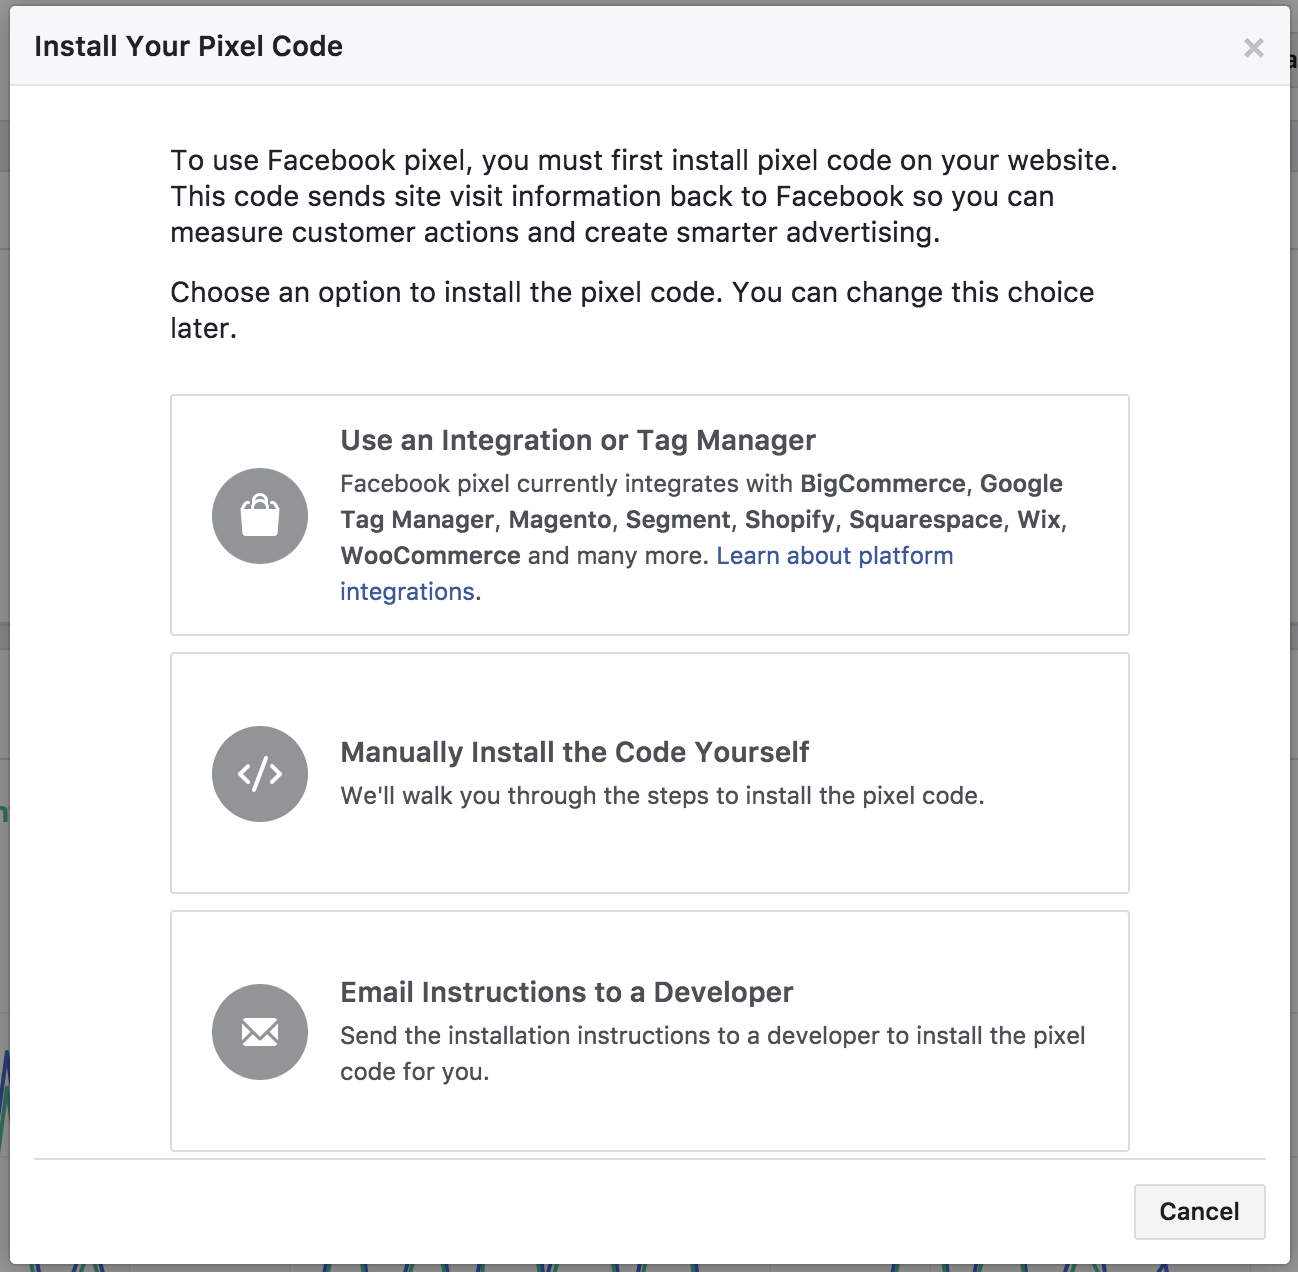
But otherwise, click to “manually install the code yourself.” In the second step, Facebook provides information for adding your Event code.
Example: Set Up Purchase Event
We could go through every Event, but it’s not necessary. If you understand how to set this up for one, you’ll understand it for them all. Let’s start with a purchase.
Click the option for “Purchase.”
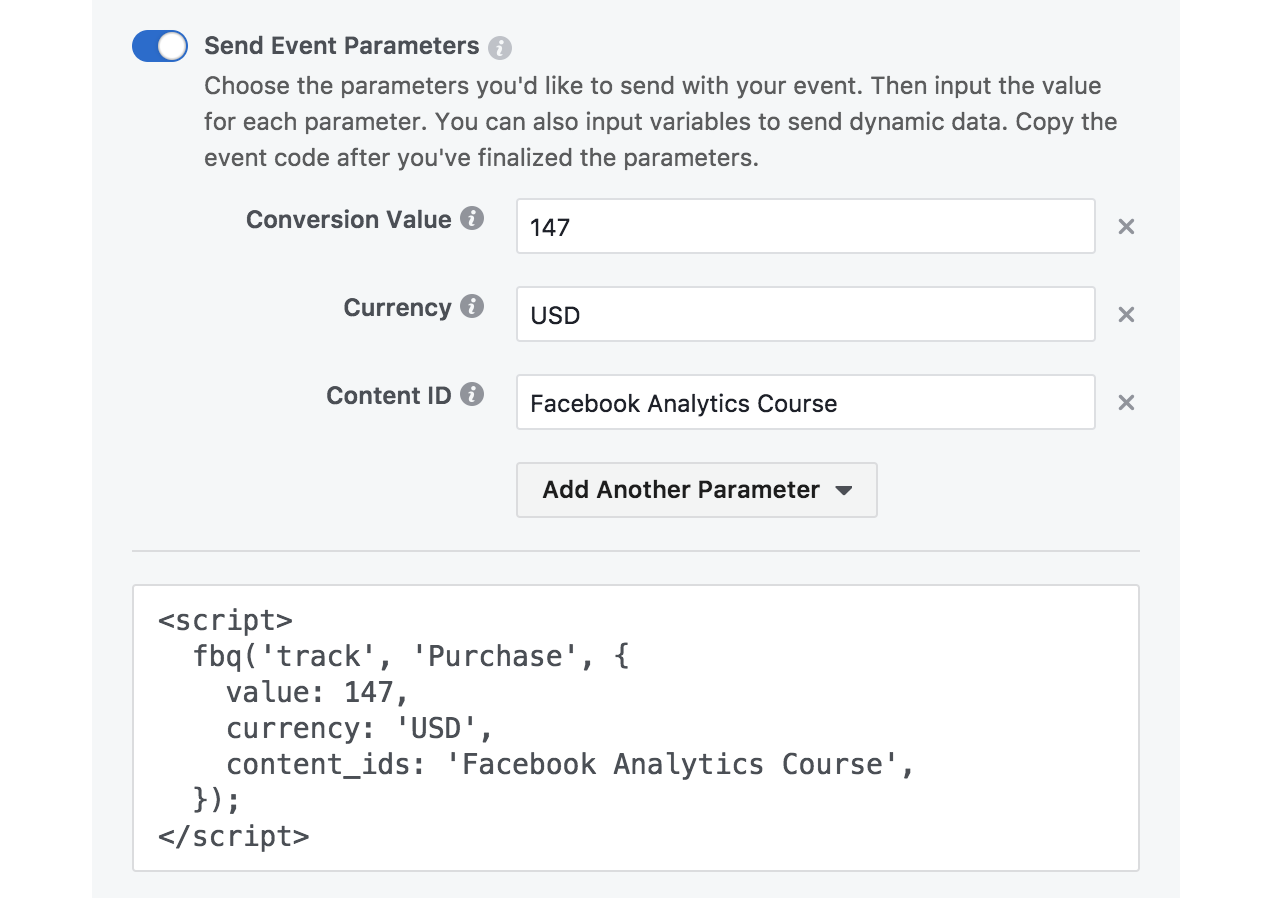
The nice thing is that as you add info for parameters, Facebook spits out the code you’ll need to use. Above is what I’d need for the purchase Event for my Facebook Analytics training program.
Then Facebook provides details on where specifically to add that code (after the opening BODY tag)…
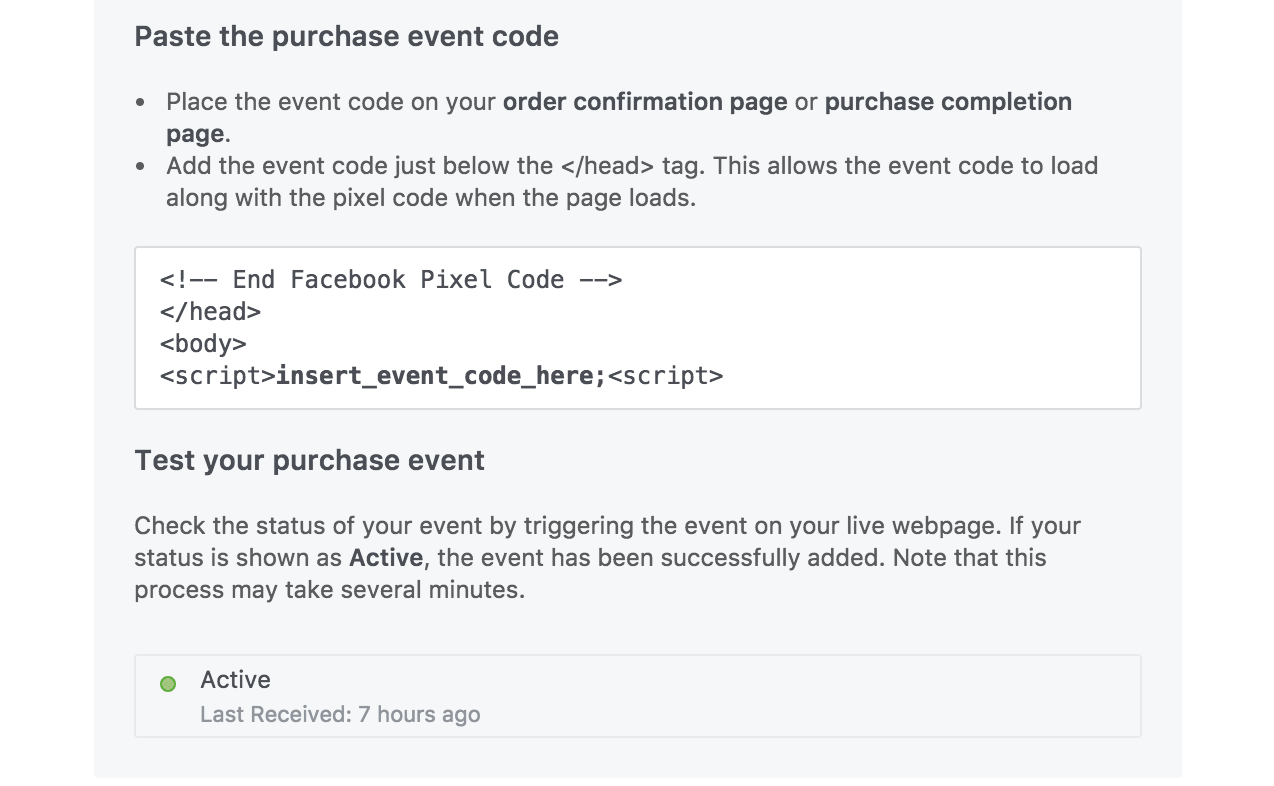
You can also test it after adding the tag to make sure it’s working.
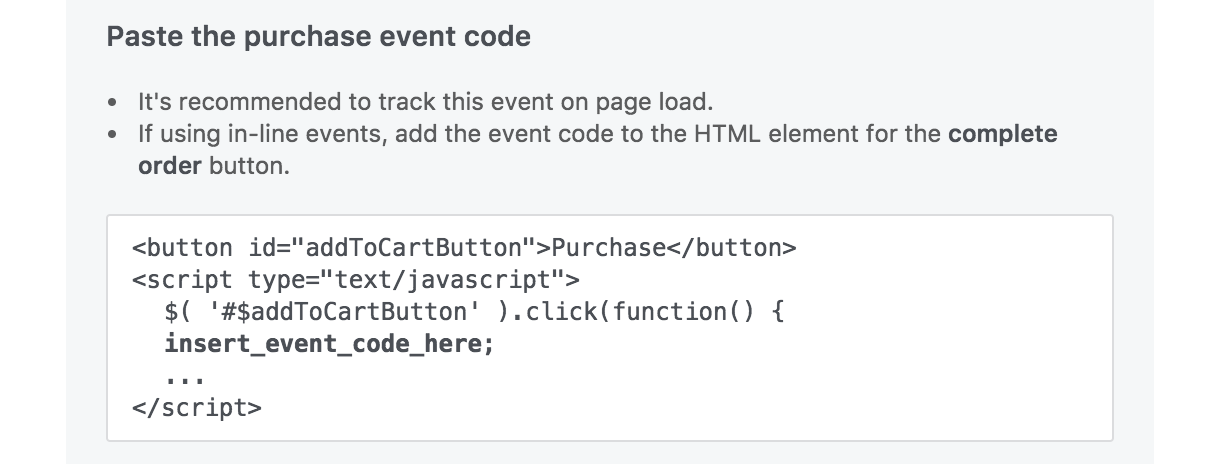
Inline Events
Are there examples where users aren’t redirected to a confirmation page? In that case, you’ll need to generate an inline Event. These Events execute when a button is pushed.
At the top of Event creation, you’ll see the option for “Track Event on Inline Action.”
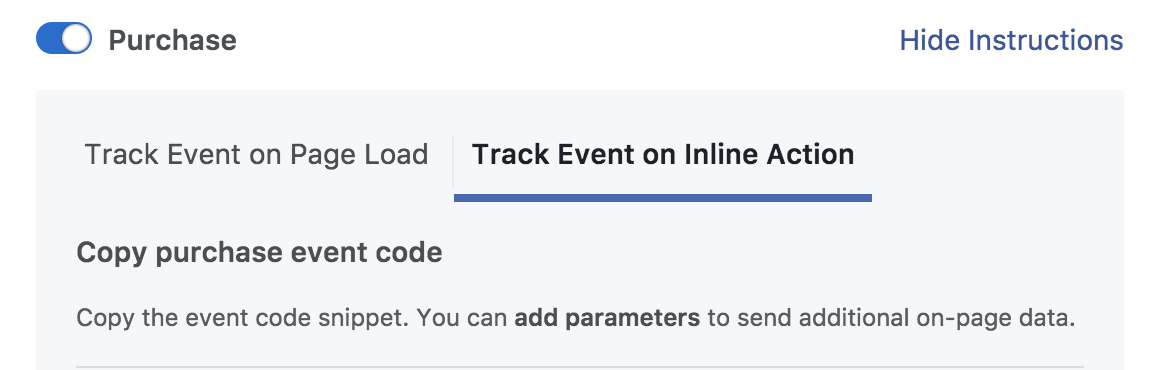
You will then be shown the inline code to use…
Integration and Tag Managers
The instructions above are for doing all of this manually. But adding Events may actually be much easier — if not automated — depending on your integration or tag manager (assuming you use one).
As I mentioned earlier, I use the Pixel Caffeine WordPress plugin. Creating Events with this plugin is very easy.
Under Conversions/Events, fill out the area to “Add New Tracking.”
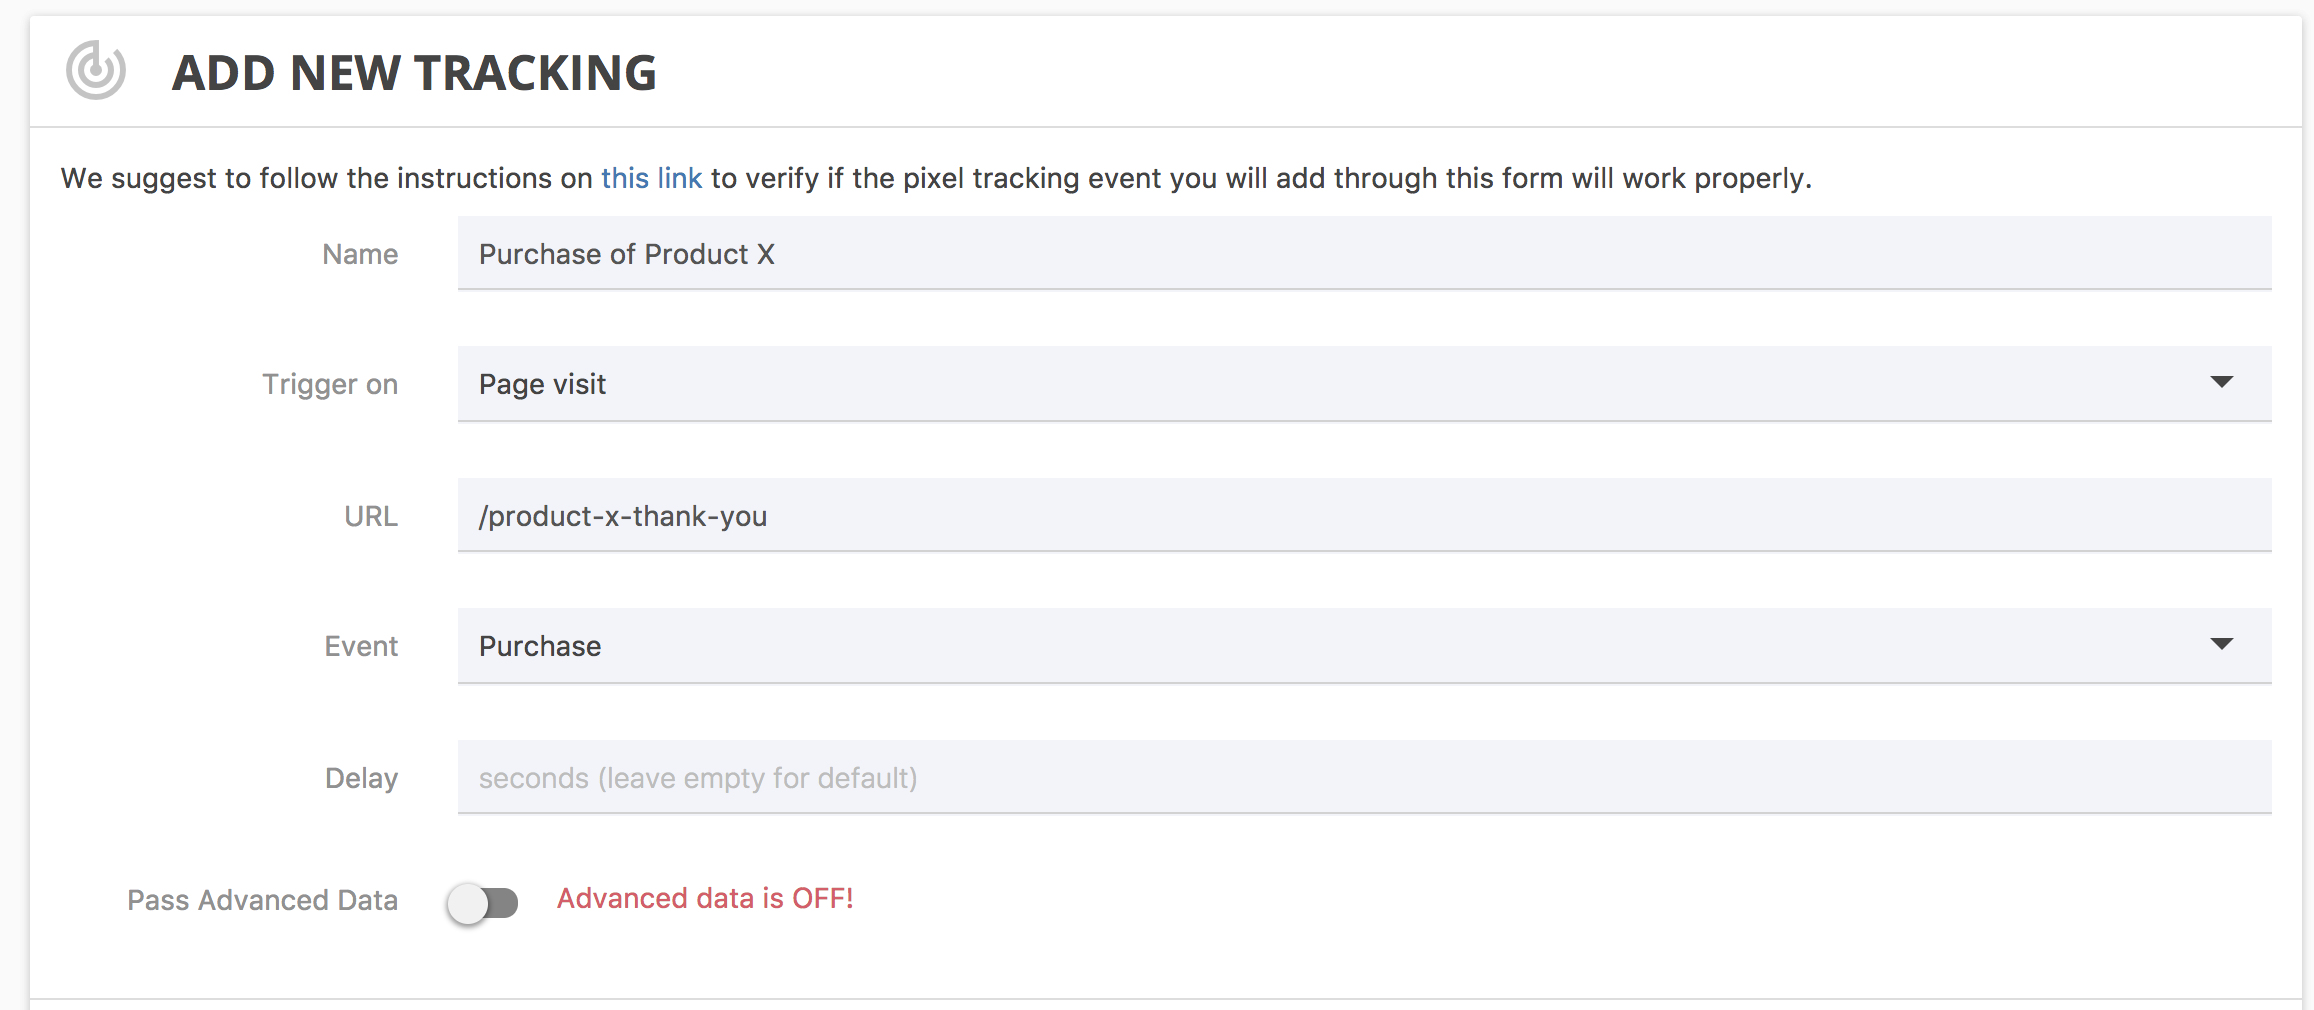
You won’t need to add any code. Just tell the plugin what Event to create and you provide the parameters. Click “Pass Advanced Data” to send even more details to Facebook…
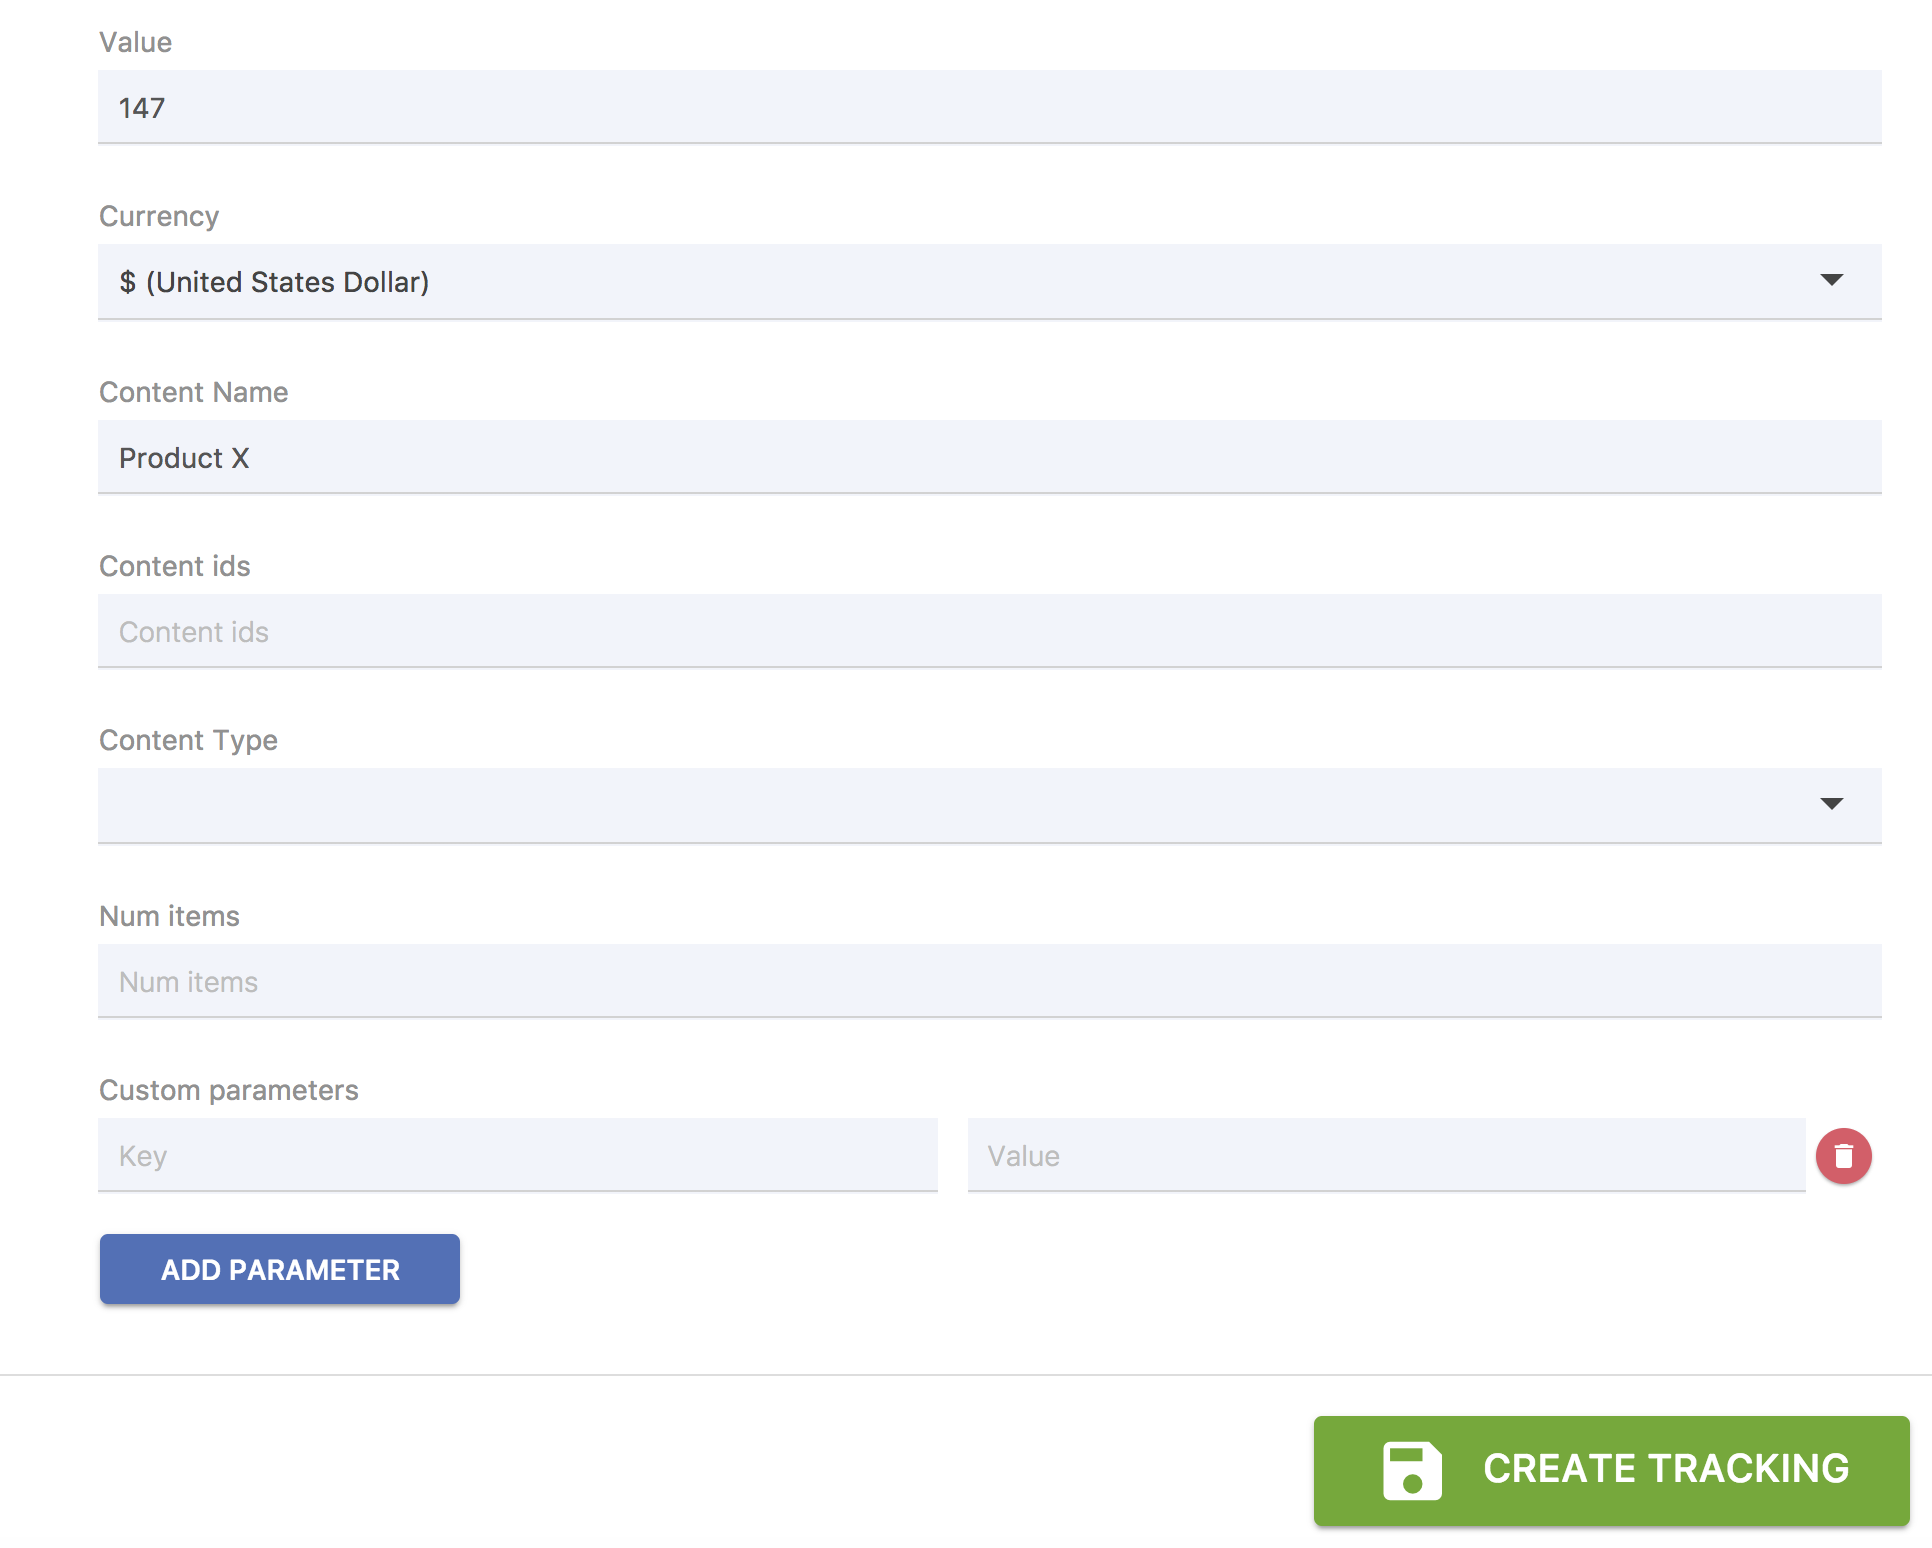
And that’s it! Event created.
If you use any of these other integration methods, click for those details.
- Wix Premium
- BigCommerce
- Magento
- Shopify
- WooCommerce
- WordPress
- Google Tag Manager
- Adobe Dynamic Tag Management
- Segment
- Tealium
- Squarespace
- Weebly
Your Turn
How are you using Facebook Analytics? What reports are you creating?
Let me know in the comments below!