This is one of my favorite topics!
Facebook has an “Easy Button” solution to advertising called “Boost Post” (or “Promoted Post”). Simply click that button next to a post on your Timeline and promote it. Easy!
The problem that comes with simplicity, however, is a lack of control. The results brands end up seeing tend to be very top-level: Mostly more reach, sometimes more fluff engagement.
But what you should be doing is creating these ads within Power Editor, giving you far more control over the people you reach, where you are reaching them, bid optimization and a whole lot more!
Ready? Let’s go!
What You Are Going to Learn Today
Today’s lesson is Promoted Posts. We’re going to focus on the following:
- Why you need to promote posts with Power Editor
- How to effectively promote a post the right way
No more Boosted Posts!
The Lesson
Okay, so you’ve published a post that you want to reach more people. Maybe it’s more Fans, maybe it’s non-Fans. Maybe you have a segment within that group that you want to spend your money on. And maybe you want to control where it goes.
Let’s talk about how exactly you will do that within Power Editor.
Why you need to promote posts with Power Editor
Here’s what it looks like when you click that dreaded Boost Post button:

Things that you can’t control with a Boosted Post that you can control within Power Editor include:
- Start and End Dates
- Target Fans Only
- Target Friends of Fans Only
- Target by Precise Interests
- Target by Broad Categories
- Target by Partner Categories
- Target by Custom Audience and Lookalike Audience
- Target by Interested In, Relationship, Education, Workplace
- Use URL Tags
- Track and Optimize for Conversions
- Choose Placement (News Feed only, Mobile, etc.)
- Optimize for specific actions (link clicks, photo views, video plays) with Conversion Specs
- Bidding
Are you convinced yet? Yeah, you’re missing out on a lot of options if you don’t use Power Editor to do this!
Most importantly, I’ve heard a lot of admins complain that Boosted Posts no longer allow them to target only their Fans. This one simple solution can be taken care of in Power Editor.
How to effectively promote a post the right way
You already know how to create a campaign and an ad in Power Editor. If not, review those lessons first. Then let’s create your Promoted Post!
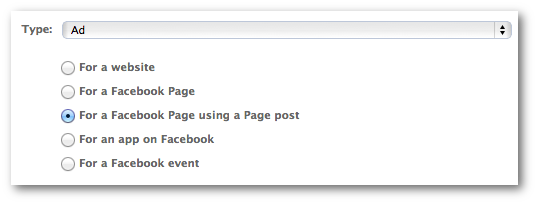
Within the Creative & Placements section, make sure to select “Ad” as the Type and then “For a Facebook Page using a Page post.”
Then select your Page and the post you would like to promote.
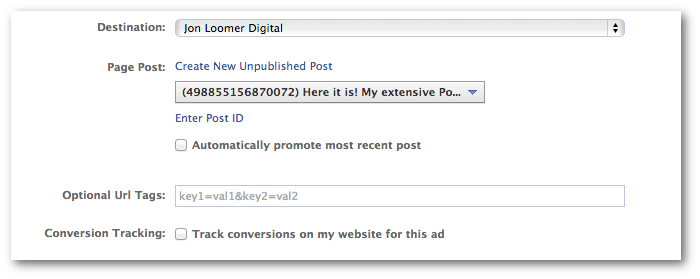
You could promote an Unpublished Post here (I’ll get into detail on this later). And if an older post doesn’t appear in the drop-down options, you can paste in the post ID. This was explained in the last lesson.
You also have the options to use URL tags or track conversions (I use Conversion Tracking on a lot of the posts I promote!). But again, these are more advanced, and we’ll get to them later.
Next, you can control where the post appears:

If you want promotion of this post to only appear within News Feeds, you can do that! Heck, you can even have it appear only on mobile — and on specific mobile devices!
Within the Audience section, you can now choose your targeting. You can target based on geography, age, gender, Precise Interests, Broad Categories and Partner Categories. You can even use your Saved Audiences to make it easier.
If you want to target only your Fans, make sure you enter all of the relevant countries at the top. Then, at the bottom under Connections…
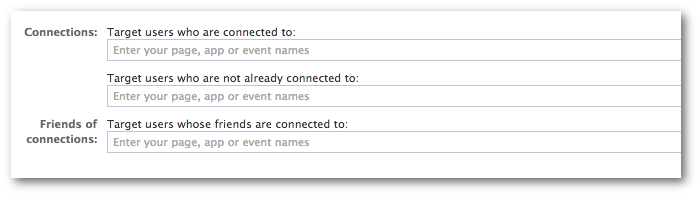
…enter the name of your Page in the “Target users who are connected to” text box. If you wanted, you could also target friends of Fans. Or you could target only those who are not connected to your Page. Or everyone! The point is you have control over this.
You can then control targeting within Advanced Options as you normally would, including Custom Audiences. Refer back to the lesson on this step if necessary.
Finally, within Pricing & Status, you have full control over bidding.
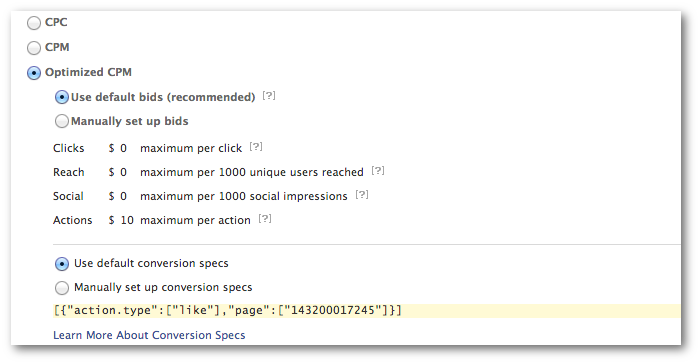
Note that within the Boost Post option, you can only set an overall budget. You can’t select CPM or CPC or select bids. Within Power Editor, you can also choose to optimize for actions like link clicks, photo views, video plays and more (we’ll get to that in a later lesson!).
See that? Promoting a post within Power Editor is infinitely better!
Recap
What did you learn today?
1. Why you should promote posts with Power Editor
2. How to promote posts with Power Editor
Your Assignment
Action Items:
- Go through the steps of promoting a post in Power Editor — not necessary to push it live!
- Experiment with options that aren’t available to you with the Boost Post feature
Related Reading
- Facebook Custom Audiences: Target Facebook Ads by Email List
- Facebook Ads Tip: How to Create a Dark or Unpublished Facebook Post
- Facebook Ads Conversion Tracking: How to Create an Offsite Pixel
- Facebook Conversion Specs: How to Optimize for Page Post Ad Actions
- Facebook Partner Categories: Ad Targeting Becomes More Powerful
- How to Create a Saved Audience in Facebook Power Editor