Advertisers now have the ability to promote unpublished (otherwise known as “dark”) posts within the News Feeds of Fans.
An unpublished post is a status update, link share, video or photo that was never meant to be shared as an organic post. Staying true to its name, it’s never published but is only surfaced as an ad.
This functionality was previously made available to the ads API in July of 2012, but until recently the only placement option was the sidebar.
Why Create Unpublished Posts?
The purpose of today’s article is to tell you how to do this, but it’s necessary to provide a short explanation for why you might want to. A deeper explanation will need to come on another day.
The main reason you should consider creating unpublished posts is for split testing purposes.
You can otherwise utilize post targeting via the following methods:
- Gender
- Relationship Status
- Educational Status
- Interested In
- Age
- Location
- Language
This is nice, but you can’t target by interests, Custom Audiences, Partner Categories and other ways that you target with ads. And there’s also the issue with every targeted post appearing on your Timeline unless you hide the extras.
One of the ways I’ll find it helpful is when I create a post that is rejected by Facebook as an ad.
We’ve all been there. You share a link to your new product. You promote it. But the image associated with that link has more than 20% text in it, so Facebook gives you a big roadblock.
Instead of creating a whole new post, you can simply create an unpublished post and promote it to the Fans who matter most to you.
Okay, so here’s how you do it…
1. Use Power Editor
This should be Step 1 for all Facebook advertising you do. Please use Power Editor. If you don’t know how to use it, check out this tutorial.
2. Create a Campaign
Every site I’ve seen explain unpublished posts does a horrible job of explaining how to do it. As a result, every necessary step is here for you.
Since you will need to create a new ad from an established campaign, let’s do that first.
Click “Campaigns” at the top and then “Create Campaign.”
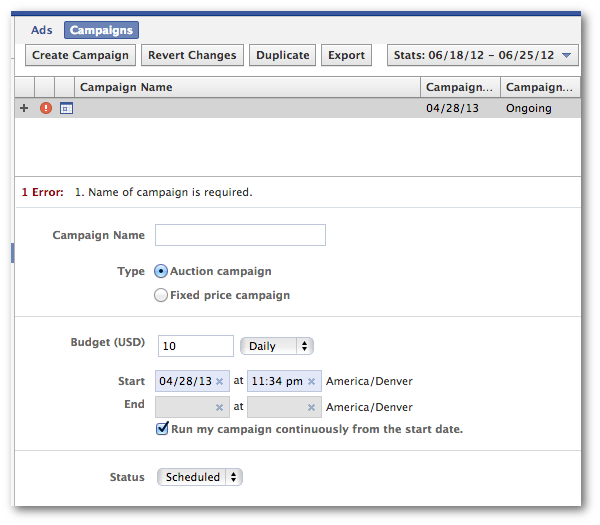
Then name your campaign, set a daily or lifetime budget and determine a start and end date.
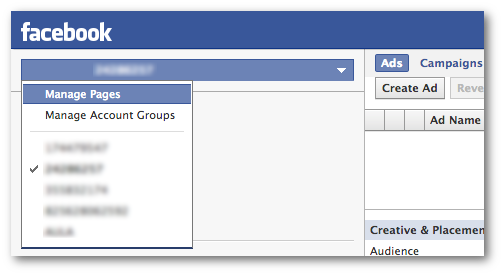
3. Go to Manage Pages
If you’ve never created a post from within Power Editor, this step is one that will likely stump you. So click dropdown at the top left and select “Manage Pages”…
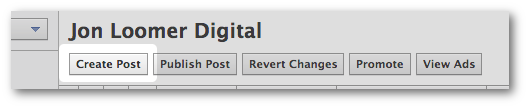
4. Create Your Unpublished Post
Select the name of your Page on the left hand side and then click the “Create Post” button at the top…
Select whether you are creating a Status, Link, Photo or Video and then compose your post. You can also target by language or location, but that really won’t be necessary.
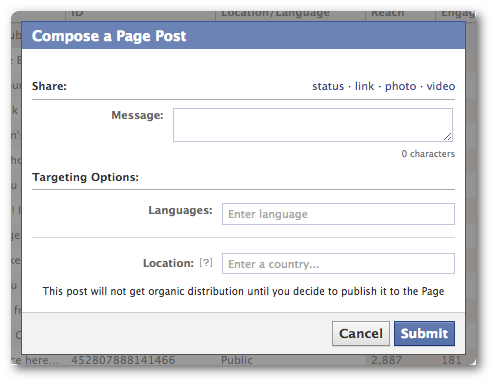
When you’re done, click “Submit.” Note that this does not publish your post, it merely saves your composed post.
5. Promote Your Unpublished Post
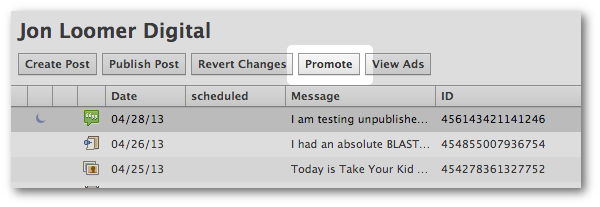
You will know that your post is unpublished (or “dark”) because there will be a moon icon next to it…
Select this post and click the “Promote” button…
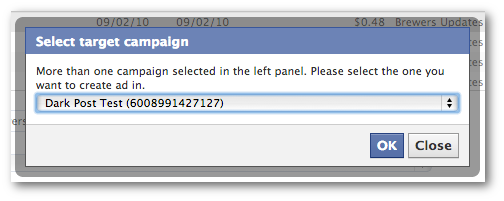
You’ll now need to select the campaign you created earlier to run your ad in…
Now go through and select the options you prefer within Creative & Placements, Audience and Advanced Options.
Then click the “Upload” button at the top right of the page, and your promoted unpublished post will be submitted for review!
6. Viewing Dark Posts and Notifications
Of course, once you create a dark or unpublished post, it won’t appear on your Timeline. So how do you see it, and what about when users comment on or like it?
From Power Editor, find that post again and click “View Post.”
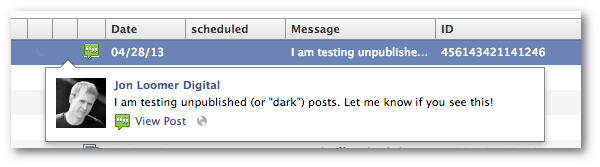
This will allow you to view that post within Facebook…
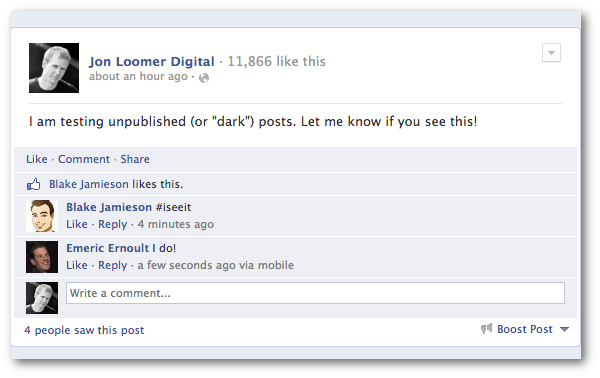
You will also receive notifications as you normally would whenever users comment on or like your post.
Also, if your unpublished post is a photo or video, it will appear within your photo album. It just won’t appear on your Timeline.
Try It!
Try your own dark post! What are some of the reasons that you’ll be using this feature? Let me know in the comments below!


