It’s pretty rare that I get access to a feature before the masses. I’m often frustrated that I can’t access that next great feature that everyone else is talking about.
But that hasn’t been the case with the freshly announced enhancements to Facebook Website Custom Audiences. I’ve had early access to this feature, and I can report back on what I’m seeing.
Let’s take a closer look at what this feature is, how you can use it, how I’m currently using it and the results that I’m seeing.
Website Custom Audiences Overview
If you aren’t yet using Website Custom Audiences, you need to start immediately. They allow you to target your website visitors by page visited and duration (and some other stuff now!).
After you add the Facebook pixel (a snippet of code) to the template of your website, you can create rules based on what page someone visited and how recently. This allows you to target people who know you, and you can craft relevant ads based on specific actions taken on your website.
The Prior Weakness of Website Custom Audiences
My website gets enough traffic that I don’t need to target interests and Lookalike Audiences — groups of people who may not know who I am. I can instead focus almost exclusively on my website visitors.
This has historically resulted in lower costs and higher quality traffic and conversions when running my Facebook ads. But even so, I’m a little greedy. Website Custom Audiences had a weakness.
That weakness: Not all website visitors are created equal. Until now it’s been very difficult to separate the highest quality visitors.
Some users only visit once while others visit every day. Some visitors bounce after three seconds and won’t remember coming to your site while others may spend hours and hours reading your content.
Wouldn’t it be great if we could separate these groups? Well, now you can…
Advanced Mode Website Custom Audiences
When creating a Website Custom Audience, select the “Custom Combination” option. Hopefully you have the “Advanced Mode” option, and you’ll want to switch it on…
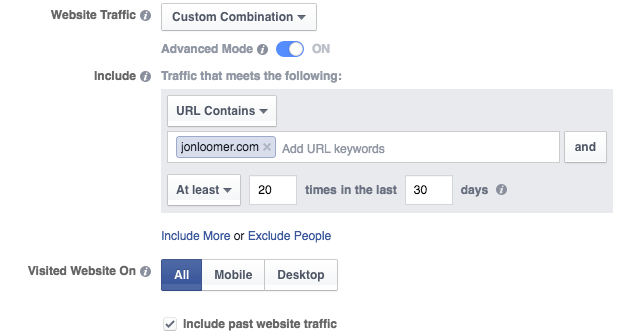
Here, you’ll be able to create Website Custom Audiences based on the pages they viewed and events they performed — now accounting for frequency, values and device used.
We’ll get to the details on those in a minute…
Options Within the API
Everything below is going to highlight how you can create one of these from Ads Manager today. But there are a few other great features that are available within the API — meaning that third party tools can allow you to do some other creative things.
Other features available within the API:
- Time spent: How long someone spent performing an action or visiting your website
- Dynamic date: A range of dates when someone was visiting (rather than a duration)
- Aggregate values: Total amount someone has spent
I’m hoping that these will eventually roll out to the Ads Manager as well, but for now we’ll have to be satisfied with frequency and events (unless we want to use a third party tool!).
Website Visit by Frequency
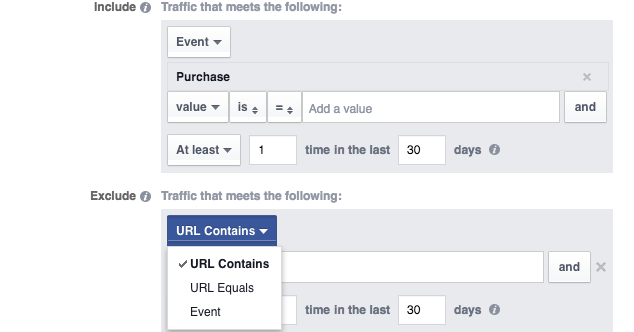
In the image above, I created an audience of anyone who visited a page of my website that includes “jonloomer.com” in the URL at least 20 times in the past 30 days. But that didn’t need to be the domain, of course. It could have been a specific blog post or section of my website.
You could also use “URL Equals.” The duration can be anywhere from 1 to 180 days. Obviously, you need to be realistic with these audiences and the frequency you use, understanding how much traffic you get.
Rules by Event: Overview
If you have the new Facebook Pixel installed on your website and you’re using Standard Events, you can also create rules based on the events that are performed on your site.
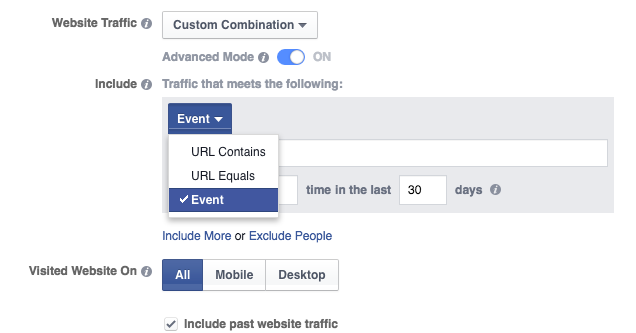
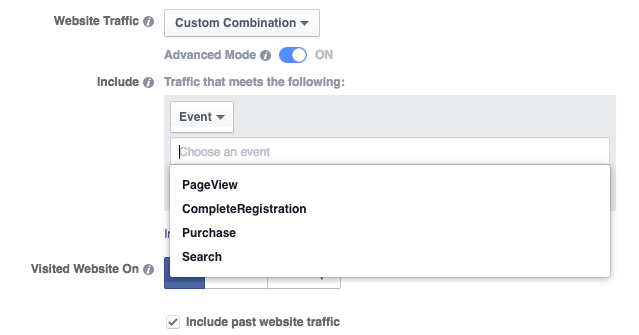
After selecting “Event” you’ll get standard event options to choose from.
Rules by Event: PageView
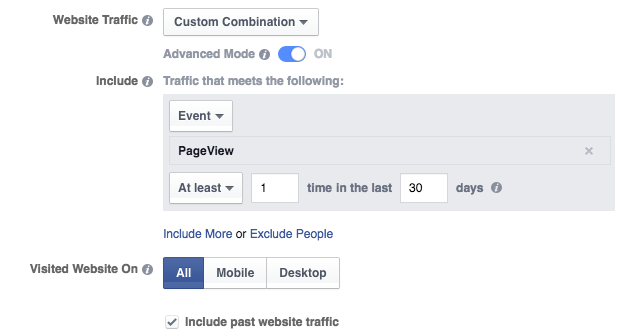
If you select the “PageView” event, Facebook will create an audience of anyone who executed the “PageView” standard event on your website a specified number of times (frequency) during a specified duration.
Rules by Event: CompleteRegistration
If you select the “CompleteRegistration” event, Facebook will create an audience of anyone who executed the “CompleteRegistration” standard event on your website a specified number of times (frequency) during a specified duration.
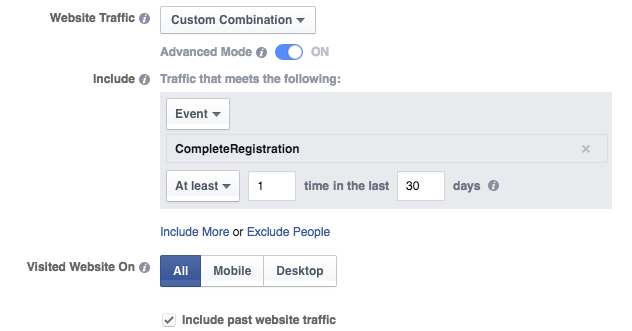
If you have the “CompleteRegistration” standard event on registration confirmation pages (using the new Facebook pixel, of course), this will allow you to focus only on those who have completed any registration on your website. You can even isolate those who have created multiple registrations during a certain amount of time.
Rules by Event: Purchase
If you select the “Purchase” event, Facebook will create an audience of anyone who executed the “Purchase” standard event on your website a specified number of times (frequency) during a specified duration.
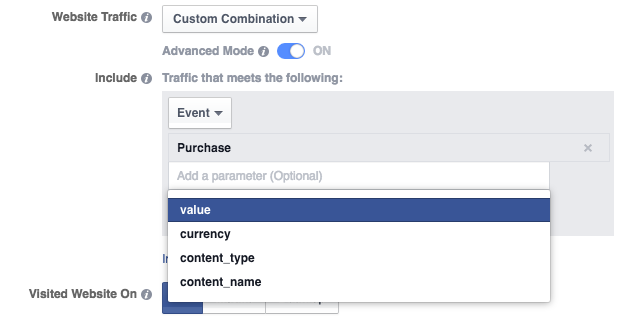
Again assuming that you have the “Purchase” standard event on purchase confirmation pages on your website, this allows you to isolate those who have bought from you in the past based on specific parameters:
- value
- currency
- content_type
- content_name
In each case, you will be able to filter by the following:
- contains
- doesn’t contain
- is
- sum is
- average is
- maximum is
- minimum is
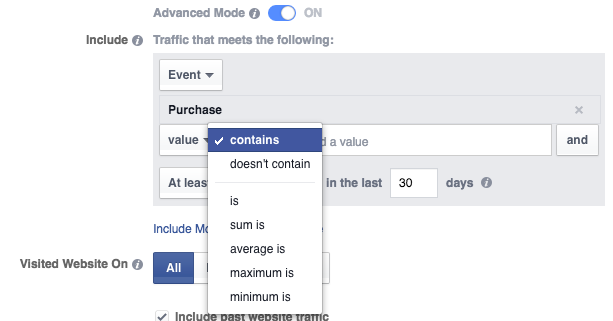
when selecting is, sum is, average is, maximum is or minimum is, you get the following options…
- Equal to
- Not equal to
- Greater than
- Less than
- Greater than or equal to
- Less than or equal to
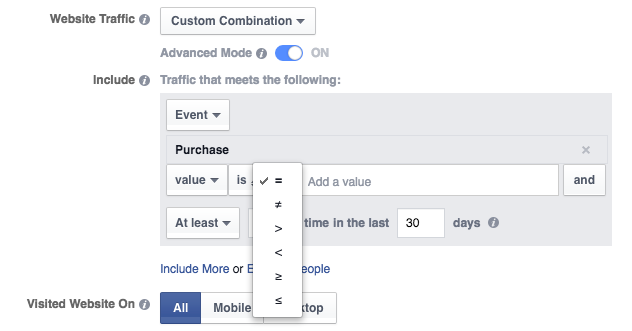
So, for example, you could create an audience of people who have made a purchase with a minimum value of $100 in the past 30 days.
Rules by Event: Search
If you select the “Search” event, Facebook will create an audience of anyone who executed the “Search” standard event on your website a specified number of times (frequency) during a specified duration.
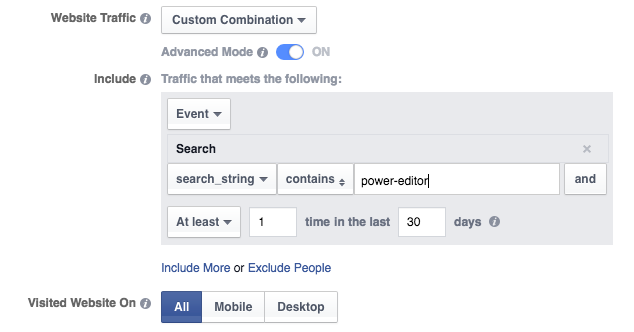
So I could create a Website Custom Audience of anyone who searched for “Power Editor” during the past 30 days. Again, this is assuming you have the “Search” Standard Event on search pages.
Include More or Exclude People
You can add a layer of complexity by clicking the “Include More” or “Exclude People” links.
If you click “Include More,” the audience will include everyone who performed the first action AND the second action. That should significantly limit the audience size.
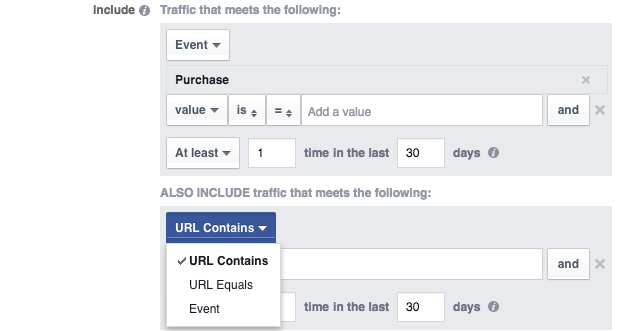
If you click “Exclude People,” you can exclude specific traffic from your audience.
Devices
By default, the audience you create will be of those who visited your website from any device. But you can select Mobile only…
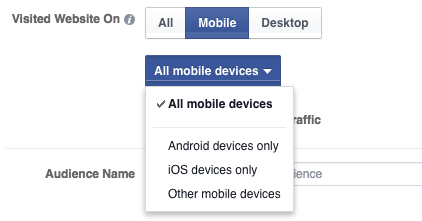
When selecting “Mobile,” you’ll also need to choose Android, iOS or “other” mobile devices. You could also select desktop traffic only.
Some confusion may arise here. Yes, you can show your ads only to desktop or mobile when targeting your website visitors. Yes, you can target people who use specific device types. But this allows you to target people (no matter what device they are using now) who accessed your website from a specific device.
How I Am Using Advanced Mode Website Custom Audiences
Since I don’t sell many products and the number of ways to register on my site is minimal, I don’t have much need for the Events options. I simply create Website Custom Audiences based on those specific purchases or registrations. But Events could certainly be very useful for others.
For me, the greatest value is in creating audiences of people who have visited my website multiple times. And I’ve created a bunch of them!
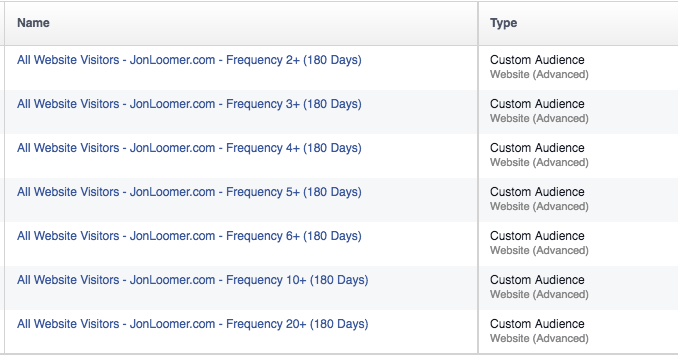
I’ve created audiences of anyone who has visited my website at least two, three, four, five, six, 10 or 20 times during the past 180 days. Sizes of those audiences are anywhere from 11,000 to 201,000 people.
When promoting a recent blog post, I created four different ad sets to put this to the test…
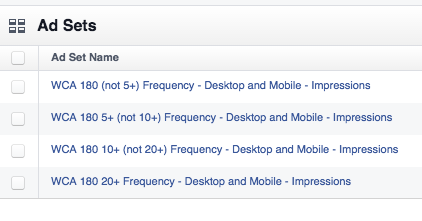
I’m comparing the following audiences:
- 1-4 Visits (180 Days)
- 5-9 Visits (180 Days)
- 10-19 Visits (180 Days)
- 20+ Visits (180 Days)
Of course, I didn’t want to have overlap. If I created one ad set for 5+ visits and one for 10+ visits, the ad set targeting those making 5+ visits would also include those who made 10+ visits.
So here’s an example of how I handled that…
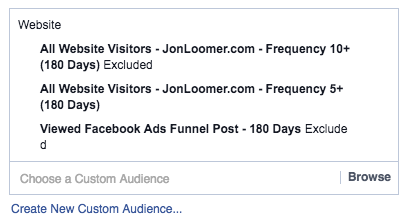
I targeted those who visited 5+ times while excluding those who visited 10+ times (I also excluded those who read a particular blog post, but that’s irrelevant here).
I also tested this while promoting my Facebook Ads Quiz.
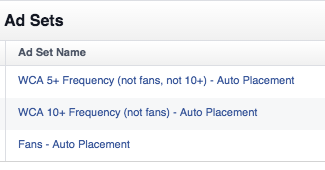
In that case, I created three different ad sets:
- 5-9 Visits, but not Fans (180 Days)
- 10+ Visits, but not Fans (180 Days)
- Fans
I was curious how these audiences would compare to targeting my fans.
My Early Results
I haven’t been testing these for long, and I’m not yet testing these audiences for conversions. While the results are early, there is certainly something to learn here.
First, let’s take a look at that blog post I was promoting…
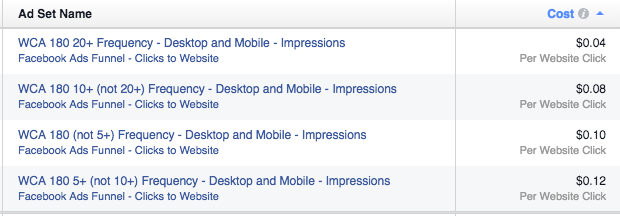
These results are mostly consistent with what we’d expect. I get the cheapest price when targeting people who have visited my site at least 20 times during the past 180 days, but I spend double when targeting those who visited 10-19 times. That cost continues to rise as frequency of visits drops (though it’s actually more to reach those who visited 5-9 times than 1-4 in this isolated case).
When promoting my Facebook ads quiz, I can expect to spend a little more per website click. And really, I should expect to spend a lot more. That quiz is 30 questions long, so it requires far more work than reading a blog post.
Here are the results…

Somewhat surprisingly, the cost is actually less to get clicks from people who have visited 5-9 times than 10+ times. But in either case, we’re talking about a cost that is about a third of what it is to get a click from my fans.
The Rollout
Facebook says that this feature is being rolled out over the coming months. I’ve been told that more enhancements will be coming.
One issue I found is around using Events. If you have your pixel on multiple websites, there isn’t a way to focus only on the Events performed on one domain. It automatically builds an audience for all registrations, for example, and that may be a problem if the websites aren’t connected.
Your Turn
I’ve been very happy about my early results, but I will continue to test. I’d love to hear what you think about this new feature. How do you plan to use it?
Let me know in the comments below!

