One of the many benefits of the Facebook pixel is that you can track and later retarget those who perform specific actions on your website. You can segment your audience in very specific ways based on page views, registrations, purchases, searches, and more.
Let’s take a closer look at how and why you should create these audiences. First, I’ll guide you through the basics. In the end, I’ll show you seven specific examples of audiences that you can create.
What Are Pixel Events?
Assuming the Facebook pixel is installed on every page of your website, you can add code to specific pages to capture and track the details of an event (registration, purchase, search, etc.). In addition to the tracking and optimization power of pixel events, you can create audiences of those who performed certain events on your website for highly relevant Facebook ad targeting.
If you aren’t using the pixel — or you’re using the pixel, but without events — you’ll be limited regarding the types of pixel event-related audiences that you can create.
Are You Using Events?
If you’re not sure whether you’re using events, there’s a good chance you aren’t. From the “Pixels” area of your Ads Manager, click the “Set Up” button at the far right…
If you use a certain integration or tag manager (WooCommerce, Shopify, Google Tag Manager, etc.), click that option. Otherwise, click to manually install the code yourself.
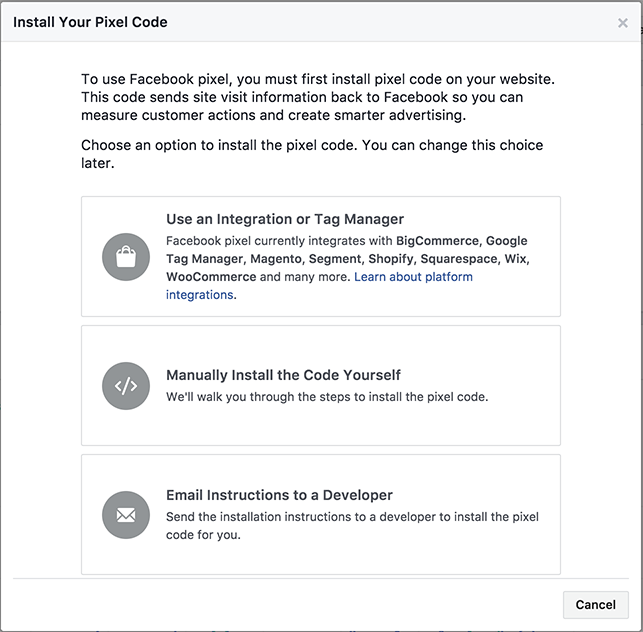
The first step is installing the pixel. Facebook does a very good job of explaining how to do this. Make sure the base pixel code goes between the HEAD tags of every page of your website.
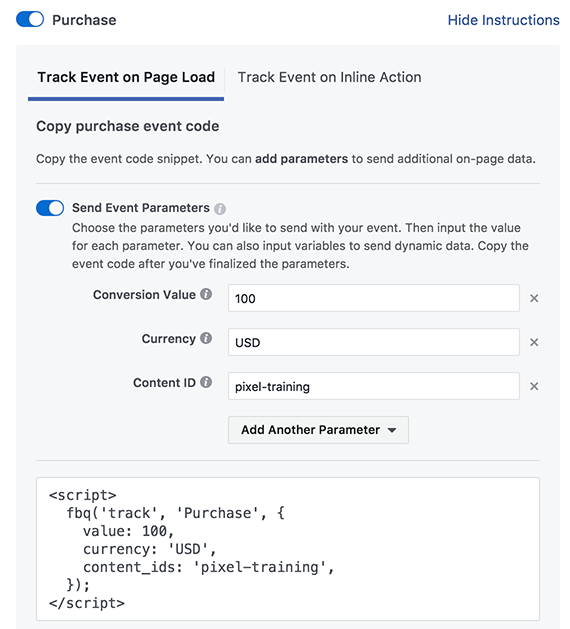
The second step is to add your events. Facebook has improved their documentation here to streamline this for you. Simply click the button by one of the events and enter the details (for a specific product, for example), and Facebook will spit out the event code that you will add.
Here’s what the event code looks like for the purchase of a product with the “pixel-training” ID valued at $100…
Instead of manually adding this code, you may also want to install a WordPress plugin. Pixel Caffeine is a free WordPress plugin that I use.
Audiences From Your Pixel Events
Assuming you are using the pixel and events on your website, you can now do some pretty cool things with Website Custom Audiences.
Click to create a Custom Audience…
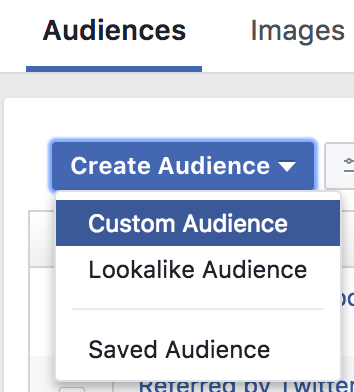
And select “Website Traffic”…
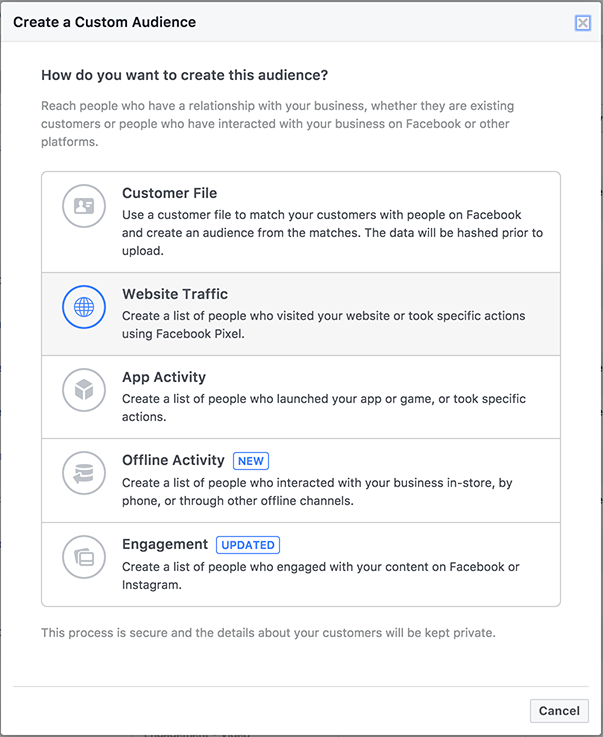
You should now see that you can create audiences “from your events”…
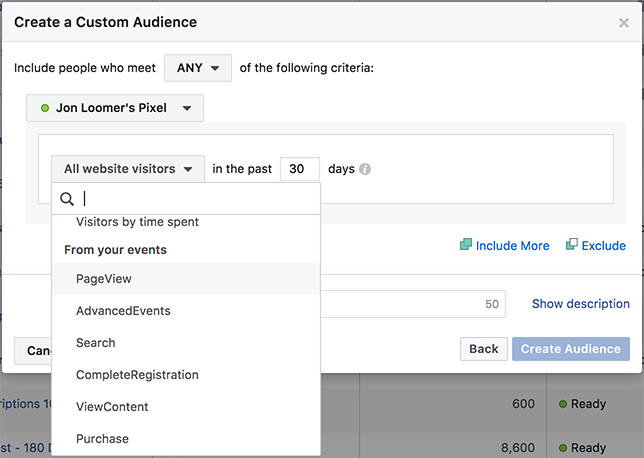
What events appear here will depend upon the events used and found on your website.
Refine by Parameter
After selecting an event, you’ll see a link to “refine by” with the first option of “URL/Parameter.” Refining by a parameter will make special use of your events.
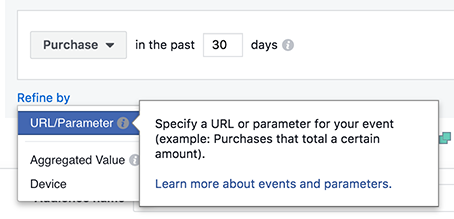
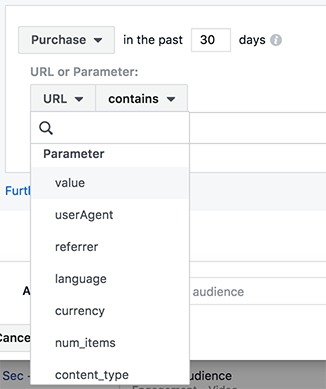
Parameters are the things that provide details of an event. For a purchase, parameters can include things like the value, currency, and number of items.
Refine by Aggregated Value
The second option when clicking to refine is “Aggregated Value.”
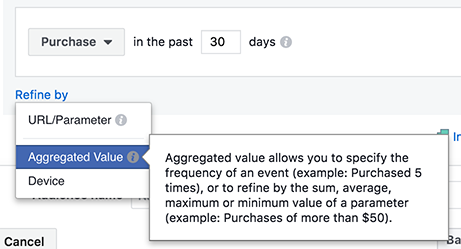
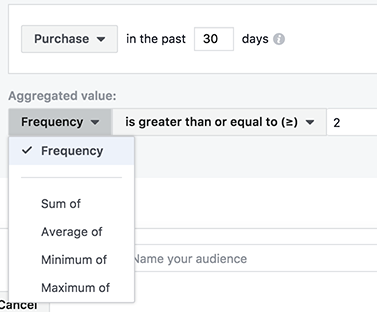
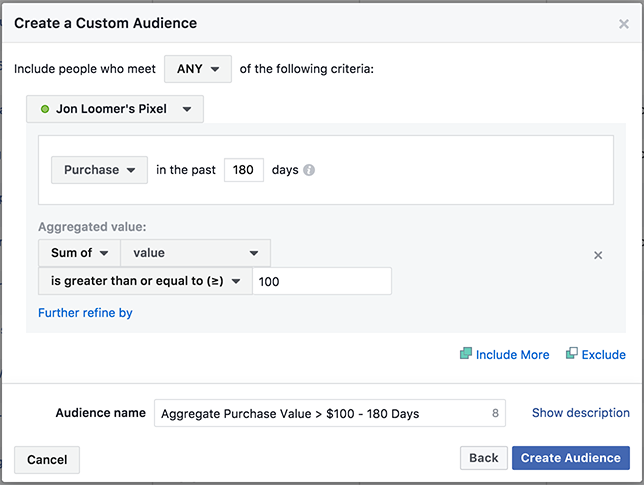
With this option, you can create audiences of people who performed a certain action multiple times. For example, an audience could be created for those who come back multiple times to make purchases totaling more than $1,000 in aggregate.
Now let’s take a look at seven specific Facebook Website Custom Audiences that you can create based on pixel events…
1. Any Registration
Let’s start generally. My website has multiple ways that you can register for something (two different webinars, two different video series, newsletter, and a Quick Video Tutorials subscription). I can (and do) create individual audiences for all of those actions. But I could also create an audience of all people who registered on my website.
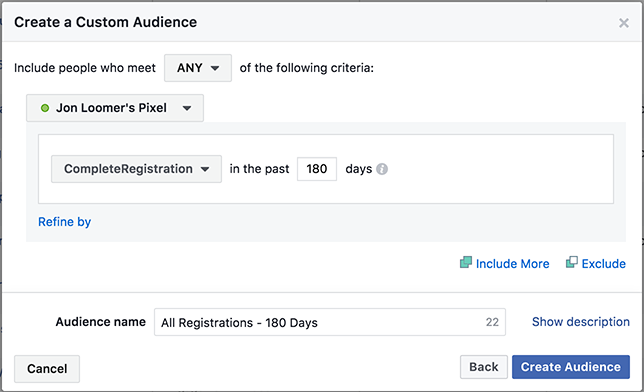
This is especially useful for websites that don’t get significant volume for a single lead magnet, but there are several ways to register on the site.
2. Any Purchase
Once again, I offer several products on my website. I create audiences for each product, but I can also create an audience of all who have purchased anything on my website.
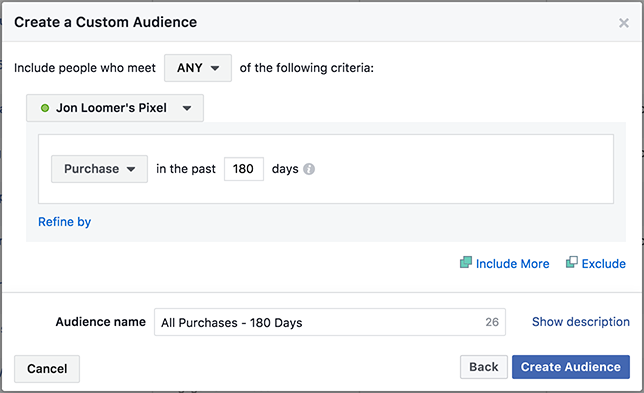
This is one of the most valuable audiences that you can create.
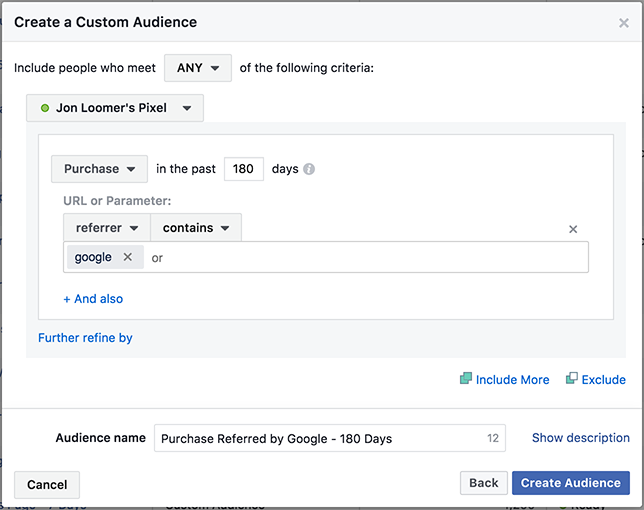
3. Referred by Google
If someone purchased on your website, how did they get there? Were they referred by Google? This is an easy audience to create…
4. Viewed Two or More Pages
It’s always helpful to isolate those who are most active on my website. One way to do this is by using “Frequency” within parameters. You can apply frequency to any event, but let’s focus on the PageView event…
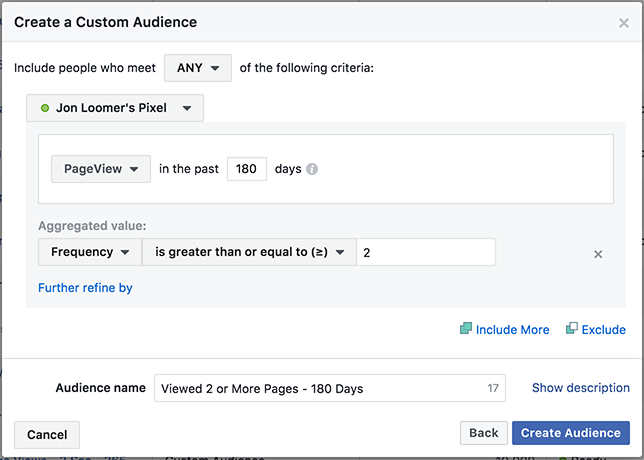
This allows me to target those who have viewed the most pages on my website — in aggregate.
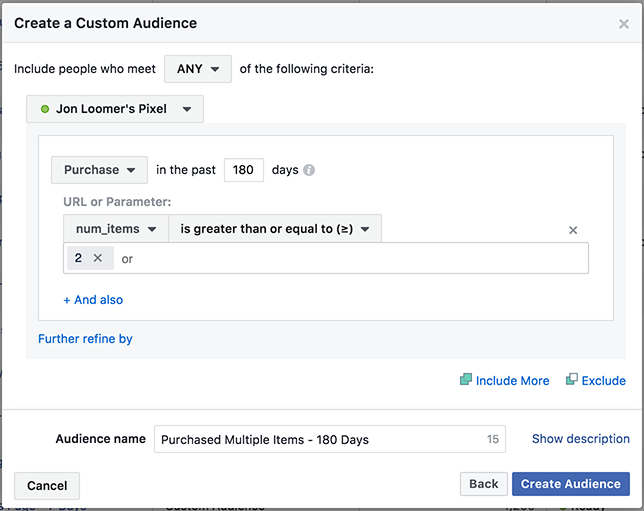
5. Purchased Multiple Items
When someone checks out, do they purchase one item or multiple items? You can separate those who purchased more than one item at a time…
6. Aggregate Purchase Value
Anyone who purchased from me is a valuable customer. But what about those who purchase again and again? We can apply aggregate value to isolate those who spent the most money…
7. Performed a Search
When people use the Search function on your website, they are looking for answers. This can be valuable information. By creating audiences based on searches, you can create ads targeting these people, promoting the solution.
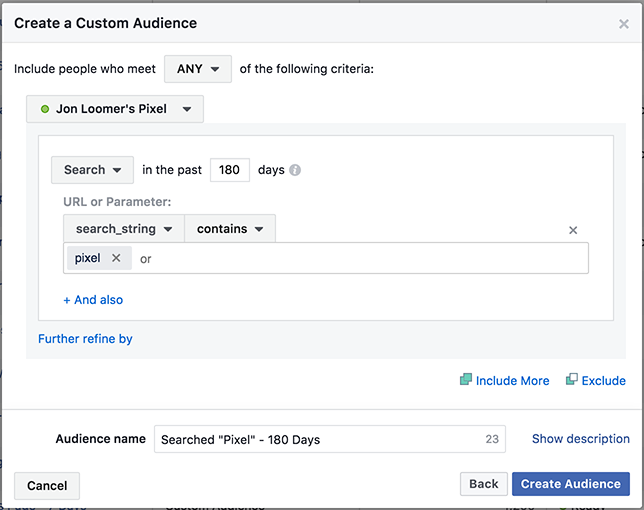
In the example above, people came to my website searching for “pixel.” I can target them when promoting my Facebook pixel training program.
Your Turn
This is just scratching the surface. There are dozens and dozens of audiences that you can create based on activity on your Facebook pixel. But this should help you understand the types of audiences that are possible.
Have you started creating these? What are examples of some that you use?
Let me know in the comments below!

