There is a need to sometimes limit the audience of people who see your Facebook posts (or page!). While it’s counter to the standard “more reach, please” attitude of most Facebook marketers, occasionally there are circumstances that require you to restrict your Facebook audience.
Let’s review three ways to apply audience restrictions on Facebook. We’ll look at an example of Page-Level Restrictions, Post-Level Restrictions, and a special case involving Lead Forms.
Restrict Your Facebook Audience at the Page-Level
To limit the visibility of your entire Facebook page to certain audience groups, you can adjust the page settings by following these steps:
First, access the admin panel for your Facebook page. If you use Business Manager, you may need to log in to your Business Manager account.
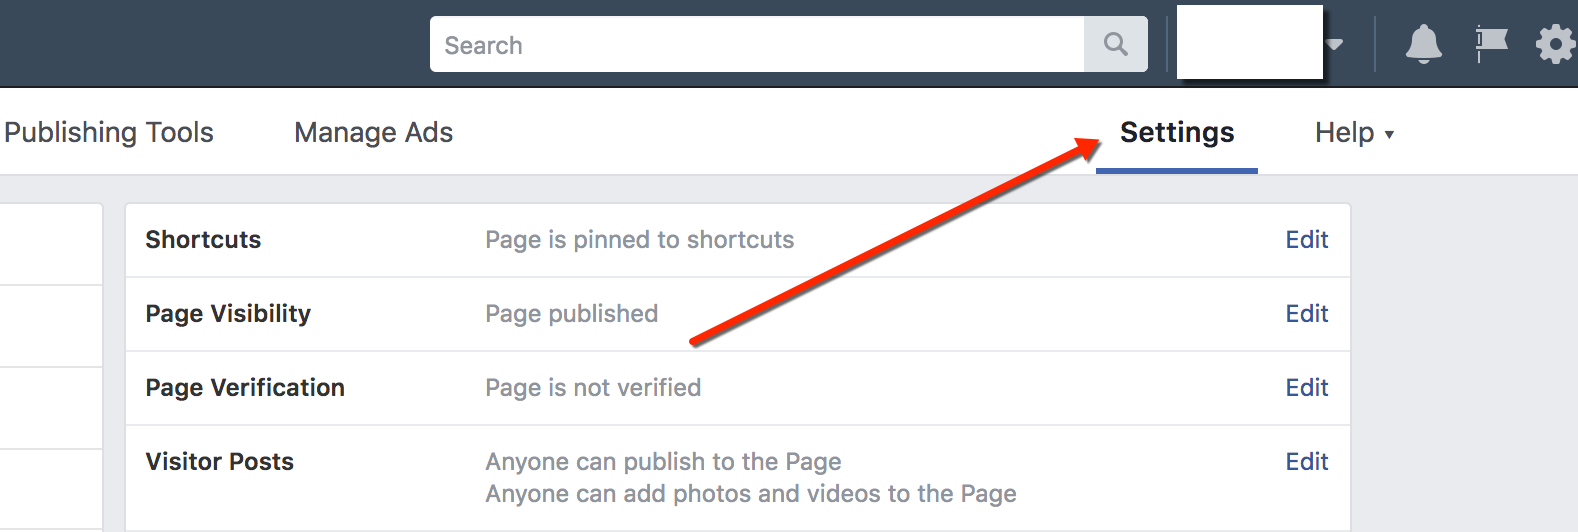
Click Settings on the top right of the panel:
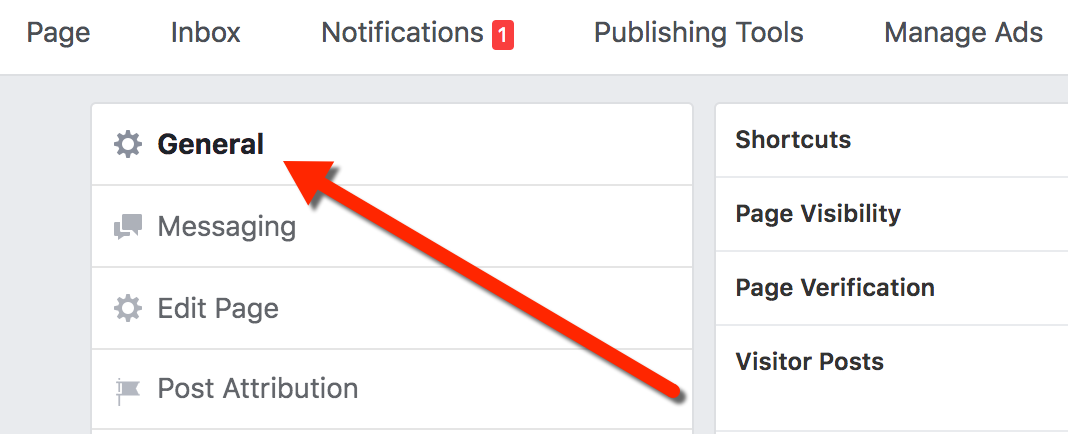
Make sure you are on the General tab:
At the Page Level, you have two restriction options. You can limit the audience to specific countries as well as set minimum age restrictions.
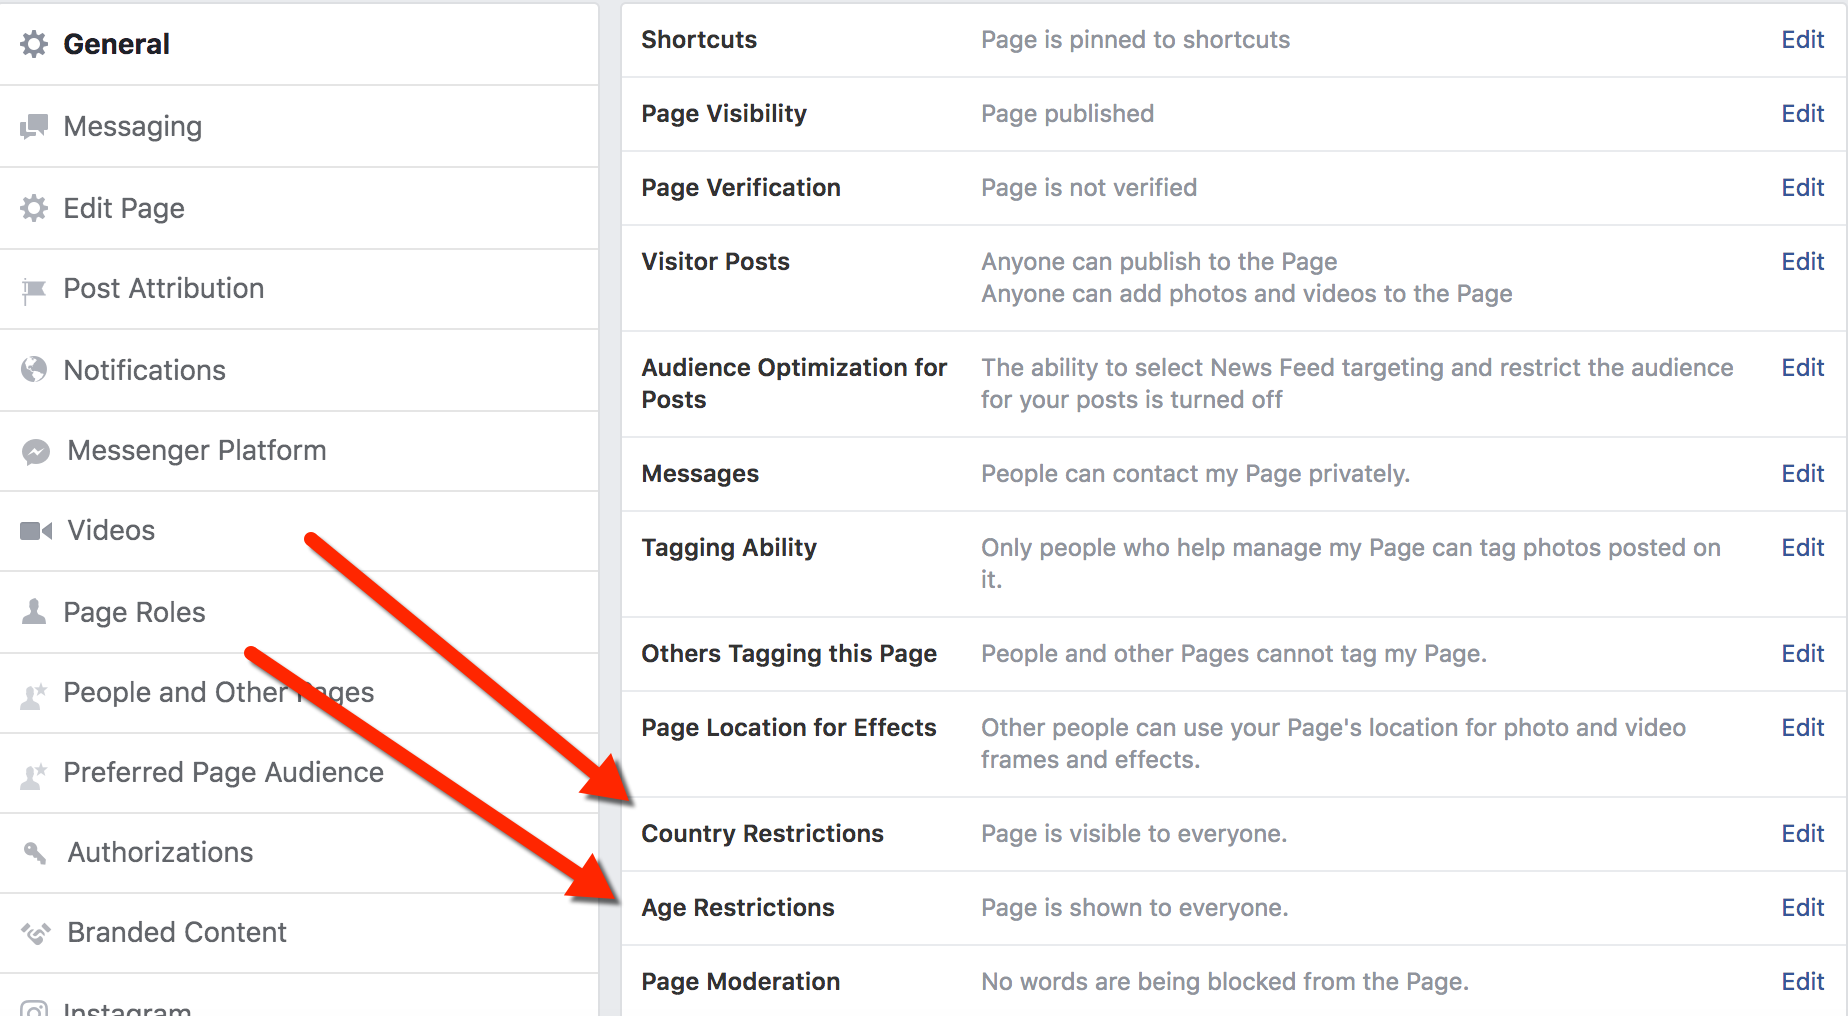
For Country Restrictions, you can choose to either set specific countries where the page will be visible or choose regions where you want to hide the page:

For Age Restrictions, you can select a minimum age for users to see the page:
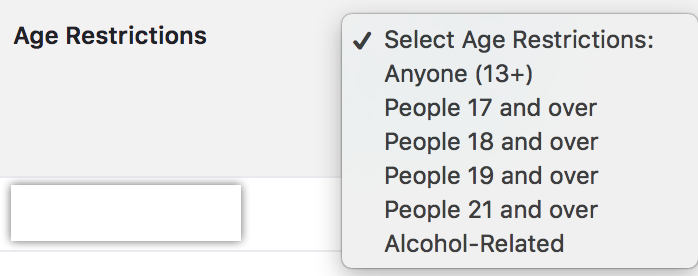
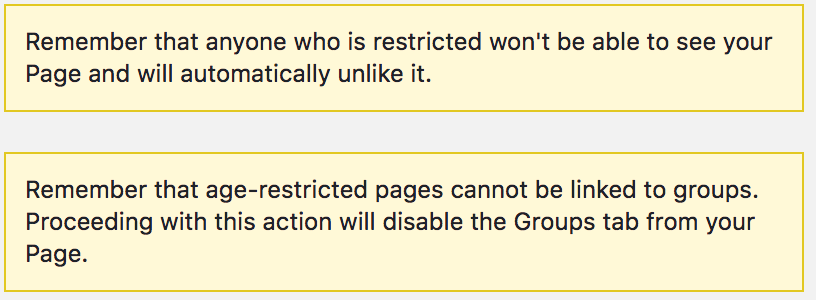
If there is not already a minimum age selected and you select one of the options to set a minimum age, you may see a warning message from Facebook. This warning reminds you that fans who have already liked your page from outside your minimum age will automatically unlike the page, so be careful with this. There is also a message indicating that age-restricted pages cannot be linked to groups:
As the warning message indicates, people outside the specified aged group will not be able to see your page. They’ll simply see a content unavailable notification, like this:

Restrict Your Facebook Audience at the Post-Level
You can limit the audience of specific posts on your page.
Similar to how we approached this with Page-Level targeting above, begin with the General tab of your page’s Settings section.
Beside the option “Audience Optimization for Posts”, click Edit. From here, select to enable the “Audience Optimization for Posts”, if the box is not already checked:
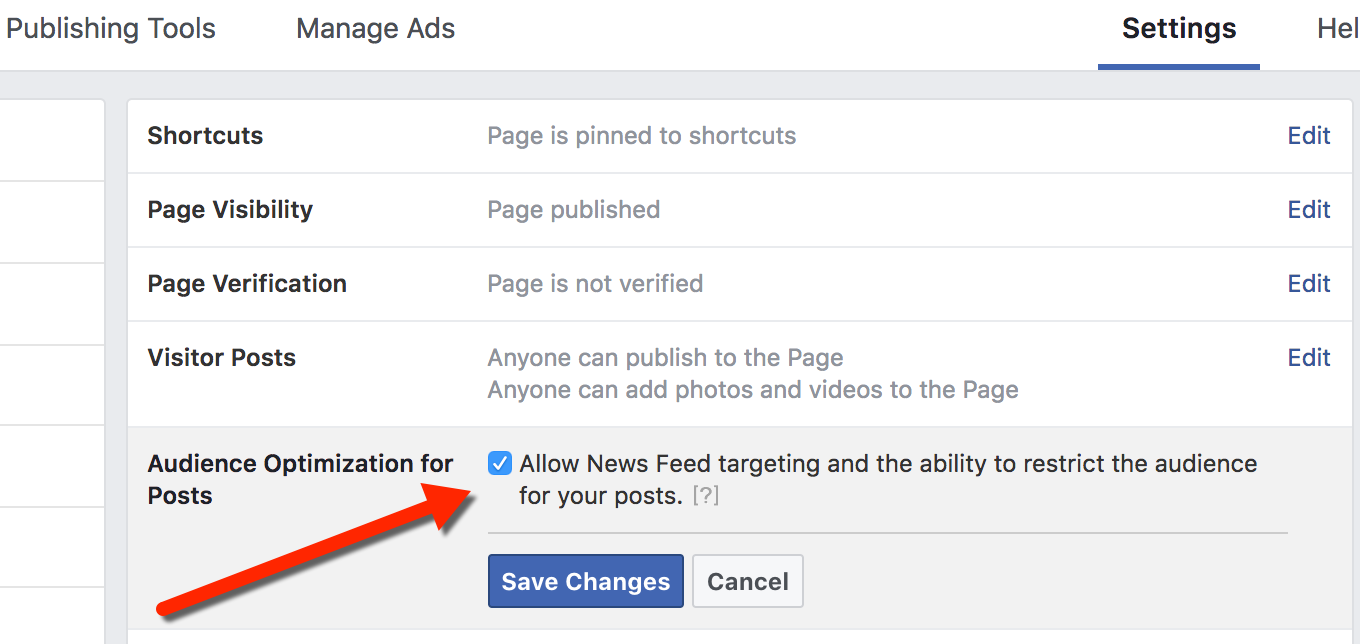
By updating this setting, you will now have an option to add audience restrictions when you create a post.
With this setting enabled, you have two options to add restrictions to a post.
To add restrictions to a post created directly on the page, select the targeting drop down:
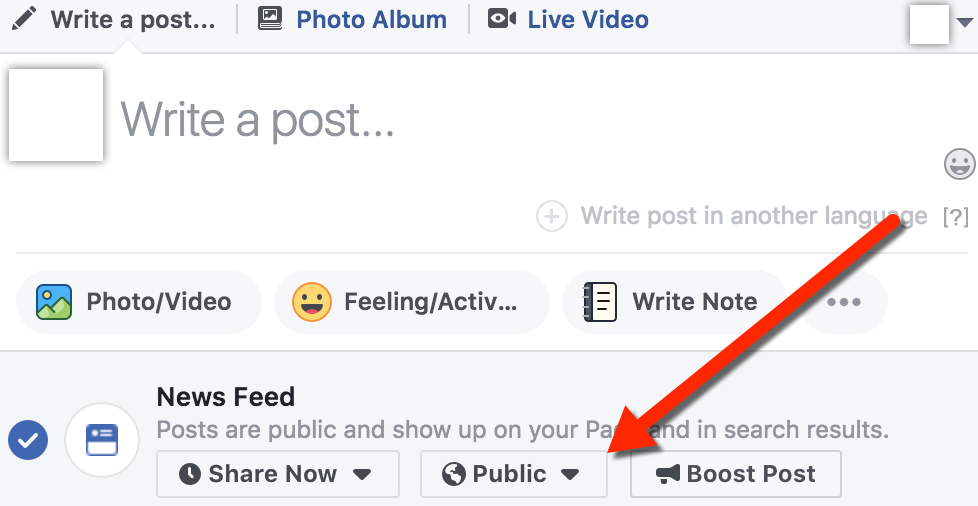
*Facebook recently changed the way this looks, so it’s possible your targeting selector may appear different from this screenshot.
Select the option for Restricted Audience:
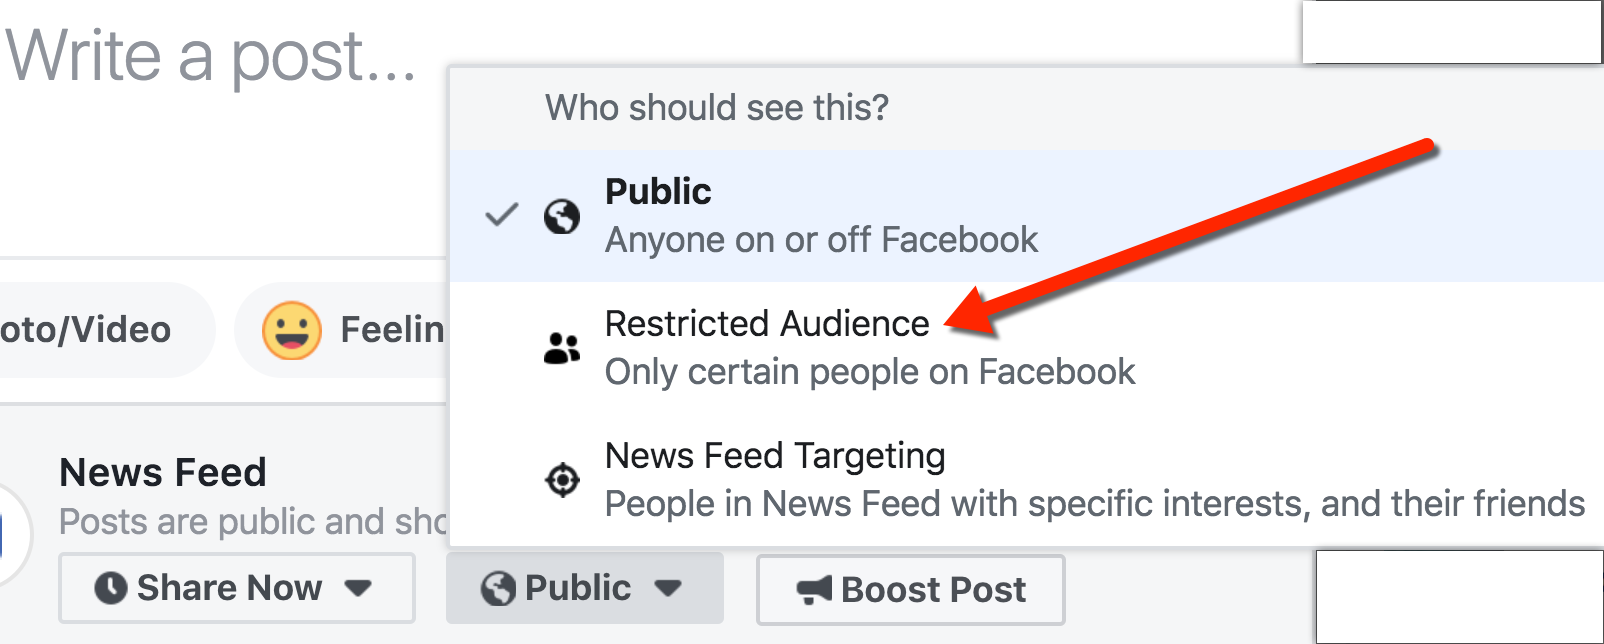
You can specify your audience restrictions here, and then save the changes:
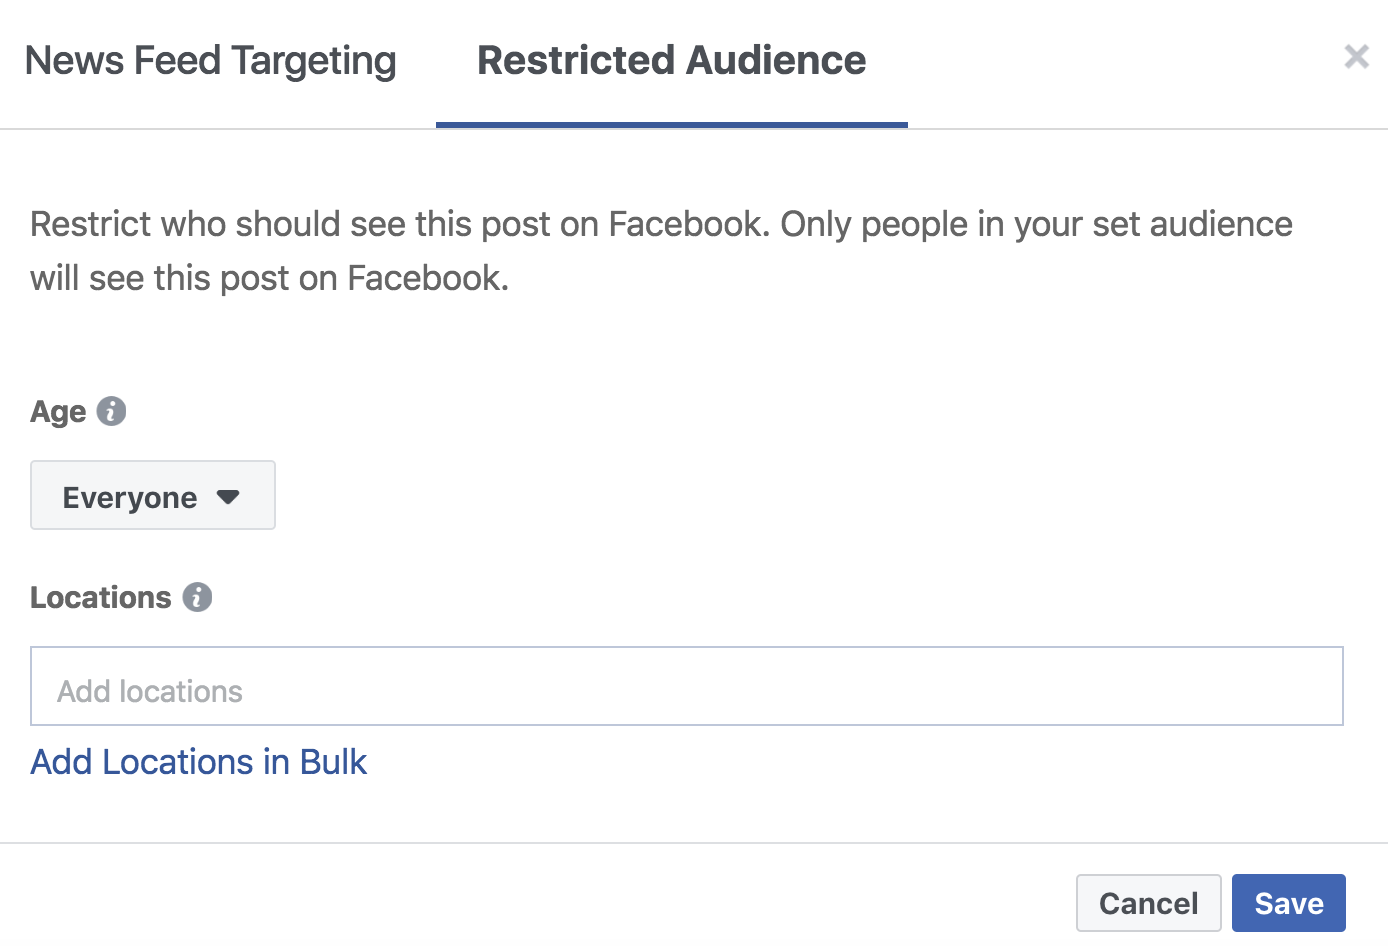
You may have noticed that alongside the Restricted Audience option, there is an option for News Feed Targeting. If you’re interested in this functionality, check out this write-up from Jon on Facebook Audience Optimization.
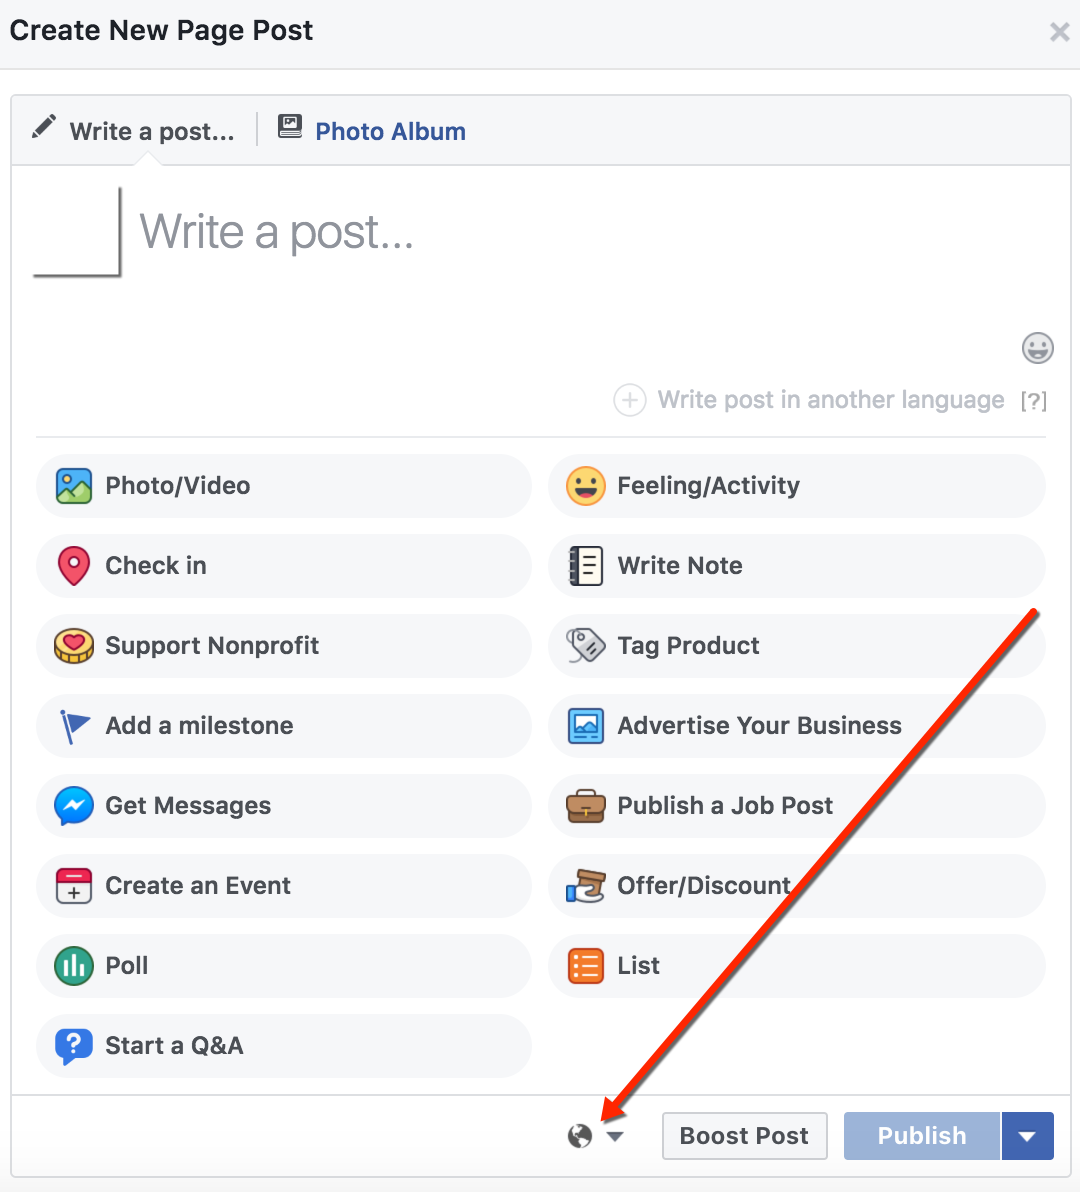
To apply post-level audience restrictions for a post created via the Publishing Tools interface, click on the globe icon at the bottom of the post:
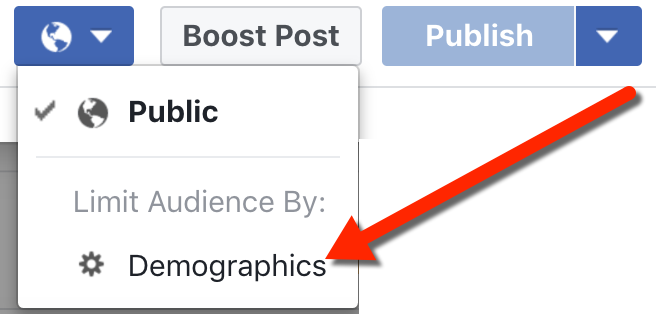
Select the option to Limit Audience By Demographics:
From here, you can specify the demographic parameters you’d like to use as limitations for your audience:
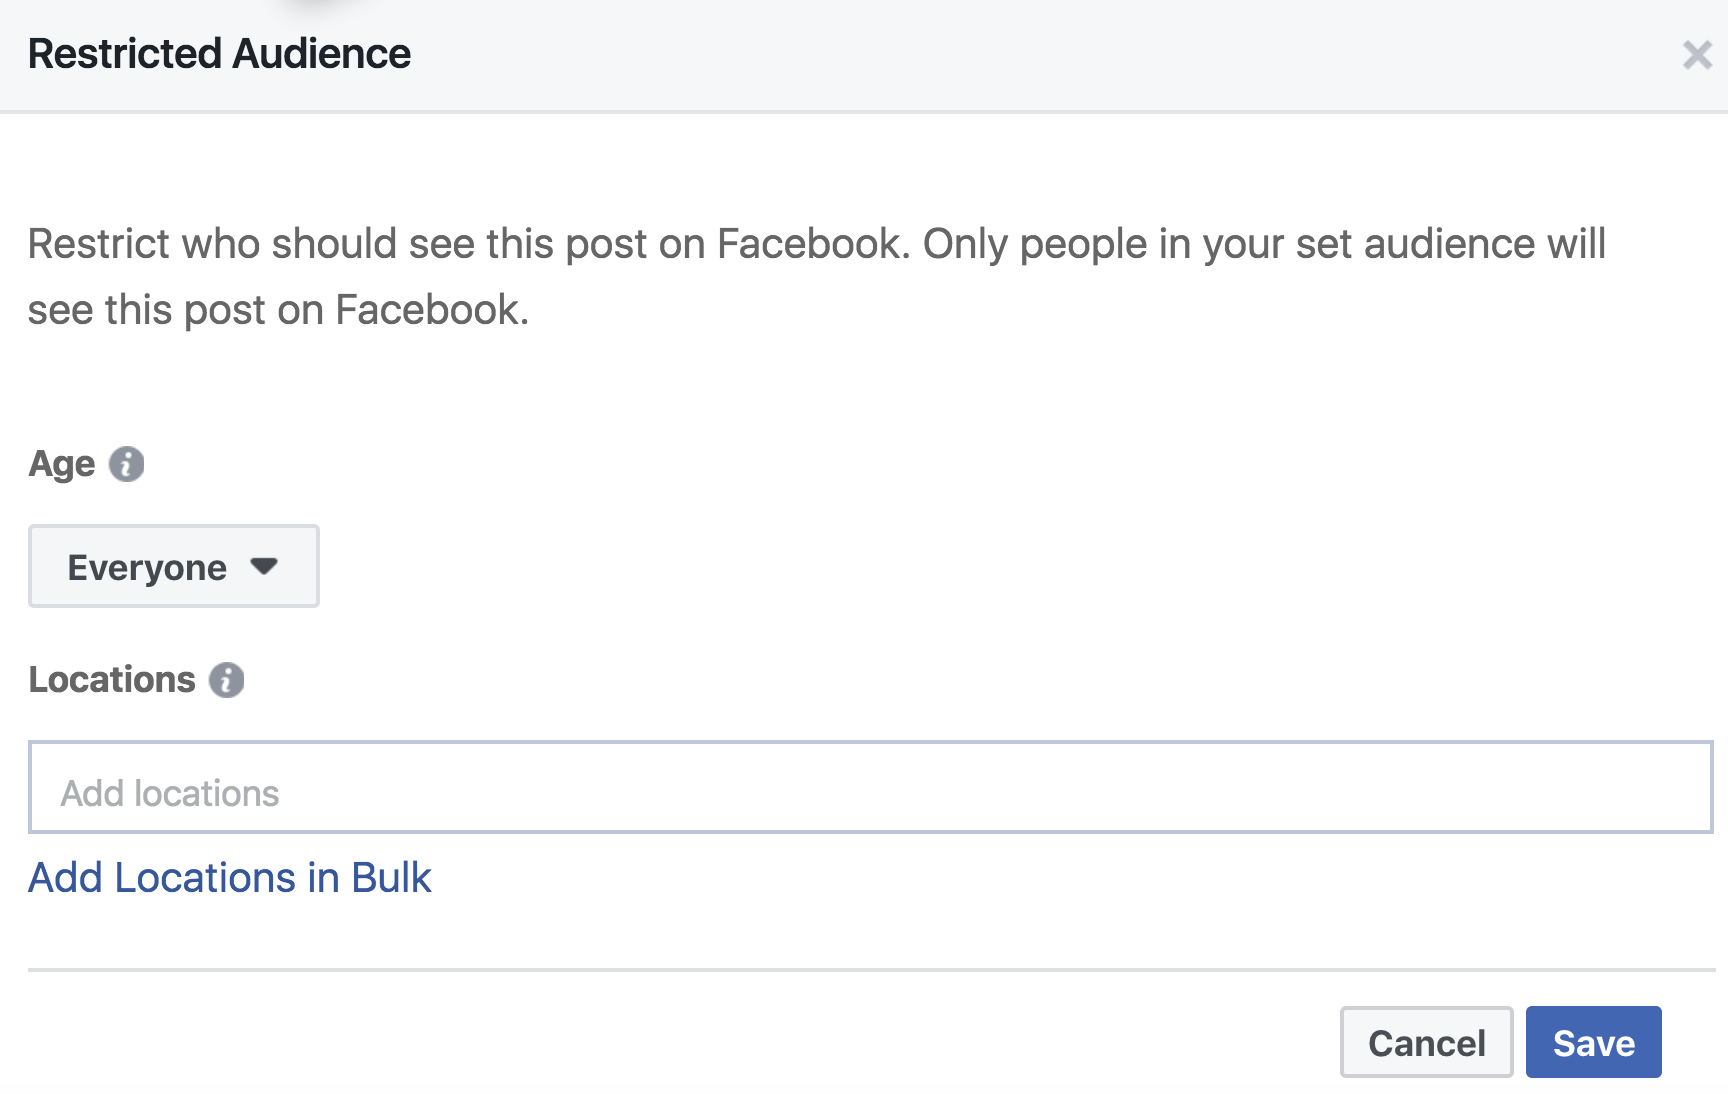
Location targeting at the Post-Level offers a few more options than location targeting at the Page-Level. In particular, at the Post-Level, you can target specific countries, states/regions, cities, or postal codes — even congressional districts. But at the Page-Level, you can only restrict the audience by country.
Lead Forms Audience Restrictions
Facebook Lead Forms have their own special options for audience restrictions. These are set during the form creation process. This feature is easy to miss, and you may even find that your Lead Forms already defaulted to a restricted audience in the past.
To set restrictions on Lead Forms, click on the Settings tab during the form creation process:
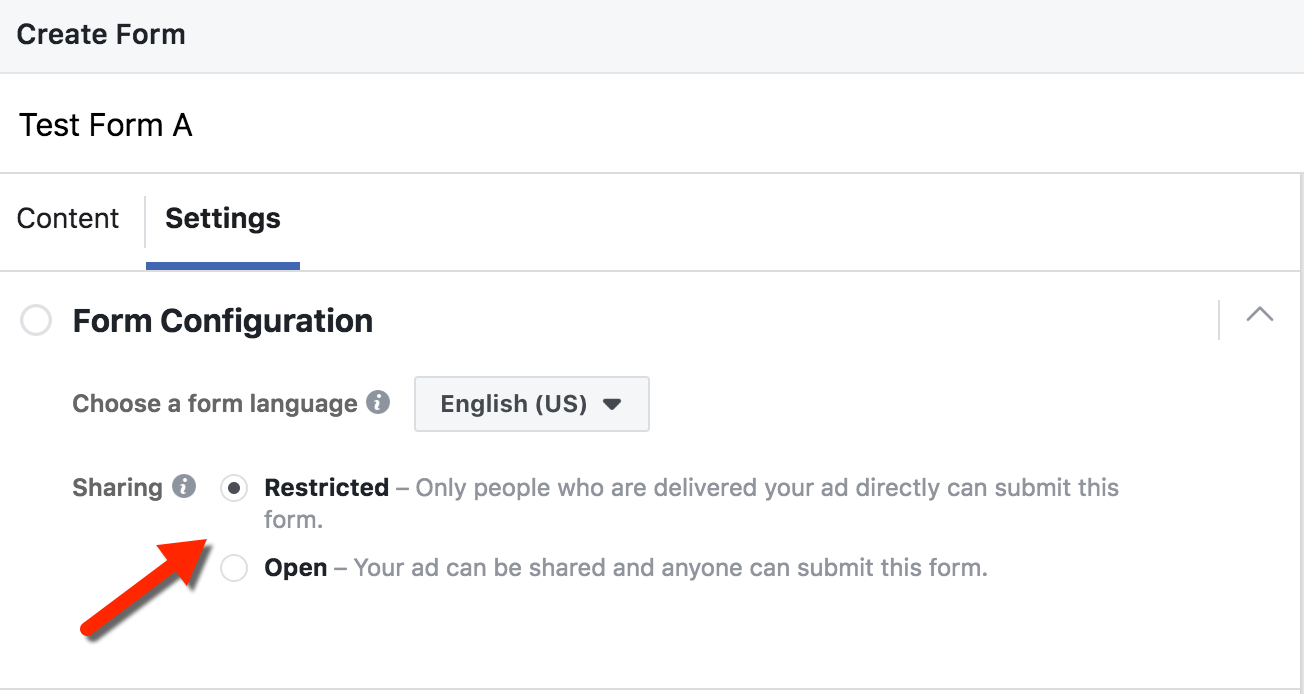
If you want to change the audience to Open, simply select that option.
As defined by Facebook (when you hover over the small ‘i’ beside the “Sharing” indicator):
By default, only people who are delivered your ad directly will be able to see and submit this form. Select “Open” to let people share this form with friends and allow submissions from people tagged in the comments.
Note that the restriction applies to the Lead Form itself, not to the associated post. This means users outside the specified audience could see the copy and creative of the post, but if they click to open the form, the Lead Form would not appear.
Generally speaking, I recommend changing Lead Forms to Open. Why? You may have users who want to share the form with their friends. If those friends are not in the audience you are using for the Lead Ad associated with the form, they will not be able to see the form even though they can view the post. This can be frustrating to your audience, and damage their perception of your brand or business.
That said, there may be certain scenarios where you only want people in the ad audience to be able to enter the form. Having this option available may be helpful to you.
The Restricted Facebook Audience Roll-Up
- You can restrict the audience on Facebook at the Page Level and at the Post Level.
- Page-Level restrictions apply to all posts that come from the page.
- Post-Level restrictions apply only to individual posts.
- Post-Level restrictions have some added location targeting functionality that Page-Level lack.
- Lead Ads/Lead Forms have their own restricted audience capabilities. They may have defaulted to restricted audiences without your realizing it!
Your Turn
Do you have a need for restricting your audience on Facebook?
Let me know in the comments below!


