

For the past couple of years now, I’ve used Google Tag Manager to manage the Facebook pixel and events (both standard and custom events). In this post, I’m going to walk through exactly how I do that.
I wish I would have started using GTM to manage my Facebook pixel and events sooner. It provides a ton of flexibility and ability to get creative in ways that you can’t while sticking with standard events only.
Install the Base Pixel Code
In order to take advantage of Google Tag Manager for standard and custom pixel events, you’ll first need to add the base Facebook pixel code.
Within the Google Tag Manager workspace for your domain, go to Tags.
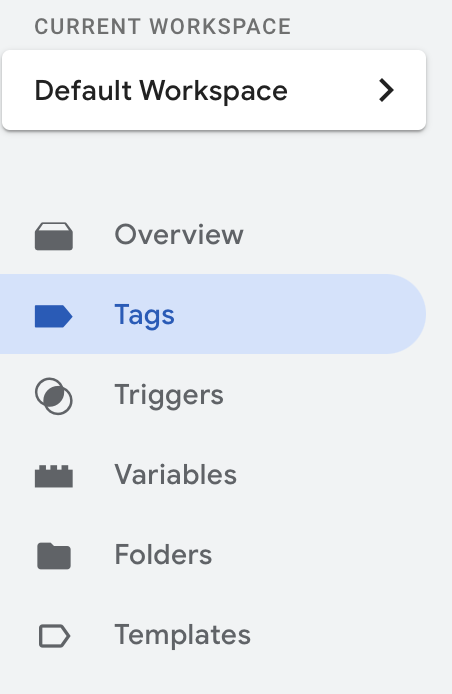
Click to create a “New” tag.

Click “Tag Configuration.”
Select “Custom HTML.”

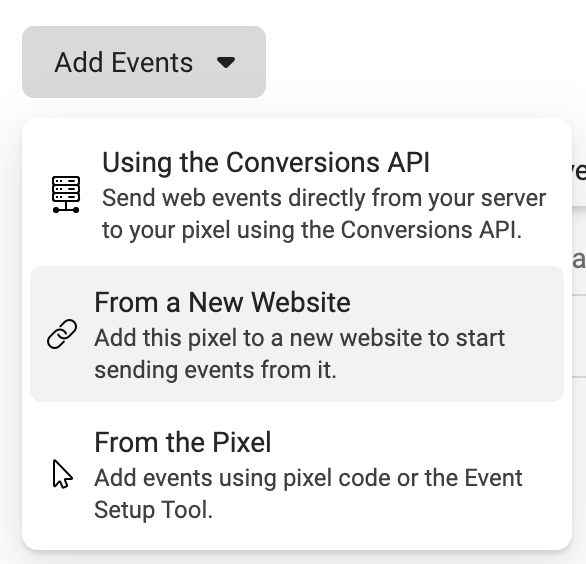
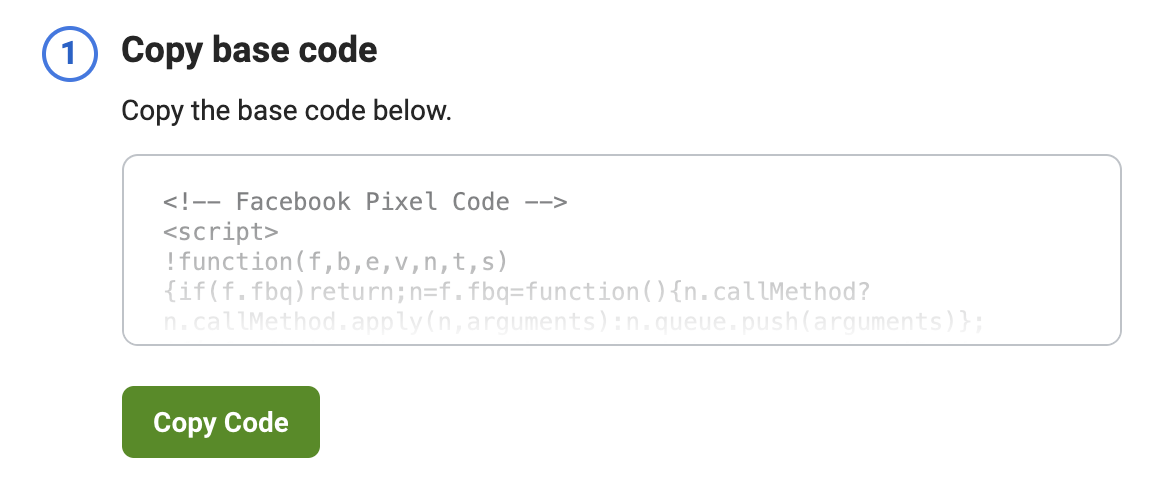
This is where you’ll need to paste your base Facebook pixel code. Go into Facebook Events Manager and select your pixel as the data source.
Then click the “Add Events” drop-down and select “From a New Website.”
Choose to “Install Code Manually.”
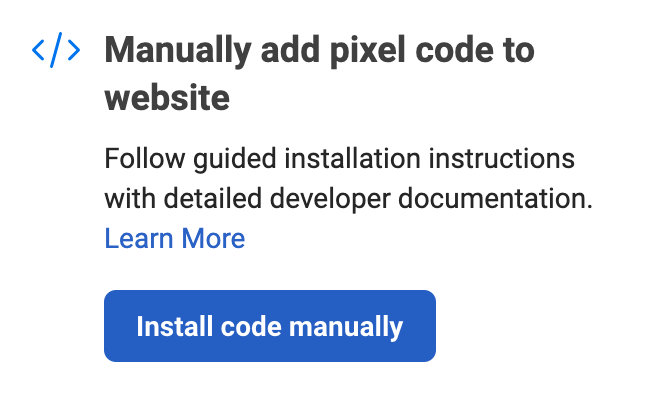
Click the green “Copy Code” button.
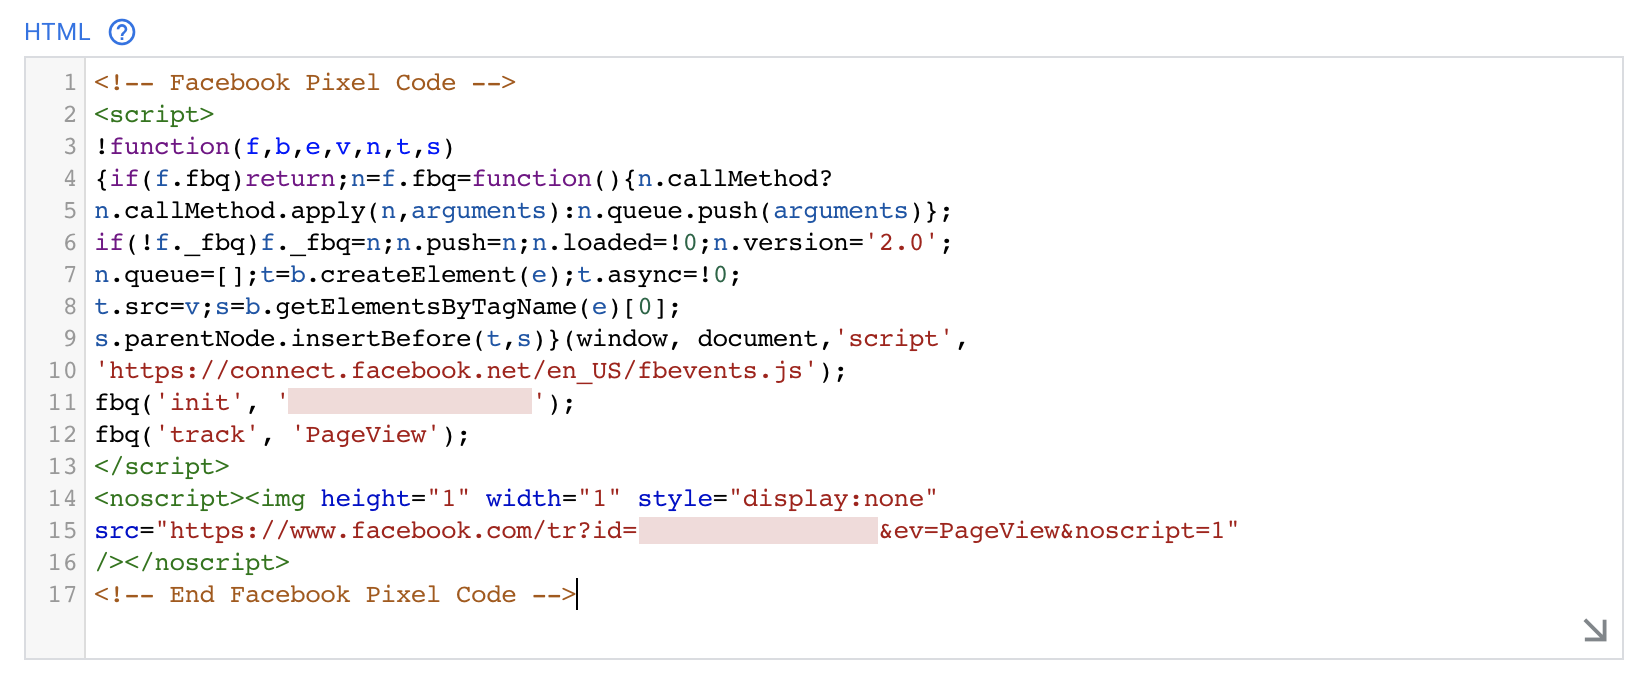
Then paste that code back into the HTML field of the tag you were creating in GTM.
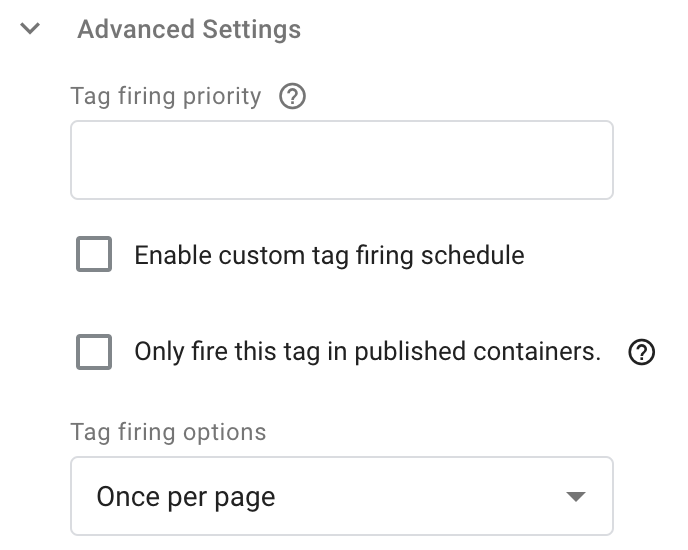
Under “Advanced Settings,” choose “Once per page.”
At the bottom, click into “Triggering.”
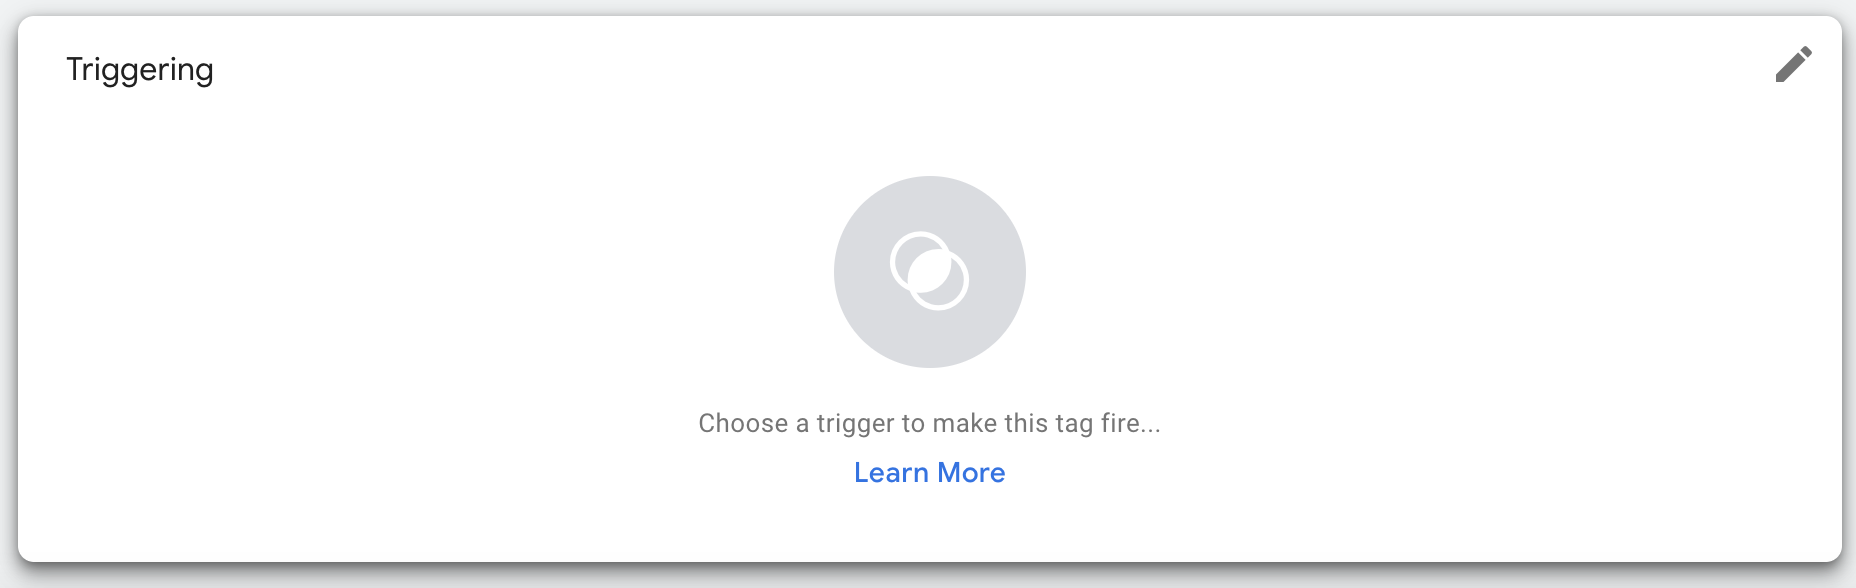
Select the “All Pages” page view trigger.

Name your tag (something like “Facebook – Base Pixel”) and save it.

Then click to submit your changes.

Create Standard Events
First, you can technically use the Facebook Pixel Setup Tool to create standard pixel events without code. I’ve personally not had a lot of luck with that tool and choose to do it manually in Google Tag Manager.
We created a Facebook Pixel Event Generator tool to help with this process. Let’s assume that I want to create a ViewContent event for the view of my training landing page.
I select “ViewContent.”
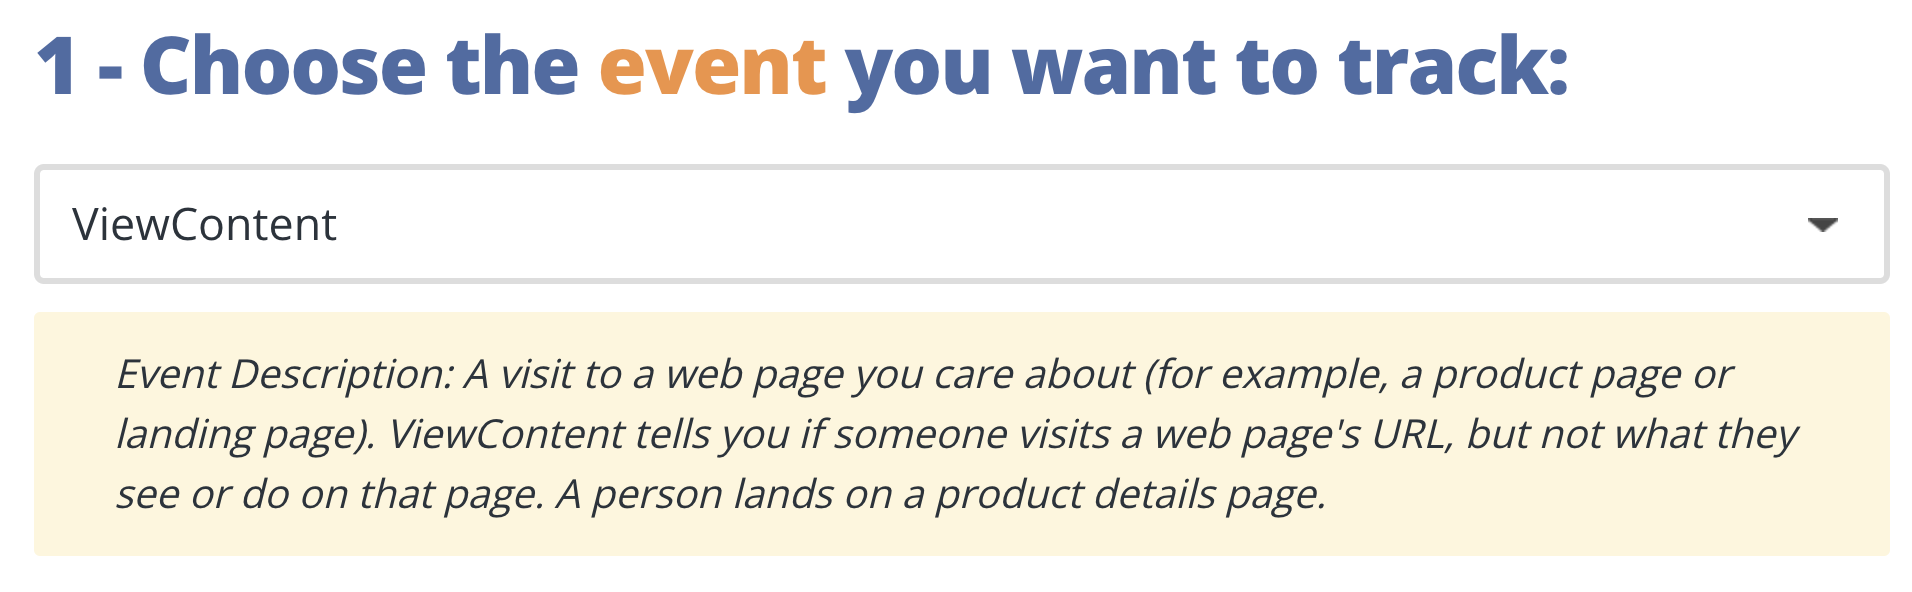
Everything else is optional, but I’ll also provide the name of the landing page for “content_name.”

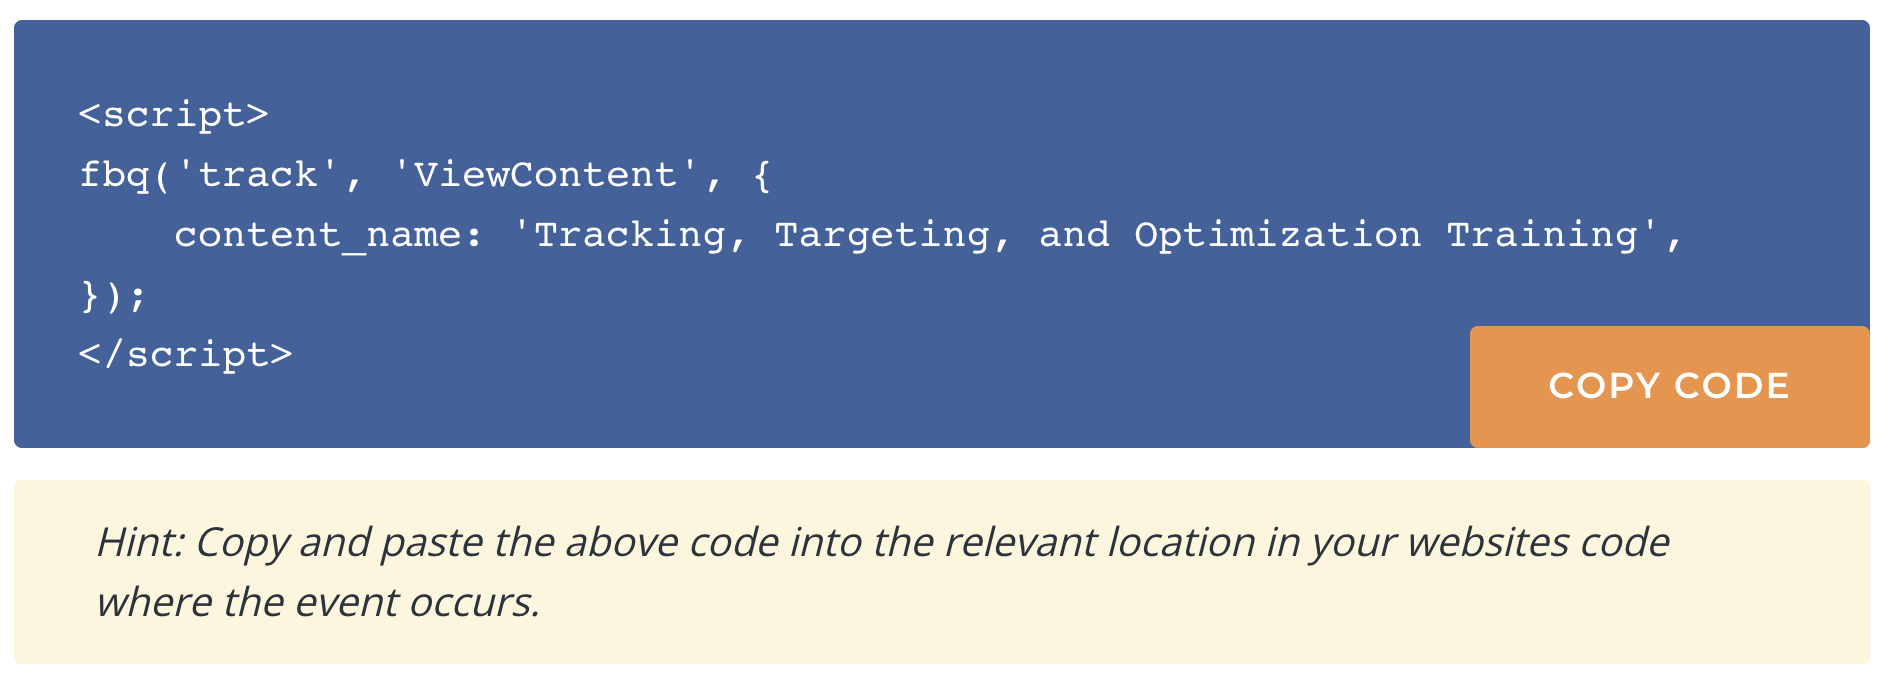
The code I need is now at the bottom of the page. Copy that.
Here’s a video of how to use that tool if you need it…

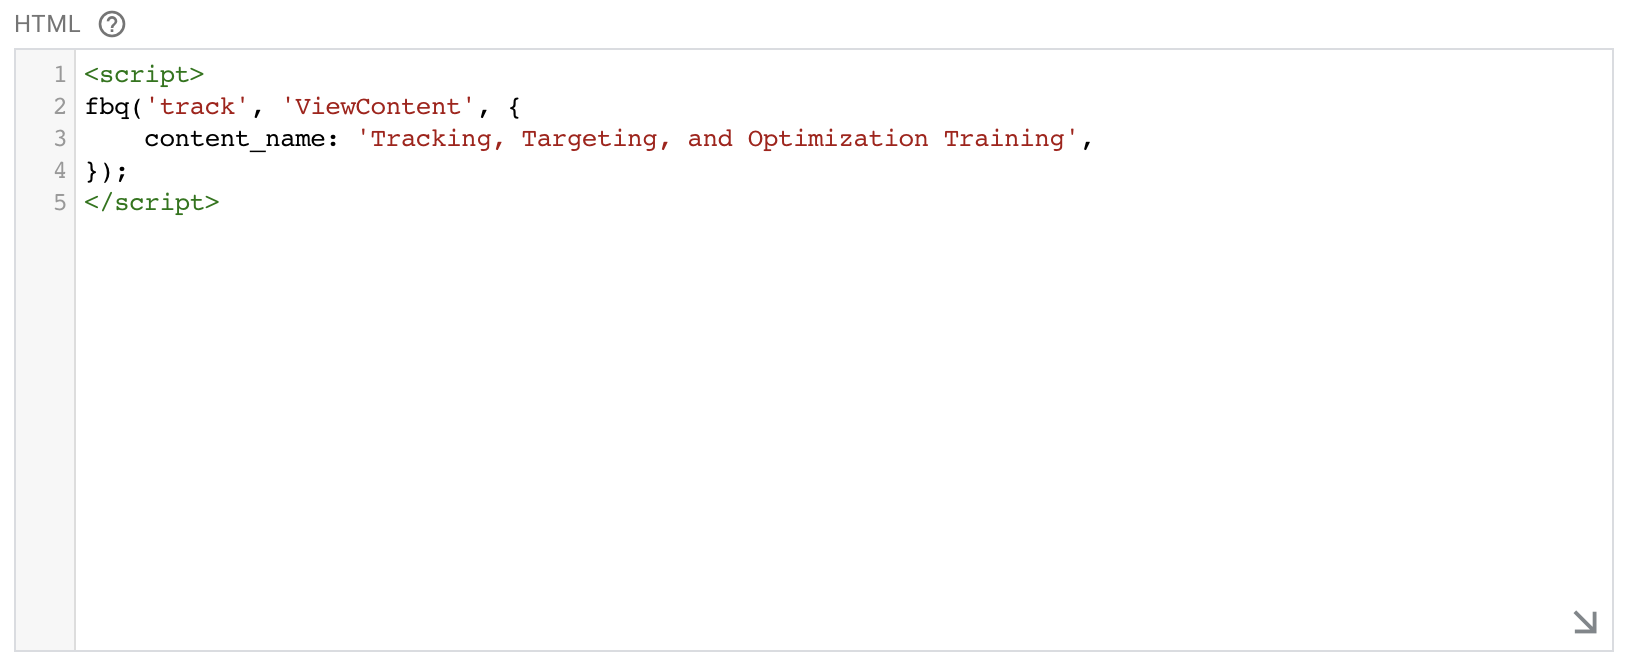
Now, create a new tag in Google Tag Manager. Once again, it should utilize custom HTML. Paste the code we just copied from the Event Generator.
Let’s name the tag before we go further. This is for you, so name it whatever you want. Make sure it’s descriptive so you know what it is.

Under Advanced Settings, expand Tag Sequencing and check the box for “Fire a tag before [your tag] fires.”
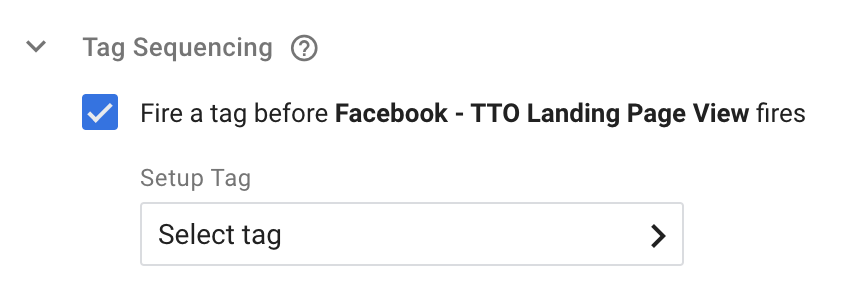
We want the base Facebook pixel code to fire first or the events won’t work. Click to select a tag and then choose the base pixel tag that we created earlier.

Click into Triggering and then click the “+” to add a new trigger. This trigger will be the view of the specific page that will result in the ViewContent event firing.
First name it. Then click Trigger Configuration. Select “Page View” as your trigger type.
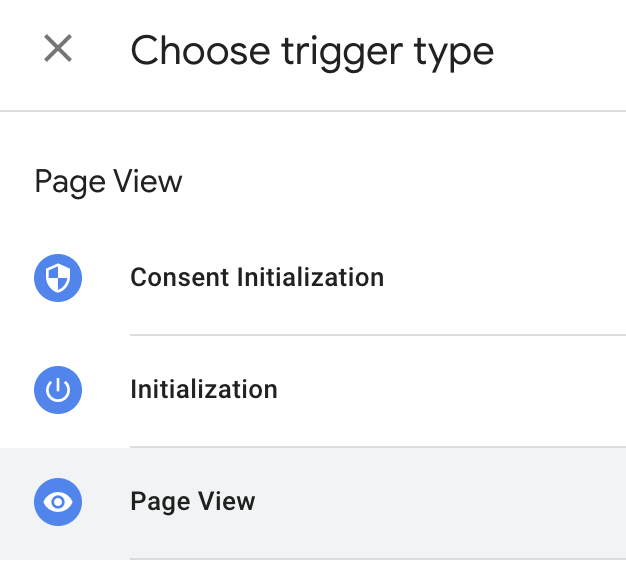
Select “Some Page Views” and then “Page URL” from the drop-down. You’ll use Page URL “contains” and then paste in everything from your landing page URL after the domain name (including “/ and /”).
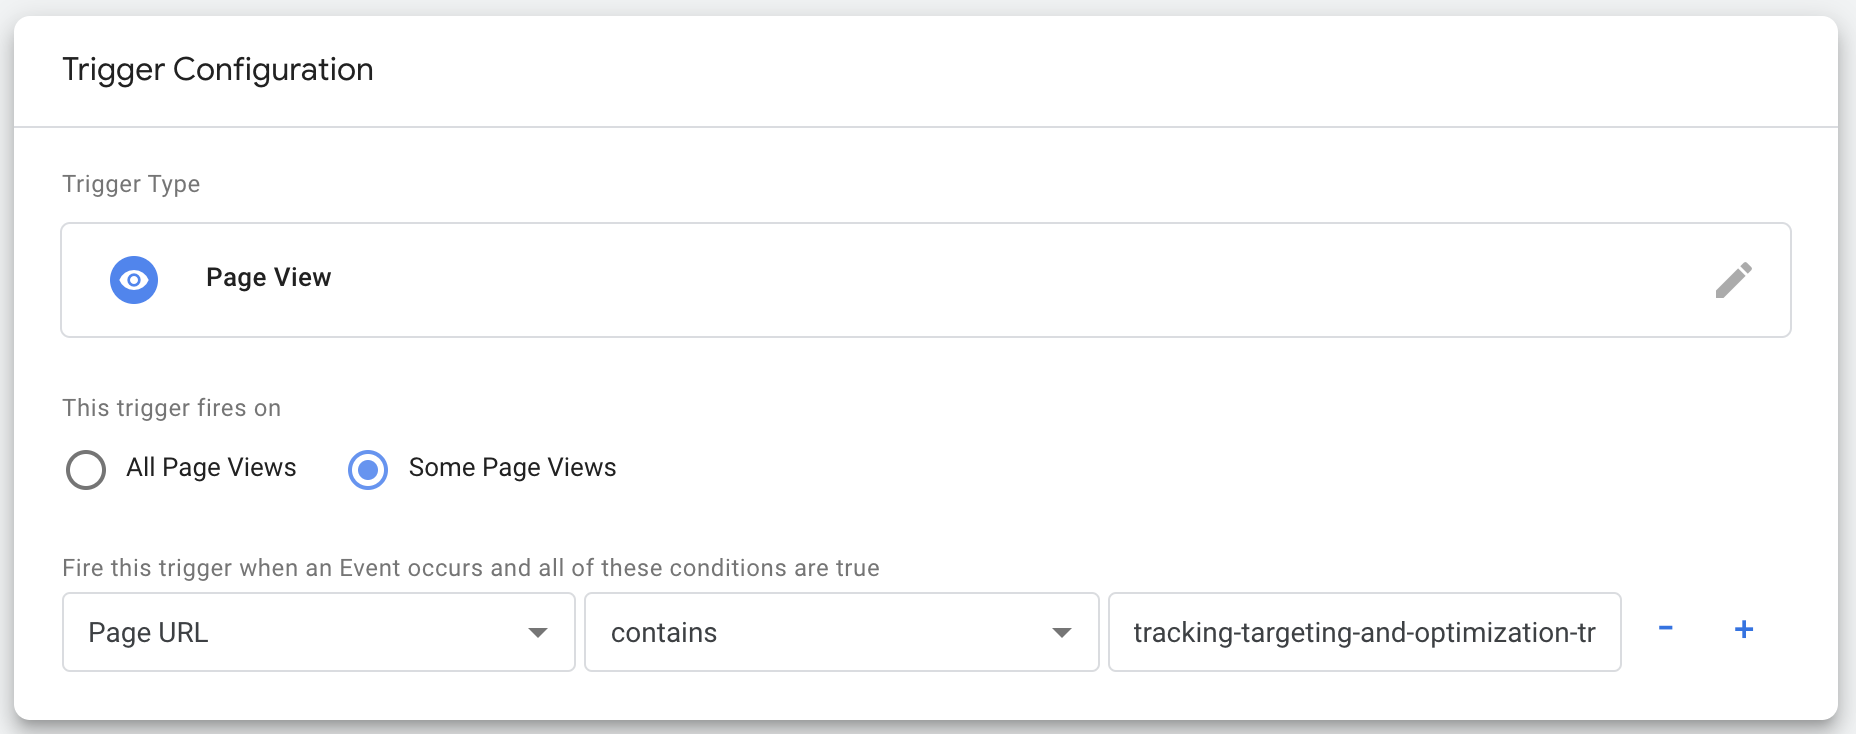
When you’re done, save and submit your changes.
You can do this with any standard event. I also create events for CompleteRegistration and Purchase using the page view of the thank-you pages as the trigger events.
Create Custom Events
One of the really cool benefits of Google Tag Manager for managing your Facebook pixel is the custom events that you can create. I’m not going to use this space to detail how I created all of my custom events because I’ve already written individual blog posts on each one.
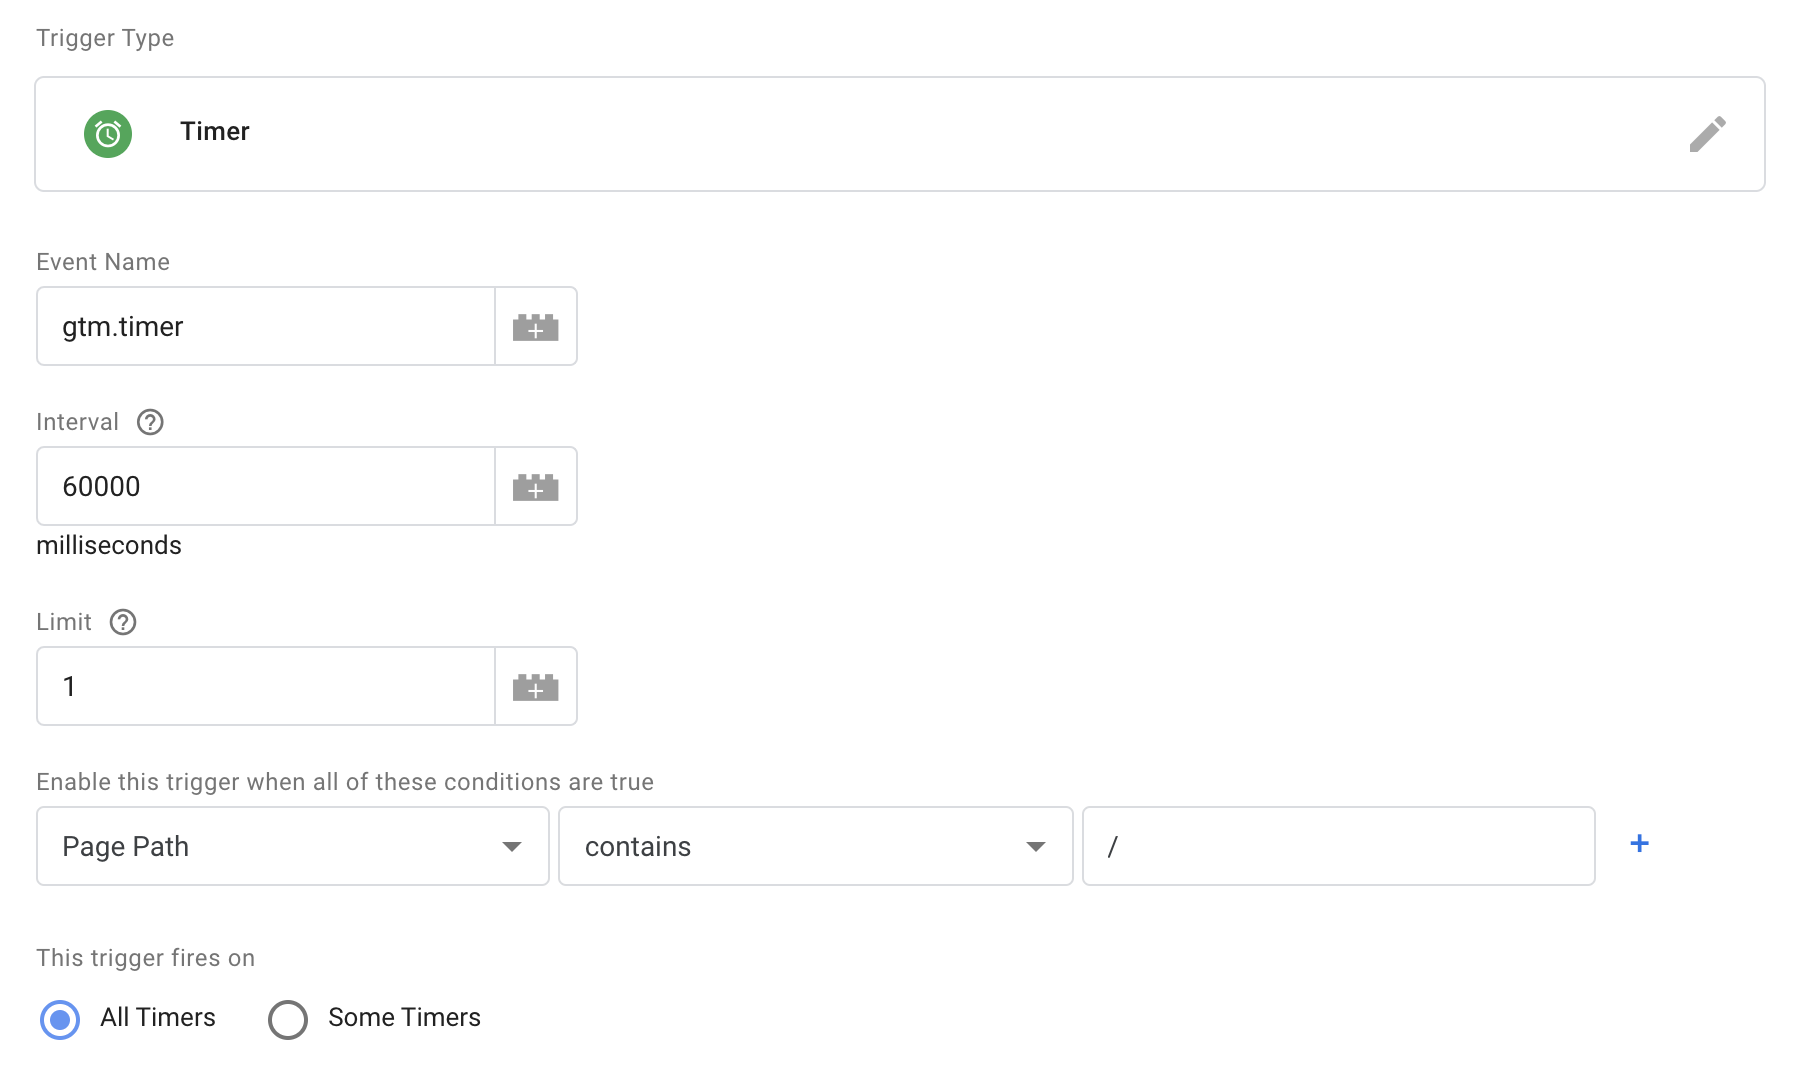
I’ve created a custom event to trigger when someone views a page of my website for at least 60 seconds. It uses a special Google Tag Manager timer trigger.
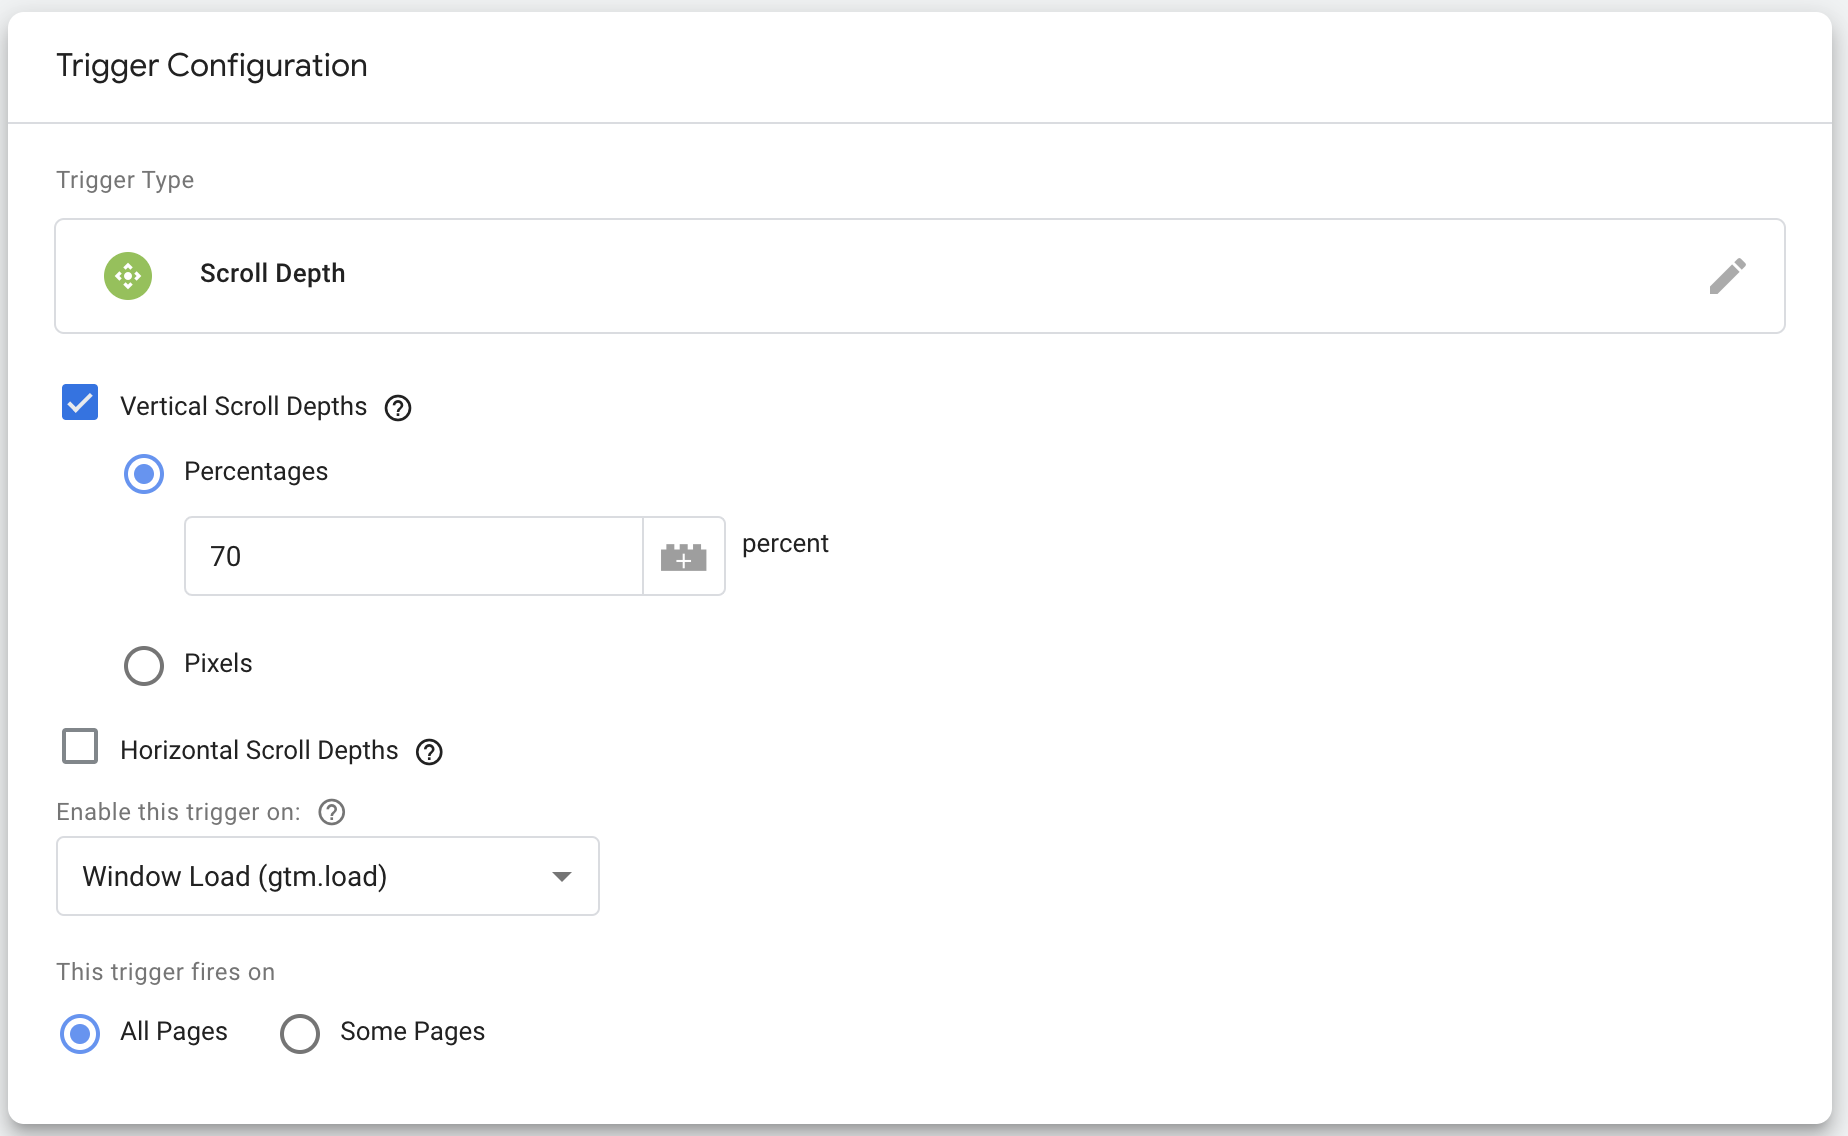
I’ve also created a custom event to trigger when someone scrolls at least 70% deep into a page. This event utilizes the Scroll Depth trigger.
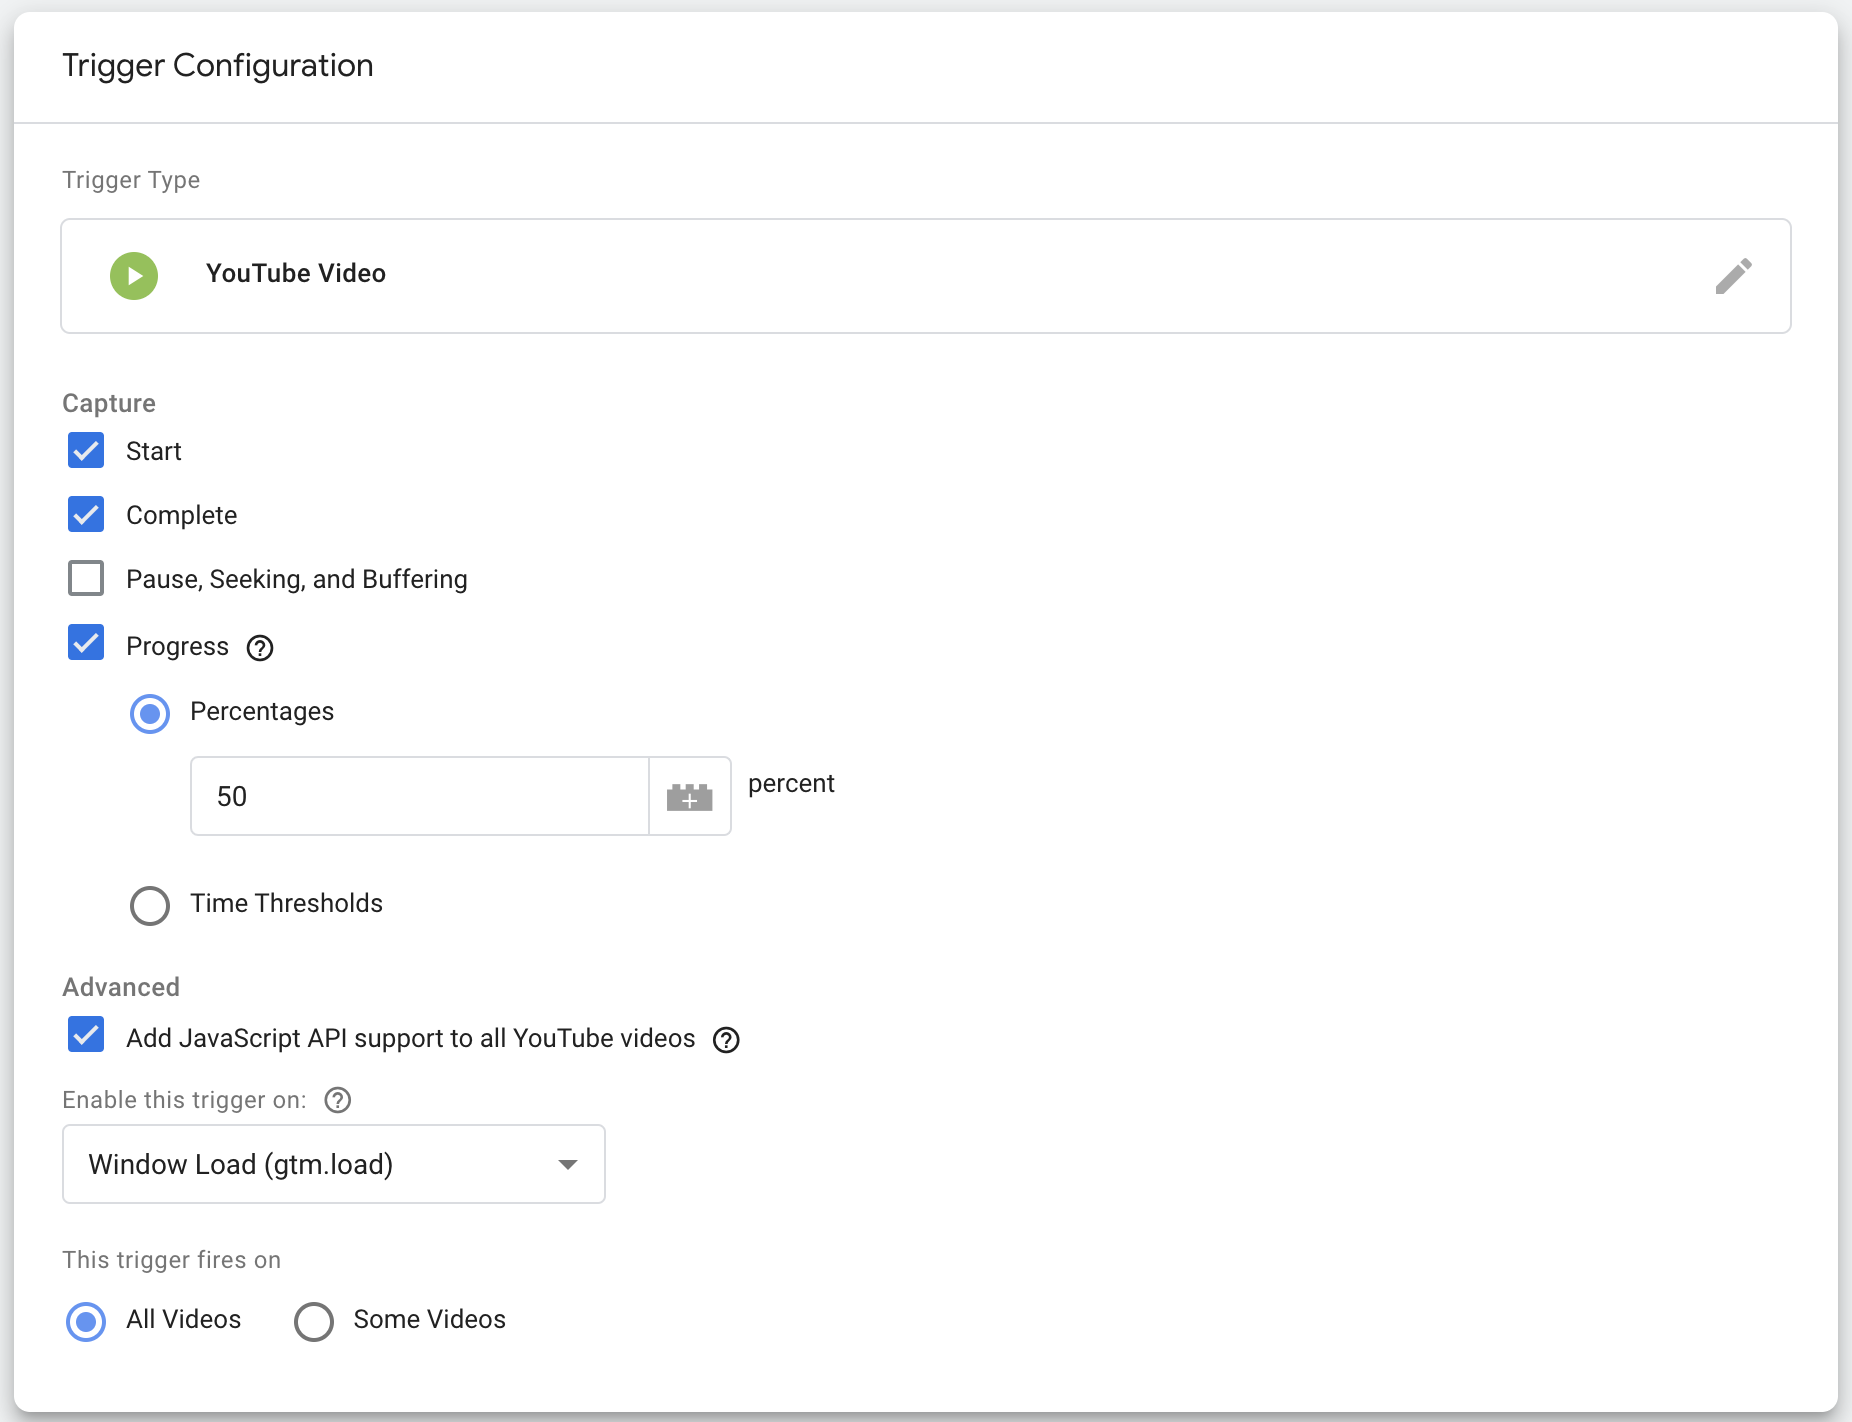
And finally, I created an event that triggers when someone watches YouTube videos embedded on my website. These events use a YouTube Video trigger.
I’m sure there’s still way more that I can do with custom pixel events using Google Tag Manager, but these are really nice tools to help me track, optimize, and target quality actions on my website.
Test Them
You can test whether the pixel and events are working using the “Test Events” tab in your Events Manager. But I find it’s easier to simply use the Facebook Pixel Helper Chrome plugin.
If you use the plugin, simply navigate to the page that should fire the event you’ve added.
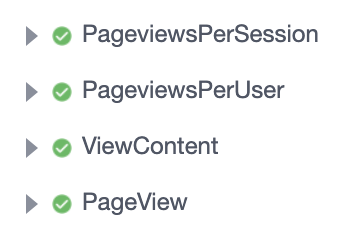
If everything is working properly, all expected events will fire and display with a green checkmark.
GTM + Conversions API Gateway
While the Conversions API Gateway isn’t part of Google Tag Manager, I wanted to note that the two play nicely. Once I set up the Conversions API using the API Gateway, it automatically detects all of the standard and custom events that pass through the pixel.
Watch Video

Your Turn
I’m a big fan of using Google Tag Manager to manage my Facebook pixel and events. Have you used it to create other powerful custom events that I haven’t?
Let me know in the comments below!