Back in 2017, Facebook started limiting the ability to edit link thumbnail images, headlines, and descriptions as a way to control the spread of clickbait and misinformation. You can still edit your link previews — and limit how others can — if you first go through a domain verification process.
Once verified, you will be able to:
- Edit headlines and descriptions for organic links from your domain to your page
- Assign pages that can or can’t edit ad link image thumbnail, headline, and description
- Prevent any other page from editing ad link image thumbnail, headline, and description
Of course, beginning in 2021, domain verification became even more important. It’s now required in order to configure your events related to Aggregated Event Measurement.
Let’s walk through the details…
Domain Verification
In order to get access to event configuration and control over your links on Facebook, you can verify a domain by claiming ownership. Keep in mind that, obviously, you can’t claim any website. You’ll need to have admin back-end access (that will become clear in a moment).
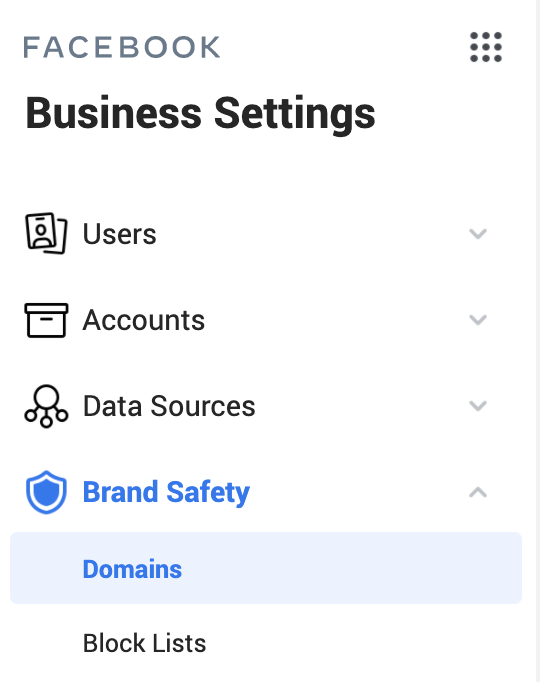
Go to Facebook Business Manager. On the left side, click on “Brand Safety” and then “Domains.”
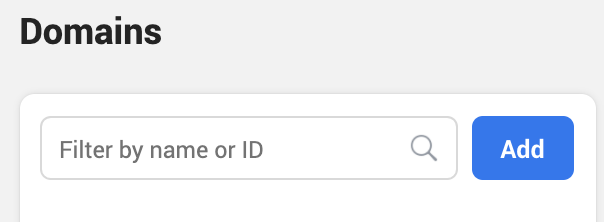
Click to add a domain.
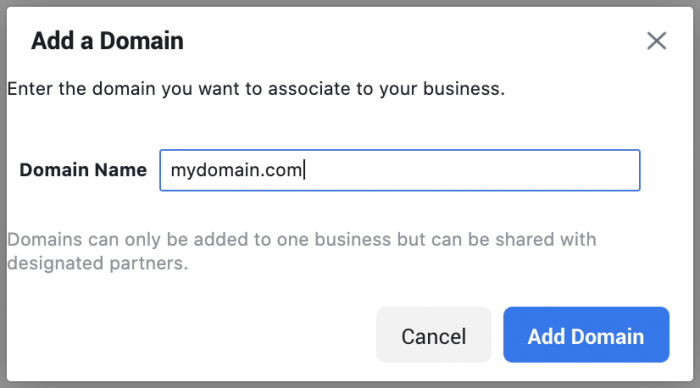
Enter the domain you want to claim and click “Add Domain.”
There are three different ways that you can claim domain ownership.
1. Add a DNS text record to your domain host.
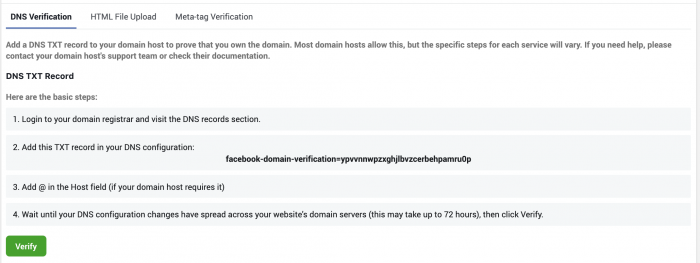
2. Upload an HTML verification file to your website.
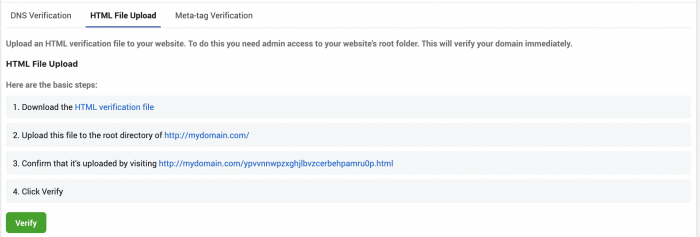
3. Set the meta-tag containing the verification code into the header section of your website’s homepage.

If you’re technical, this may all make sense to you. The easiest option for me (a sorta-technical-but-not-that-technical-guy), was the third because it’s similar to the process for adding the pixel to my website. Simply copy the code Facebook provides and paste it into the header of the home page. Then verify.
Add a Connected Asset
Next, you’ll want to add a connected asset so that you can edit link details when publishing to your page. Click to Add Assets.

Select the page that you want to grant URL editing powers to. If you don’t see the page that you want to add, you’ll need to first connect it to your Business Manager under Accounts.

Now, when you create a link post in Creator Studio from that page, you’ll be able to edit the URL headline and description.

Facebook Ad Link Control
If you stop here, you’ve put controls over who can edit link headlines and descriptions for organic posts. But, ANYONE would be able to create an ad and edit these things. If they can create an ad, they can also publish that ad organically.
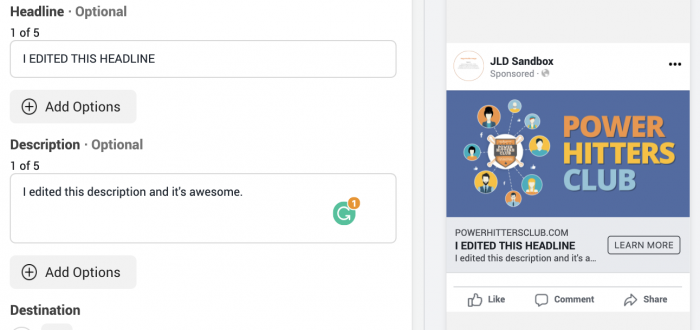
You may not want that. Luckily, you can control who does and doesn’t have the ability to edit link thumbnail, title, and description of link ads that go to your website.
Back to where we were before, click on “Domain Access.”
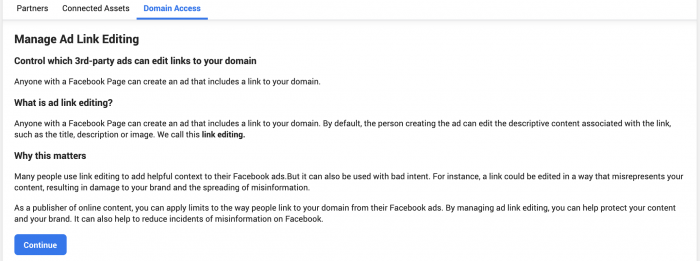
Then click “Continue.”

You have the following options:
- Anyone can edit ad links
- Deny specific advertisers from editing ad links
- Allow only specific advertisers to edit ad links
Below there, you’ll see the pages that are currently running ads to your domain. Hopefully, there aren’t any surprises!

You can deny specific pages from editing your links in ads.
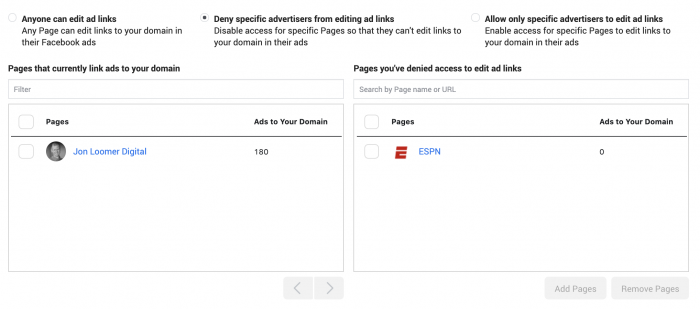
An easier approach, though, may be to grant specific pages the ability to edit your links in ads.
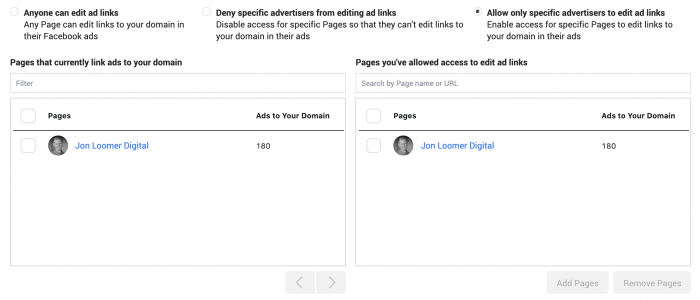
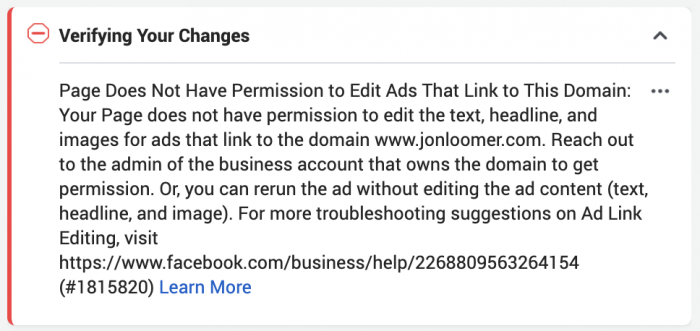
Once this is done, if anyone tries to run a link ad from a page that you restrict, they will not be allowed to edit the link thumbnail image, headline, or description. Instead, they’ll get an error…
Your Turn
Have you been struggling to edit link preview details? Does this help?
Let me know in the comments below!


