Back in June, Facebook introduced Offline Events, a way to track purchases made in-store or offline after a customer was shown a Facebook ad. Now that it appears that most, if not all, Facebook advertisers have access to this tool, it’s time to take a closer look…
What Are Offline Events?
When you run Facebook ads, you can track how many people who saw or clicked your ad went to your website and completed a conversion. This is all done with the help of the Facebook pixel.
Really great. But some businesses get conversions online and offline. If you promote a product and a customer comes into your store to complete the purchase, how do you show that the campaign was a success?
Up until now, you couldn’t. Especially for businesses that sell primarily in-store, you were stuck guessing, trying to spot trends or simply assuming the campaign wasn’t working.
Offline Events change all of that. Now you can upload an offline purchase file (including customer contact info and the product purchased, for example) and Facebook can match that up to the users who were shown your ad to add offline events to your conversion picture.
Create an Offline Event Set
To get started, go to Offline Events within your Business Manager…
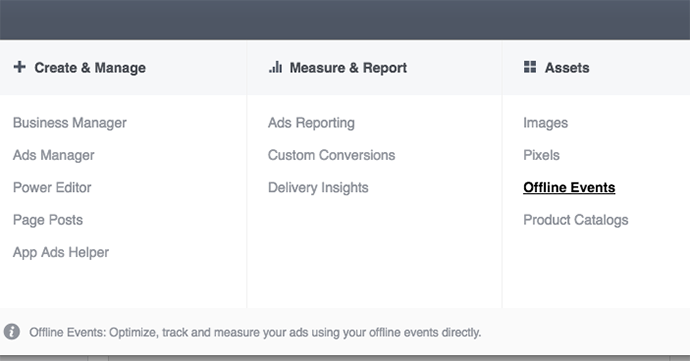
The direct link to Offline Events is below…
https://business.facebook.com/offline_events/?business_id=[YOURBUSINESSID]
You’ll need to enter your Business Manager ID at the end of the URL (remove the brackets, too). You should be able to find that ID in the URL when navigating to other areas of Business Manager.
The first thing we need to do is create an Offline Event Set. Click that green button…
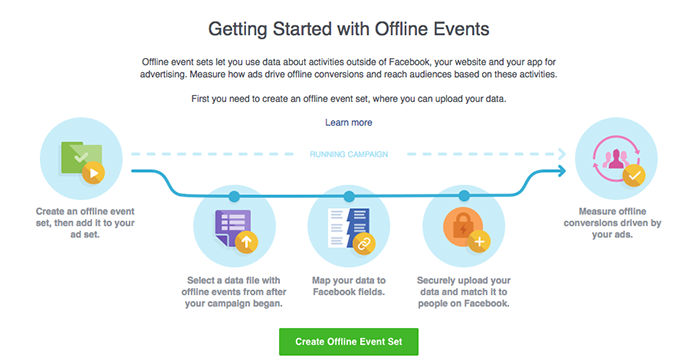
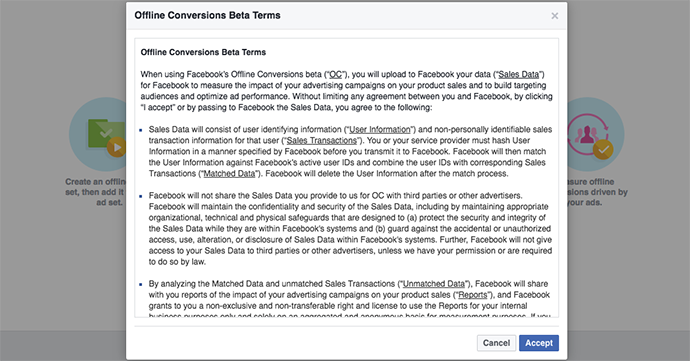
Read through the terms. If you’re cool with them, click “Accept.”
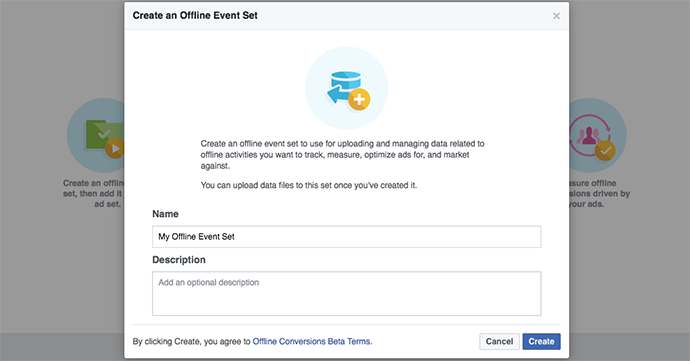
Now name your Offline Event Set and add a description, if you desire.
Now select which of your ad accounts (if you have multiple) should be assigned to this Offline Event Set. You can choose more than one if you use more than one ad account to promote a given business.
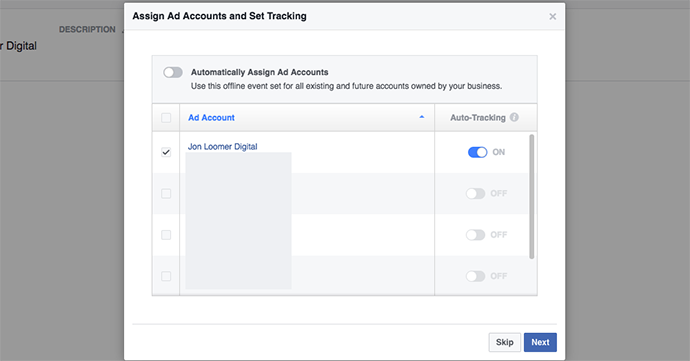
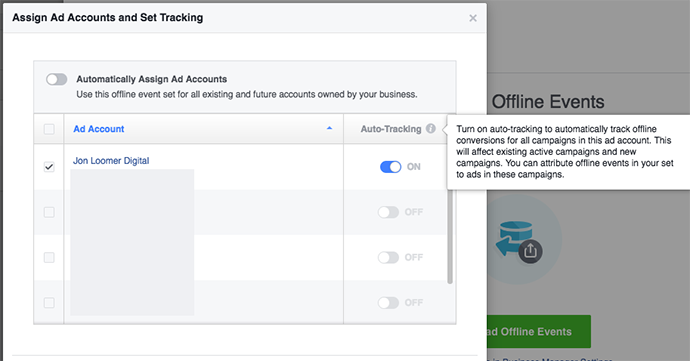
You can choose to automatically use that Offline Event set for all of your business accounts. Turn on auto-tracking so that Facebook will automatically track Offline Events for that paired ad account and Offline Event set for existing and future campaigns.
Now you’re done!
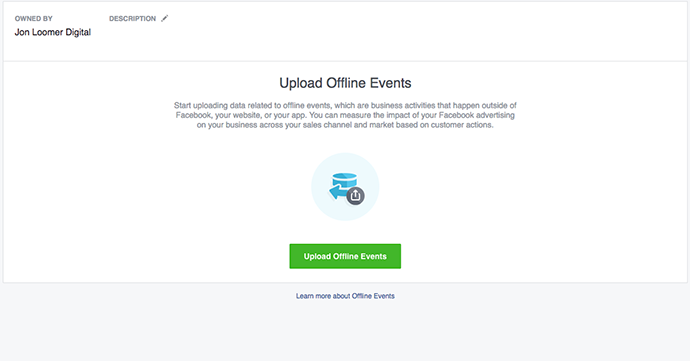
Upload Offline Events
This is great, but that Offline Event Set doesn’t include any data. You now need to provide Facebook with a file that consists of your offline sales.
Click “Upload Offline Events.”
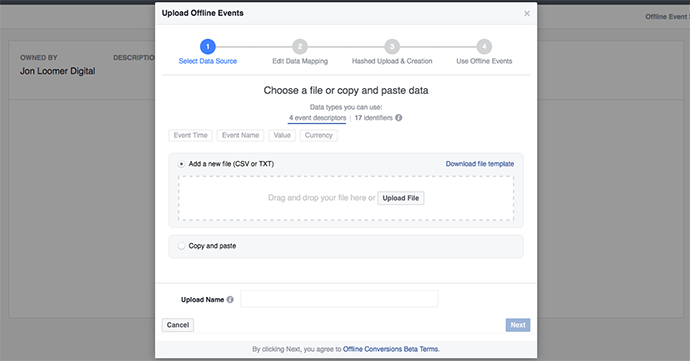
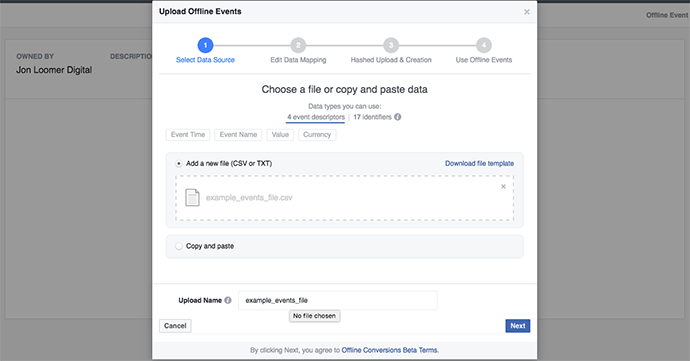
You can either upload a CSV or TXT file or copy and paste the data. That file can either include columns consisting of Event Descriptors (Event Time, Event Name, Value and Currency) or 17 Identifiers.
Those Identifiers should look familiar to you if you’ve created Data Custom Audiences lately. It’s essentially the same process.
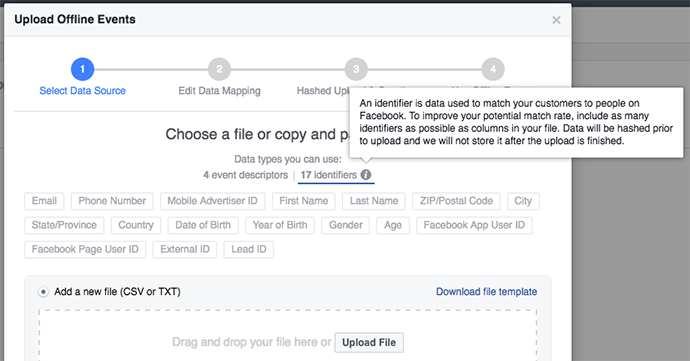
If you need help, you can download a file template. This way, you’ll see precisely what Facebook expects to see…

You don’t need to include all of the columns. But the more data you can provide, the more likely there will be a match. As is the case with Data Custom Audiences, you can’t expect to get 100% match on the offline conversions.
Note that it appears the three types of events you can use are “Purchase,” “Lead” and “Other.”
So, you’ve uploaded the file. Click “Next”…
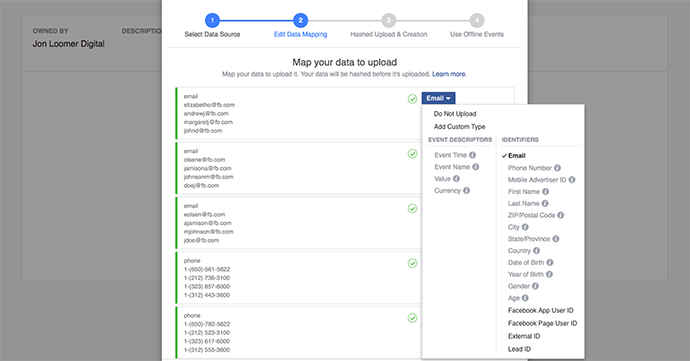
Now we map the data to tell Facebook what information is contained in each column. There may be data in that file that does not match up with one of the Identifiers. If that’s the case, simply select “Do Not Upload” for that column.
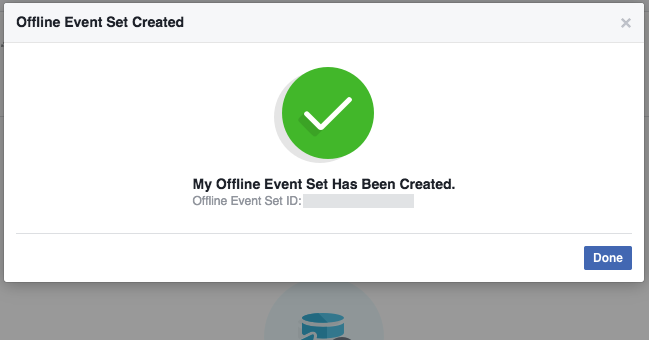
When you’re done, Facebook will give you a green checkmark to indicate the process is complete and with no errors…
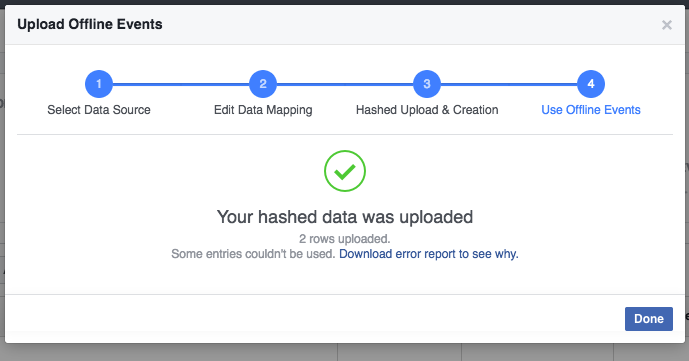
After clicking “Done” you’ll see that Offline Event Set in your list.

Note that you can upload more files to this set in the future.
The Offline Events API
The manual process of Offline Events is very cumbersome, similar to manual updating of Data Custom Audiences and the transfer of leads from Lead Ads. But as is the case with those two, you can also update automatically if you utilize the Facebook API.
Facebook generated an Offline Events API (click for details) that allows you to automatically update your Offline Events Sets. This will take some programming work or the use of a third party tool with access to that API.
I’m not currently aware of any third party tools that tap into the Offline Events API, but some likely already exist and many more will be coming.
Track Offline Events
Now that you have an Offline Events Set, let’s assign it to an ad.
Within Power Editor, you will notice “Offline Tracking” under Pixel Tracking at the ad level.
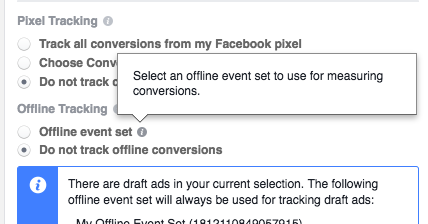
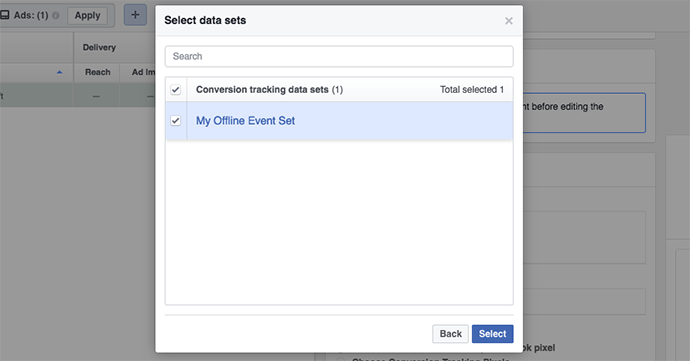
By default, Facebook will not track Offline Events. But if you choose to track them, you’ll need to select the Offline Event Set…
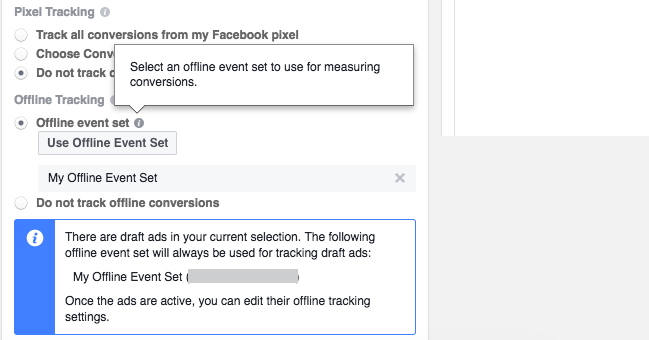
Once selected, you’ll get a message under Offline Tracking that indicates what Offline Event Set is being used…
Offline Event Reporting
How does Facebook report on this data? Well, you’ll need to uncover it within the ad reports.
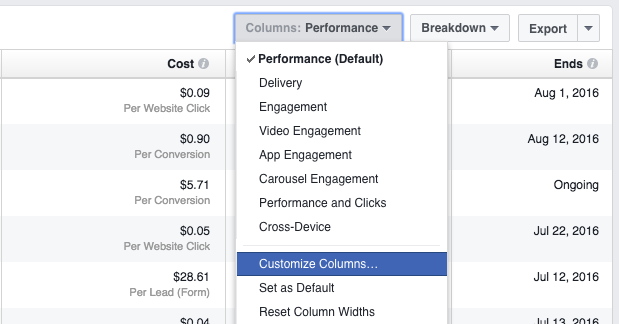
Click on that magical “Customize Columns” option within the Columns dropdown…
On the left side, you’ll notice a new “Offline” category.
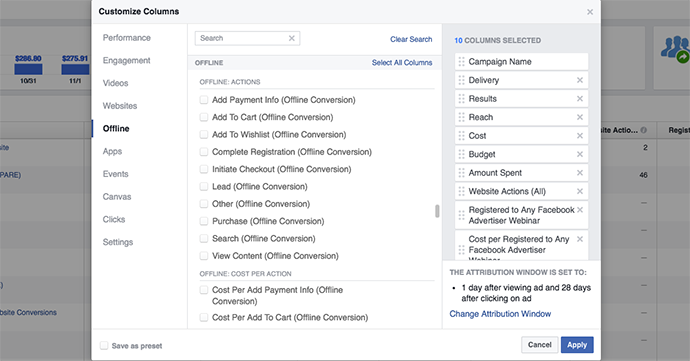
You can select from actions, cost per actions and value of those actions. By selecting these, you will add columns for Offline Events to your report.
Note that there are several event types that don’t seem logical for offline sales. Why would you use “View Content” or “Add to Cart,” for example? Within the Offline Event API information, it does appear that there are only three options for Offline Event Type:
- Purchase
- Lead
- Other
Your Turn
This should be a very helpful addition to reporting, particularly for businesses with a high volume of offline sales. While it’s impossible to match all sales to a campaign, it will provide advertisers a clearer picture of campaign performance.
Have you started using Offline Events? What do you think?
Let me know in the comments below!

