During the past year, Facebook released Automated Rules to the ads API, meaning that it was available to those managing their ads with a third-party tool. It’s a great feature that has now made its way to Ads Manager and Power Editor.
Let’s take a closer look…
What Are Automated Rules?
Managing and monitoring Facebook advertising campaigns is a lot of manual work. Those with more clients, budgets, and campaigns are buried in this manual work.
You can’t just start a campaign and let it roll. Some ad sets will outperform others. Some ads will perform poorly. It becomes your job to constantly tweak and optimize — increasing budget here, stopping an ad set there, decreasing a bid over here.
You likely have a system for determining when you make these changes. What if you could apply this system to automate it for you?
That’s the idea behind Automated Rules. While you should still monitor your results, this feature helps limit some of the busy work that may have been unnecessary.
How Automated Rules Work
You need to build your Automated Rules with a set of variables…
Apply Rule To: Your rule can apply to specific campaigns, ad sets, or ads that you’ve selected, or all active campaigns, ad sets or ads.
Action: Following are actions that your rule can take if conditions are satisfied:
- Turn off
- Send notification only
- Adjust budget (increase/decrease daily/lifetime budget by…)
- Adjust manual bid (increase/decrease bid by…)
Conditions: This is what Facebook needs to evaluate in order to determine whether or not to take an action. Current conditions available:
- Cost per Result
- Cost per Add Payment Info (Facebook Pixel)
- Cost per Click (Link)
- Cost per App Install
- Cost per Add to Cart (Facebook Pixel)
- Cost per Initiate Checkout (Facebook Pixel)
- Cost per Purchase (Facebook Pixel)
- Cost per Lead (Facebook Pixel)
- Cost per Complete Registration (Facebook Pixel)
- CPM (Cost per 1,000 impressions)
- Daily Spent
- Frequency
- Impressions
- Lifetime Spent
- Reach
- Results
You can select one or multiple conditions. In each case, you’ll be able to choose from “is greater than,” “is smaller than,” “is between,” or “is not between” a manually entered value.
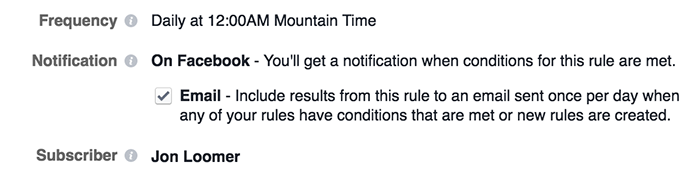
Frequency: This is how often Facebook runs the rule. For the time being, it appears it is not possible to adjust it from “Continuously – This rule will run as often as possible (usually every 30 minutes).”
Notification: You will automatically be notified on Facebook when a condition is met and the rule is applied. But you can choose to have an email sent to you when this happens as well.
Subscriber: When there are multiple people with access to your ad account, you can select which of these people will receive rule results.
How to Create Automated Rules
Let’s create our first Automated Rule.
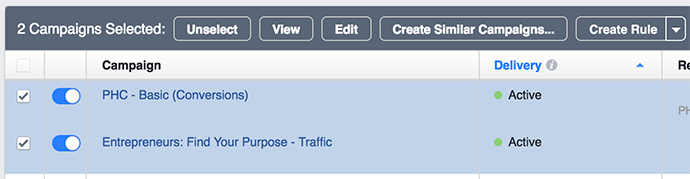
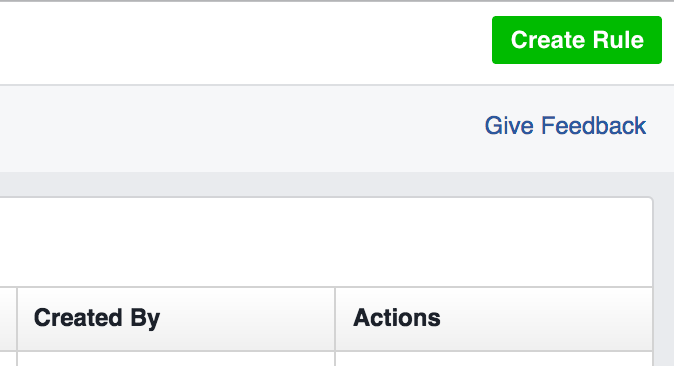
When viewing your campaigns, ad sets or ads, select one or more by checking the box to the left. That will bring up a menu that includes a button for “Create Rule.” Click that!
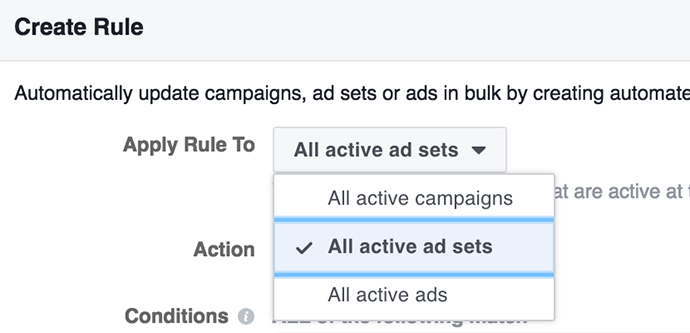
You’ll now be put through the process of creating your rule. It will look like this…
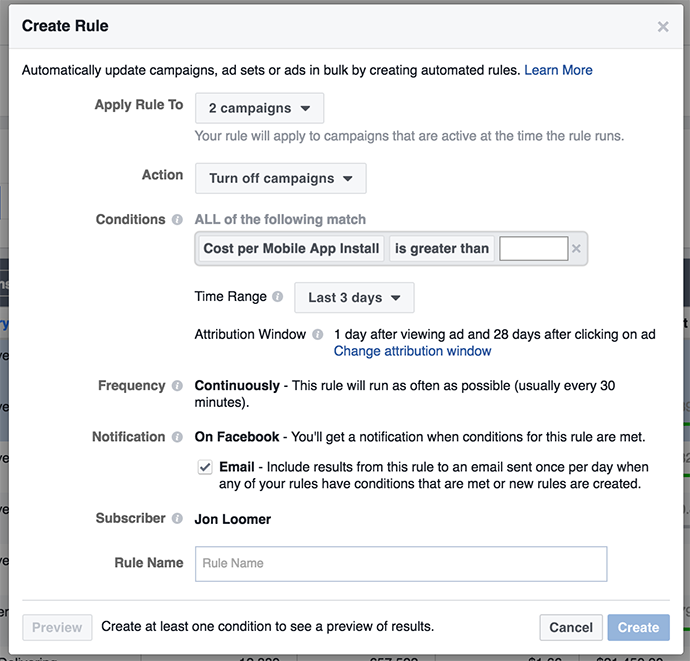
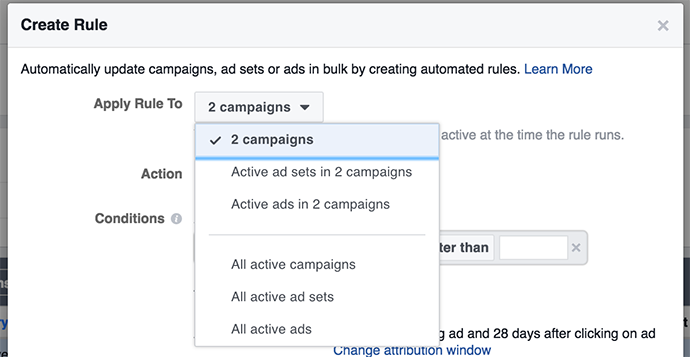
First, you’ll need to determine what your rule should apply to. Remember you selected something before clicking to create this rule. But you’ll have the option of having the rule apply to the campaigns, ad sets or ads associated with what you selected. Or you can choose to apply the rule to all active campaigns, ad sets, or ads (choose one).
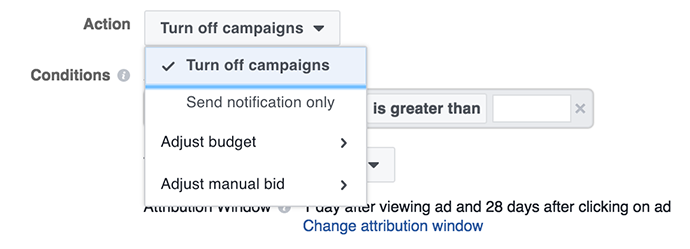
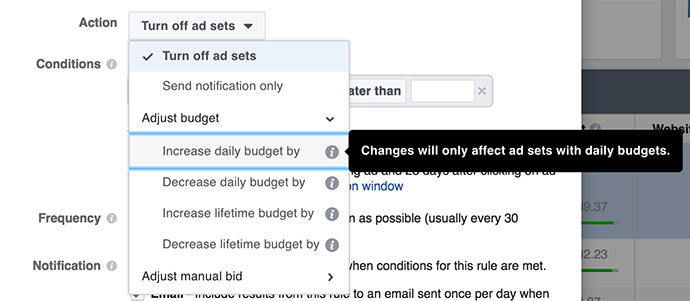
Now you’ll want to determine the action you want Facebook to take on the campaigns, ad sets, or ads that qualify. Your options are…
- Turn off campaigns
- Send notification only
- Adjust budget
- Adjust manual bid
Expand “Adjust budget” to drill down…
Know that these options will be grayed out if you’re applying the rules to campaigns or ads. This is because you set your budget at the ad set level.
But as you can see, you’ll be able to increase or decrease your budget for whatever ad sets that qualify. If you select daily budget, this will only impact ad sets using a daily budget; if you select lifetime budget, it will only impact ad sets using a lifetime budget.
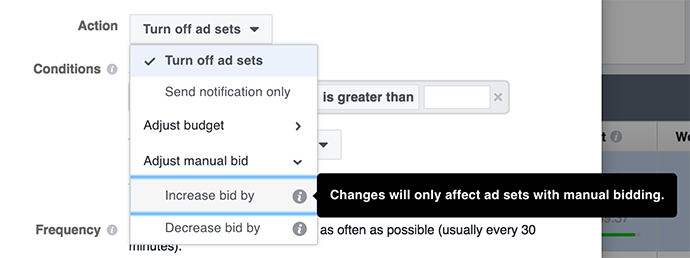
If you expand “Adjust manual bid,” you’ll see options to increase or decrease your bid. Once again, this will only be executed if you are already using manual bids.
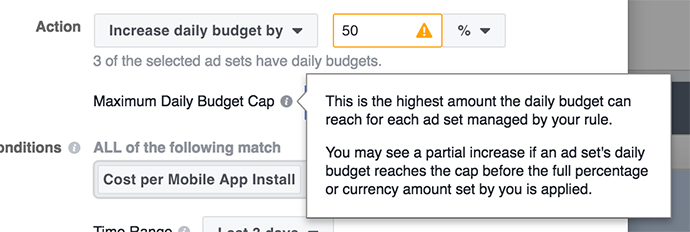
Let’s use “Increase daily budget by” as an example. You will be able to increase your daily budget by either a dollar amount or percentage.
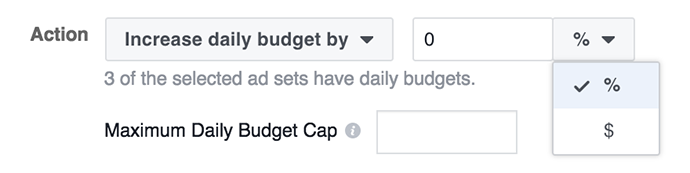
Facebook recommends a maximum daily budget cap to prevent budget from going higher than you anticipated.
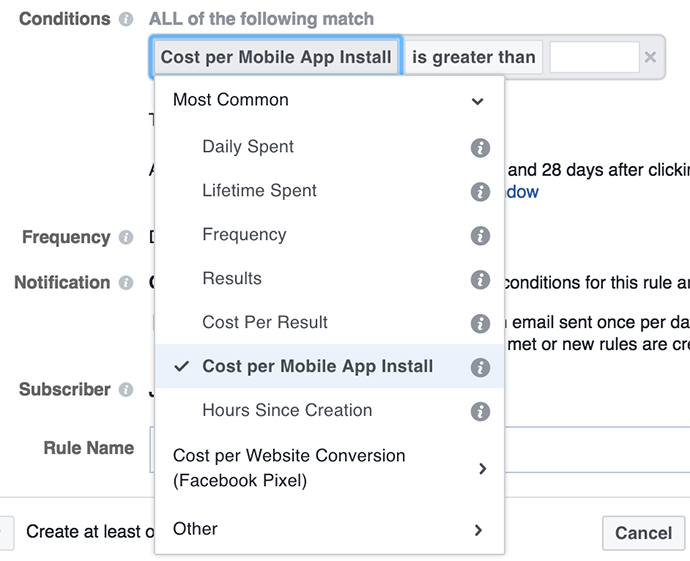
Now it’s time to choose our conditions. When these conditions are met, Facebook will execute the action. Under “Most Common,” you’ll see the following options:
- Daily Spent
- Lifetime Spent
- Frequency
- Results
- Cost Per Result
- Cost Per Mobile App Install
- Hours Since Creation
After selecting one of these, you’ll need to complete the condition with a variable for spend, frequency, etc. More on that in a moment.
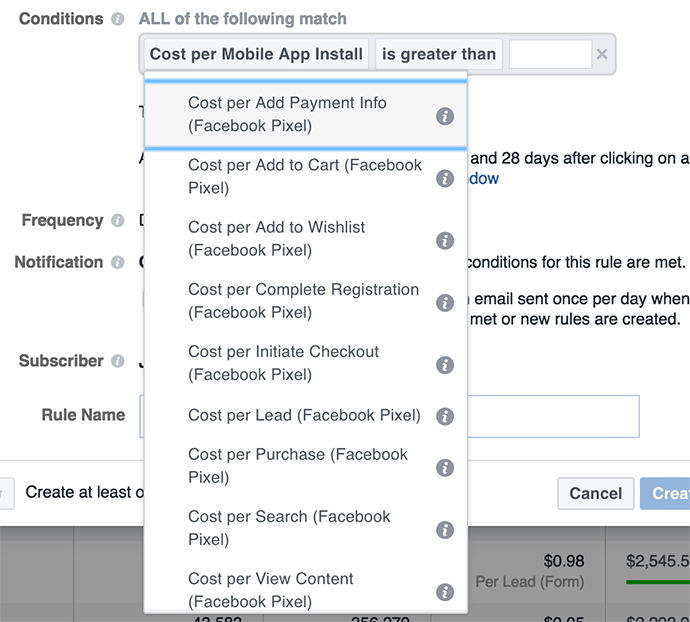
You also have several Facebook pixel-related condition options. This is only for advertisers using Standard Events on their websites. Those options are as follows:
- Add Payment Info
- Add to Cart
- Add to Wishlist
- Complete Registration
- Initiate Checkout
- Lead
- Purchase
- Search
- View Content
If you aren’t using Standard Events, don’t bother with this.
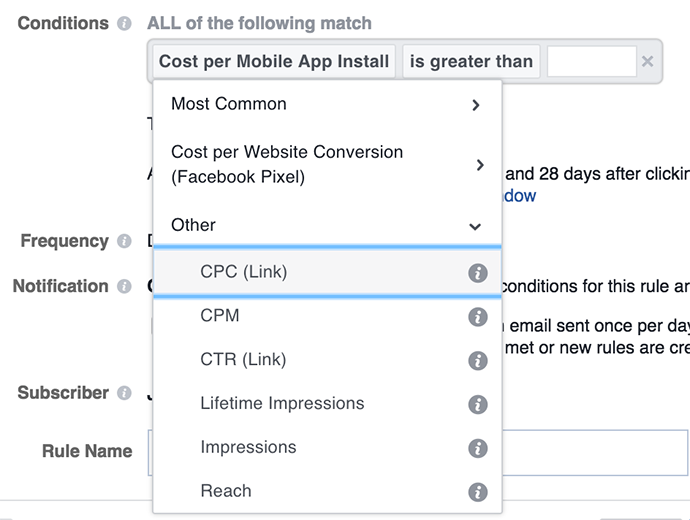
Under “Other,” you’ll find five more options:
- CPC (link)
- CPM
- CTR (link)
- Lifetime impressions
- Impressions
- Reach
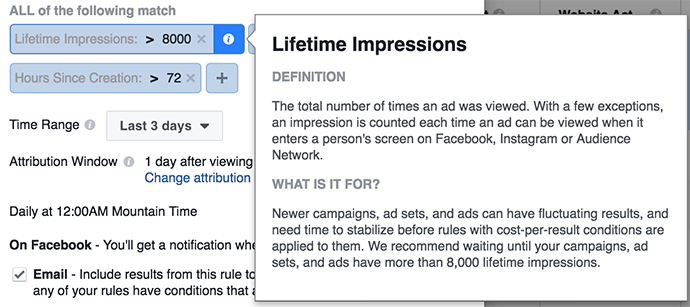
I’ve gotta be straight with you. I have no idea what the difference would be between Lifetime Impressions and Impressions. Understand that in either case, you set a time range from which to pull. And the definition for each one is the same.
So let’s assume that you want to create a rule based on CPC (link). The most common reason you’d do this is because you are promoting content, as opposed to promoting a product or opt-in. So in that case, you care most about the cost to drive traffic.
In this example, I want to tell Facebook to increase my budget if CPC (link) is below $.10 during the past three days.
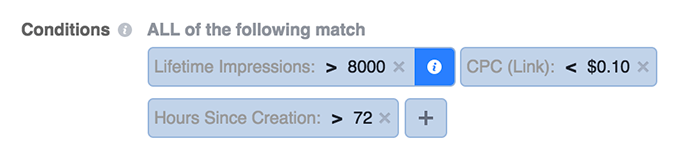
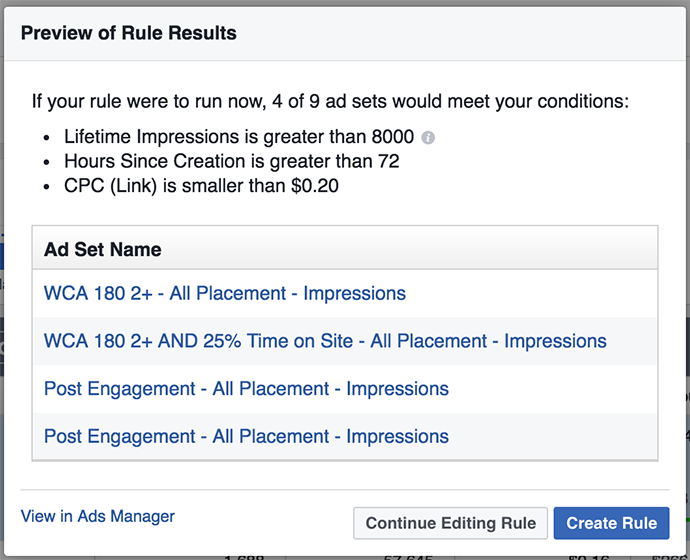
Note that Facebook then automatically adds Lifetime Impressions of more than 8,000 as a condition. This is so that the rule is executed with a reasonable sample size.
Note I’ve also added “Hours Since Creation > 72 hours” as well. I was just testing this to make sure that rules wouldn’t be applied until three days went by. It could very well be overkill.
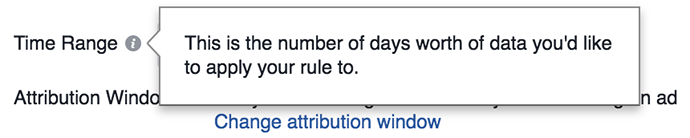
Next, you’ll select your time range. This is the number of days of data Facebook will be looking at when running your rule. The range you use should be related to the sample size you can gather in that amount of time.
For example, a $5 daily budget would not get much of a sample size for a conversion campaign during a three day period. In that case, you may want to expand the time range.
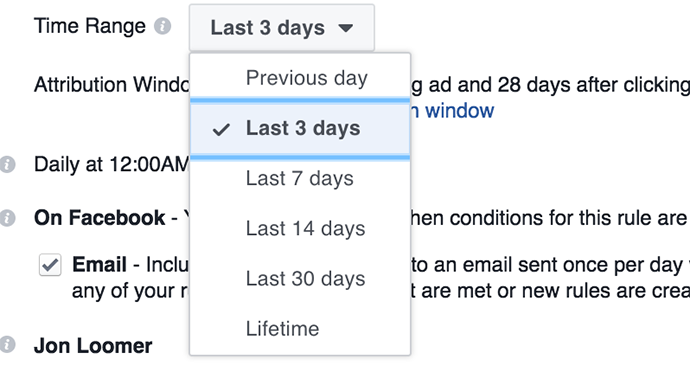
Here are your time range options:
- Previous day
- Last 3 days
- Last 7 days
- Last 14 days
- Last 30 days
- Lifetime
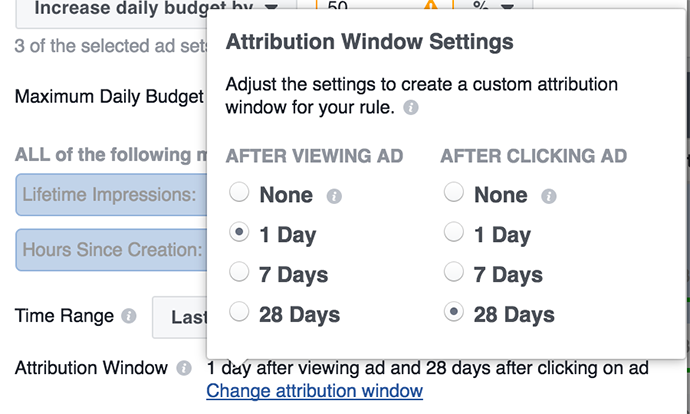
You can also adjust the attribution window. This comes up most frequently with conversions and creates quite a bit of confusion for advertisers. Understand that, by default, Facebook reports a conversion if either of the following two things happens:
- Someone who clicked your ad converts within 7 days (previously 28)
- Someone who saw — but didn’t click — your ad converts within 1 day
Facebook isn’t only reporting direct click-to-conversions. It can be much more than that.

If you’re not a fan of that attribution window (I like it), feel free to change it by checking any of the boxes you want to define a conversion.
Currently, your rule is going to be run on a daily basis at midnight your time. I presume that eventually there will be options for this.
As mentioned earlier, you will receive a Facebook notification when a condition is met and your rule is executed. You can choose to also have an email sent.
While creating your rule, if Facebook spots any campaign, ad set, or ad that currently satisfies your conditions, you’ll see that at the bottom. You can then click preview to get a closer look (the button will not be functional otherwise).

Then you’ll see which campaigns, ad sets, or ads will be impacted by this rule, as of this moment.
How to Manage Automated Rules
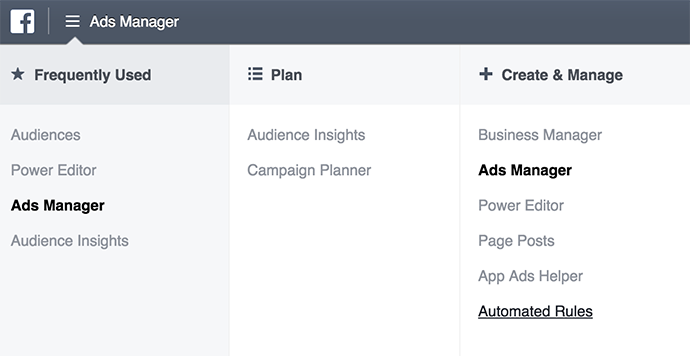
You can access Automated Rules that you’ve created before and activity on those rules clicking “Automated Rules” within the Business Manager menu.
You also may find it by going here.
You will now see a list of your rules and the following information:
- Applied To
- Action and Condition
- Rule Results
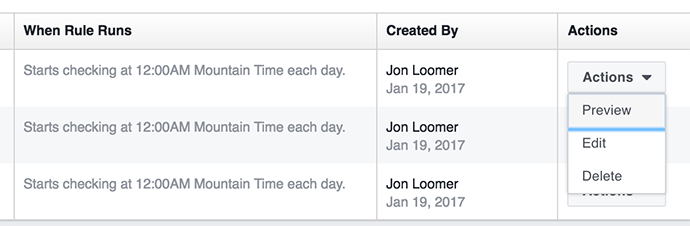
- When Rule Runs
- Created By
- Actions

Within Actions, you can view, edit or delete a rule.
You can also create a rule from scratch here, without needing to select a specific campaign, ad set, or ad.
So now when you create a rule, you can only apply it to ALL active campaigns, ad sets or ads.
If you toggle to the Activity tab within Automated Rules, you can also view the following:
- Rule Results
- Details
- Rule Name
- Changed
- Last Checked

How I’m Using Automated Rules
I only recently gained access to this feature, so I’m still figuring it out. But for now, I’m using it for the primary purpose of raising daily budget, lowering budget, and stopping an ad set if it isn’t performing up to par.
The condition I’m using as the focus is CPC (link), but only for campaigns where the objective is traffic (promoting blog posts). The reason is simple. I expect much higher CPCs for ads where I’m promoting a product or opt-in. And a CPC doesn’t determine success or failure of those campaigns.
But it does when the goal is to drive traffic. So I am having Facebook increase my budget by 50% if the CPC is under $.10, lower it by 50% if it’s over $.20 and stop it if it’s over $.25.
We’ll see how this goes, but this could allow me to leverage strong performance by increasing budget sooner while cutting back waste when something just isn’t working.
I will also create similar rules for conversions, but the conditions will be relative to what I’m promoting. I shouldn’t expect the same Cost Per Conversion for selling a membership, for example, as I would a free registration.
Weaknesses of Automated Rules
And that takes me to the issues I have with Automated Rules. They apply locally or globally with little in between.
I created a rule for current campaigns that drive traffic. However, when I create a new campaign, I can’t apply that prior rule to this new campaign. I’ll need to create a new (duplicate) rule.
The “solution” would be that I could apply the rule globally so that it will apply to all new active campaigns as well. But as mentioned earlier, I don’t want that.
What would be great is if I could apply a rule against all campaigns with the same objective, at least in the case of driving traffic. I would apply the same rules for all of those ads.
But as I was just saying, the conversion objective couldn’t be handled globally since not all conversions are equal — and not all expectations for cost per conversion would thereby be the same.
So in addition to wanting a “Campaign Objective” condition, it would be nice to add conditions like “Campaign name includes” or “Ad set name includes.” That way, I could make sure to include a certain word or phrase in the name, knowing it would trigger a certain rule.
These are the immediate issues I’m seeing, but I need more time with the feature.
[UPDATE: A representative tells me that some or all of this actually is possible, but I am awaiting confirmation on specifics.]
Your Turn
Overall, there is enormous potential for Automated Rules. Do you have it yet? How are you using it?
Let me know in the comments below!


