In our continuing overview of understanding the basics of Power Editor, it’s time to take a look at how to manage and update your account and Pages within Power Editor.
Ready? Let’s go!
What You Are Going to Learn Today
Today’s lesson is Managing Your Accounts and Pages. We’re going to focus on the following:
- Selecting Your Account
- Managing Pages
- Account Settings
- Billing
Reminder: This section introduces Power Editor, so we will not yet be getting into the details of creating campaigns and ads.
The Lesson
Before you even get started with creating campaigns and ads in Power Editor, you should make sure you have your accounts in order. You need to understand how to access your different accounts, manage and post from your Pages, adjust your settings and update billing.
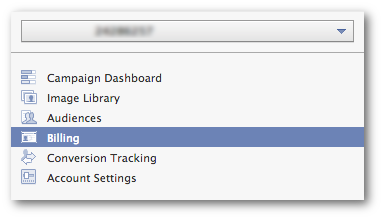
Selecting Your Account
If you are a consultant, you likely have access to multiple accounts. This allows you to manage ads for clients while having Facebook bill them directly. Additionally, you can easily keep your accounts separate for reporting and ad creation purposes.
At the top left, there is a drop-down.
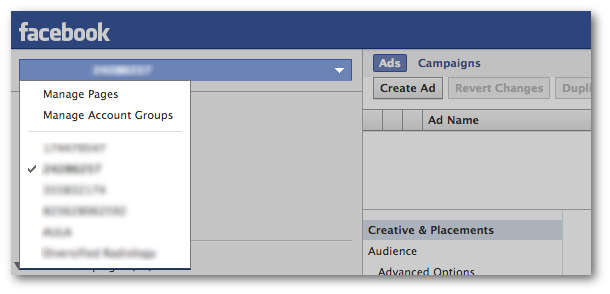
Within it, you can select the account you want to manage. Make sure that you switch to the proper account associated with the campaigns that you want to create or manage.
Account Settings
In the top left section there is a link for “Account Settings.” Click that.
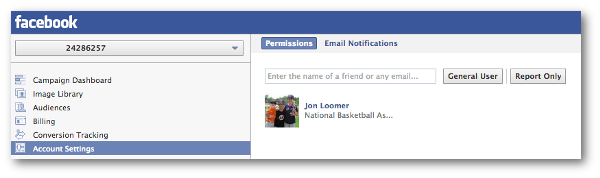
The default view is for “Permissions.” This is how you add other advertisers to your account. Keep in mind that they would then have full access to any Page that you control.
Enter their name (if you are Facebook friends) or email address and click either “General User” (full access to the entire ads account) or “Report Only” (access to ads reports only).
I’ve found that within Power Editor, Facebook often doesn’t allow me to click one of those buttons if I first enter an email address. If that happens to you, first type in the name of a friend so that those buttons become live. Then enter the email address of the person you want to add to the account.
This is also where you would have a client add you to an advertising account to get that account to appear in the drop-down at the top left.
Next, click on Email Notifications…
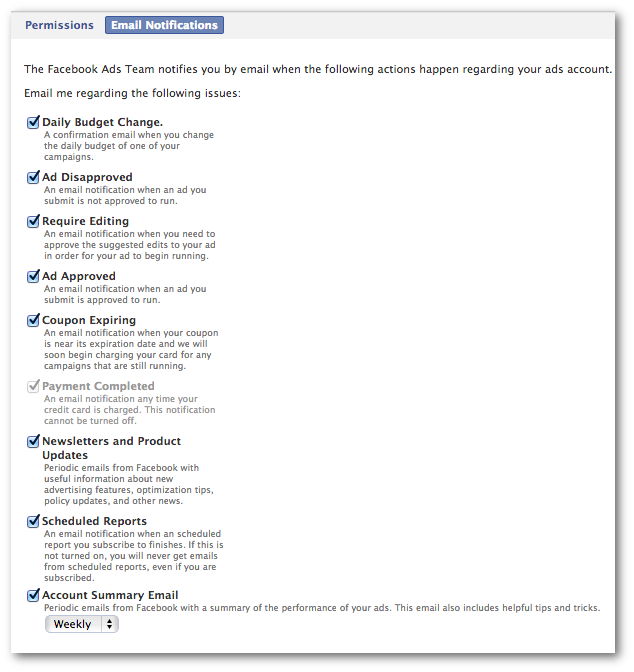
If you’ve ever wondered how you can control the alerts you get from Facebook regarding your ads, this is it! Feel free to uncheck any annoying alerts you don’t need or move from “Weekly” to “Monthly.”
Managing Pages
Many people don’t realize this, but you can actually create posts for any Page you manage from within Power Editor.
Within that same drop-down at the top left, select “Manage Pages.” Then select the Page that you want to manage.
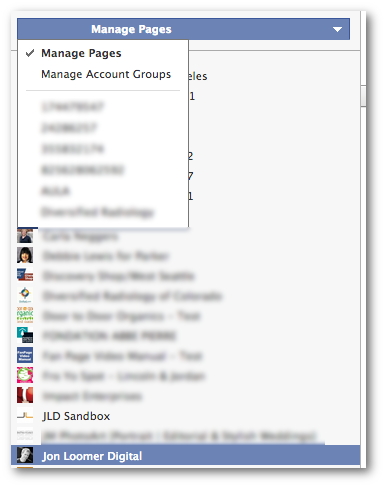
Now you’ll be given a list of your posts and some very basic stats. I’d refer to your Insights for monitoring and measurement.
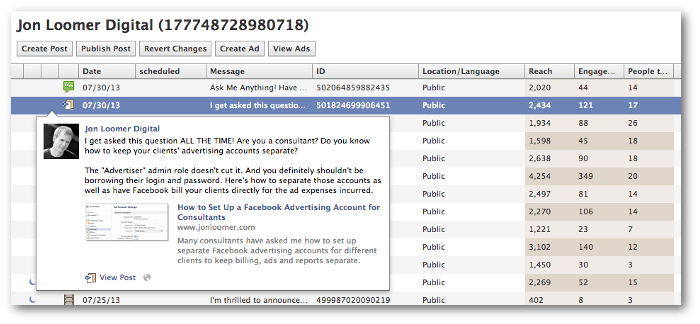
Here are some options:
- Create Post: Create a new or Unpublished Post from Power Editor (more on that in a later section).
- Publish Post: Highlight an Unpublished Post and click “Publish Post” to push it live.
- Revert Changes: Undo what you just did!
- Create Ad: Highlight a post and click this button to start creating an ad around it.
- View Ads: Highlight a post you’ve promoted and click this button to view all ads associated with it.
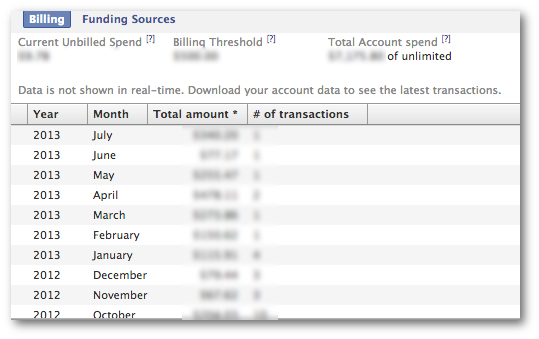
Billing
While your account is selected at the top left, click on Billing.
The default view will show you your billing history as well as information on your Current Unbilled Spend, Billing Threshold (where Facebook cuts you off) and Total Account Spend.
Next, click on “Funding Sources.”
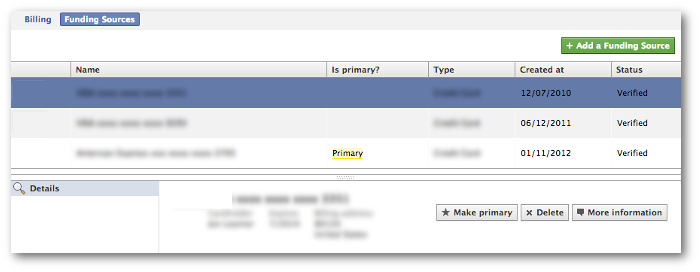
This will give you a list of all of your funding sources connected to your account. Note that you can’t advertise without a verified funding source.
Highlight any of those funding sources to delete or make them primary.
If you want a new funding source, click the green “Add a Funding Source” button at the top right.
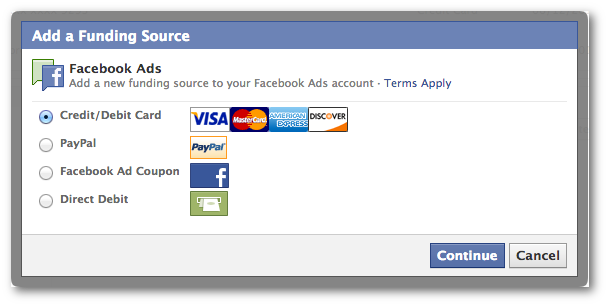
You have the option of adding any of the following to pay for your ad spend:
- Credit or Debit Card
- PayPal
- Facebook Ad Coupon
- Direct Debit
Recap
What did you learn today?
1. How to select an account
2. How to add a user to your advertising account
3. How to update your notifications
4. How to manage your Page
5. How to view and update your billing
Your Assignment
Action Items:
- Step through the process of adding a user to your advertising account.
- Consider having clients add you to their account if it makes sense.
- Review and update your email notifications.
- View posts you’ve created for a specific page from Power Editor.
- View your billing history and update as necessary.
Related Reading
How to Set Up a Facebook Advertising Account for Consultants