Any screenshots and details of functionality may no longer be relevant.
Now that brands have the option of converting to Facebook Timeline, one new task is in front of all of us: Create an awesomely engaging cover photo.
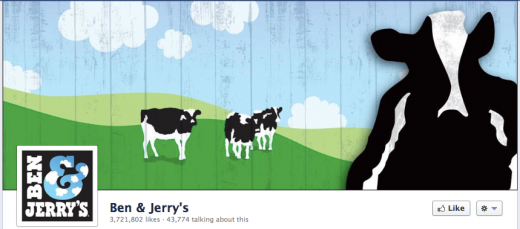
Many of the big brands are already on top of it. Here’s Ben & Jerry’s cover photo:

Consistent branding between the cover photo and the profile photo. Very creative, and it reflects the personality of the brand.
This is what you want. Your Timeline now will not have a designated landing page. This is your landing page. So your cover photo needs to make a good first impression.
When you first come to your Timeline, you will not have a cover photo. There will be a drop-down that reads “Add a Cover.”

Click that. You can either choose from your current photos or upload a photo.
Keep in mind that your cover photo will be 850 x 315 pixels. You won’t want to stretch photos. And it would be ideal if the cover photo and profile photo work together, if at least the same theme. So chances are good that you’re going to have to design a new photo to do this successfully.
Once you find the photo you want, you can drag to reposition it if necessary. Then click “Save Changes.”
That’s really it. Not all that difficult, but the challenge will be in getting creative with your design. This is where a staff graphic designer would be useful. If you are a consultant, this is where you make your money! Your services will be in high demand.
Have you had a cover photo created for your page yet? Share a link to it below!


