Yesterday, I walked you through how I conduct interview-style Facebook Live sessions using BeLive. Today, I wanted to show you how I set up and conduct webinar-style Facebook Live sessions for my private community.
This is part of a series of posts I’ve written on a topic that’s more important now than ever, as businesses around the world are forced to prioritize communication with customers, partners, and staff online. Businesses must adapt. Read my thorough guide on all the ways I currently conduct business virtually using BeLive, Ecamm Live, GoToWebinar, GoToMeeting, Webinar Jam, Zoom, and more.
For the past couple of years, I have used several different software options to stream webinars to the Facebook group for my Power Hitters Club – Elite community. I have settled on Ecamm Live (not an affiliate link) due to its simplicity and ease of use. Let’s take a closer look at how I use it.
If you want take this a step further, sign up for my upcoming training on Virtual Conferencing. It starts Thursday, and I hope to see you there!
Setting Up a Facebook Live with Ecamm Live
Scheduling a Facebook Live using Ecamm Live is really easy. I do this every week for the PHC – Elite weekly webinars, as well as training courses, that I conduct. They are streamed directly to the private Facebook group.
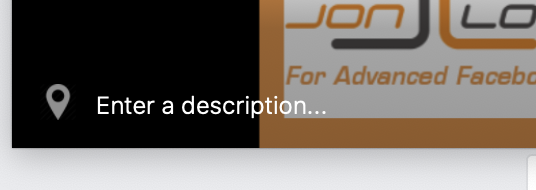
Within Ecamm Live, we’re first going to enter a description of the Facebook Live we’re going to schedule. I just enter the name of the webinar.
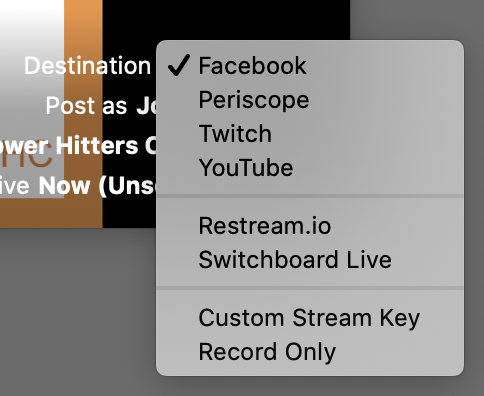
Next, we need to select a destination. For my purposes, I’m going to select Facebook. But, you’ll see that you can also choose from Periscope, Twitch, and YouTube, among others. You can also simply record only.
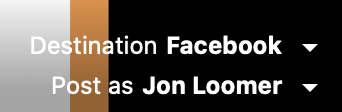
I’m going to post as myself. But if you manage your group as a page, or if you want to livestream to your page, you can select your page as well.
I then select which group I want to publish to. If you always publish to the same place, these selections should all be chosen for you.

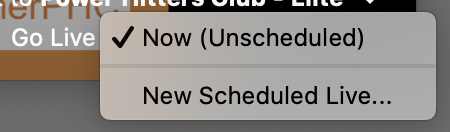
You can go live now or you can schedule it. I’m going to schedule it.
Next, I enter all of the details of the livestream: Title, description, and start time. You can also add a custom thumbnail image. While I do this for my BeLive sessions, I typically don’t for the weekly webinars. No real reason. Just know that if you don’t, it will pull your profile’s cover photo.
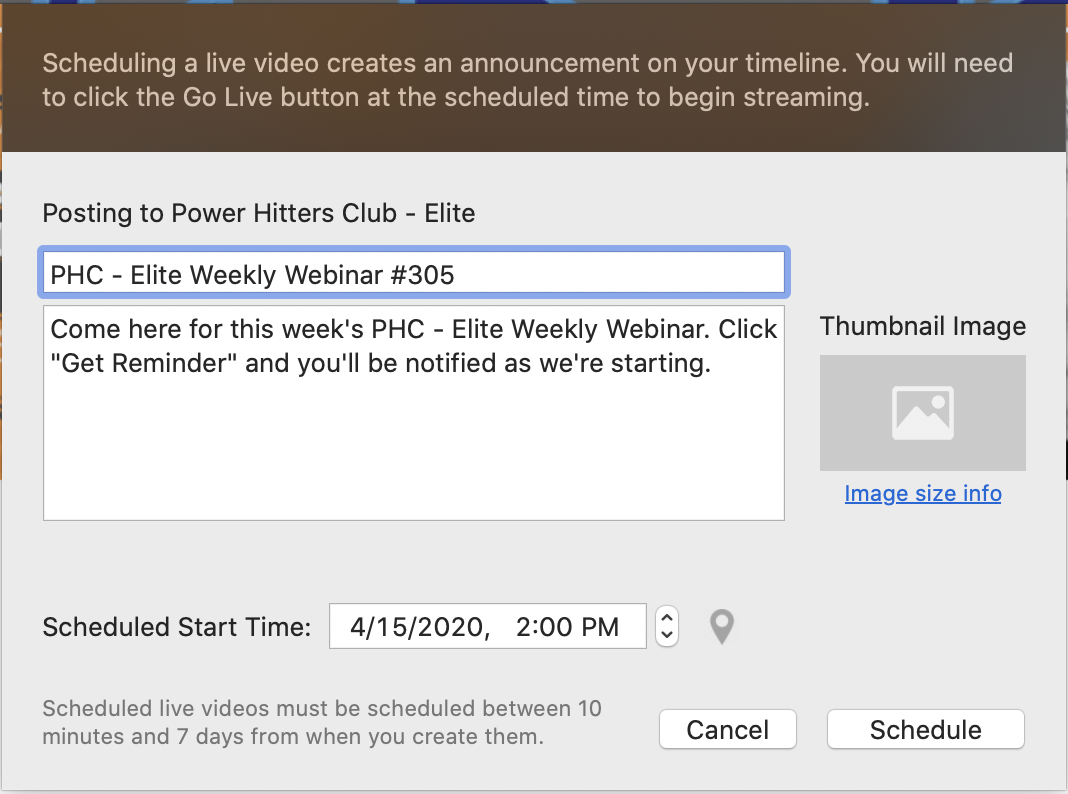
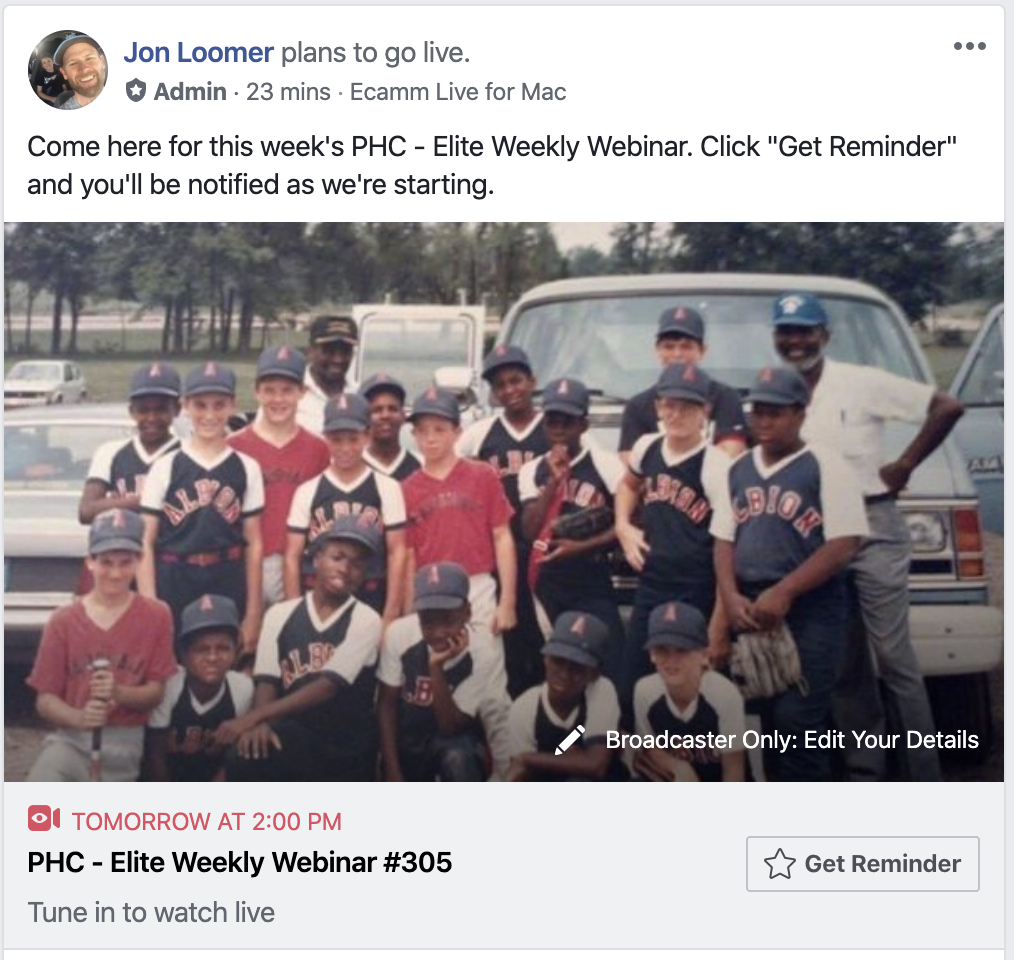
That’s it! A scheduled post is then created.
Going Live with Ecamm Live
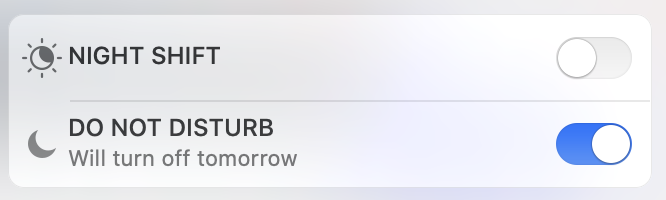
Before we talk about hosting the actual Facebook Live, something I always do before I get started is set my computer to Do Not Disturb. This is so there won’t be any notifications flying in during the broadcast. How this is done will depend on your computer, but I have a Mac.
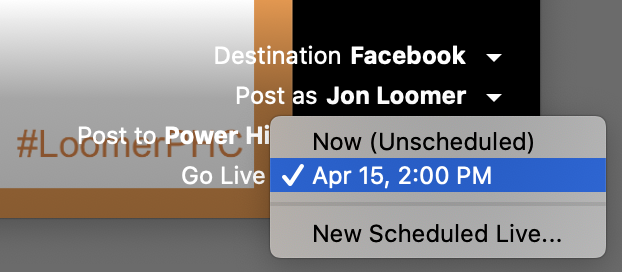
When it’s time to go live, I’ll open the Ecamm app. At the bottom, there will be a countdown to when your next scheduled Facebook Live will begin.

If you don’t see that, click the drop-down at the bottom right to select your scheduled broadcast.
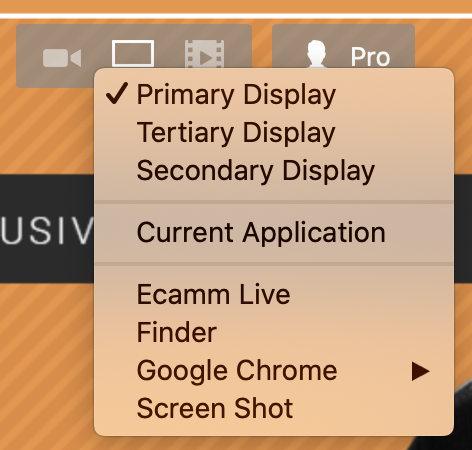
At the top of Ecamm Live, you’ll see three icons to choose how you will broadcast video: Camera, share screen, or recorded video.
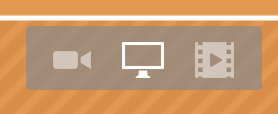
Since I’m conducting a webinar, I always choose to share screen. From there, you can select which monitor (I have three) or app you want to share.
While BeLive allows you to go live earlier than scheduled, Ecamm Live prevents you from doing that. So, you’ll need to wait. Once it’s time, the countdown will disappear and you’ll get a button to go live.
For peace of mind, I will then go back to the Facebook post itself to check to be sure everything is working. Not only that it’s streaming, but that the audio is working. Once I know it is, I get started.
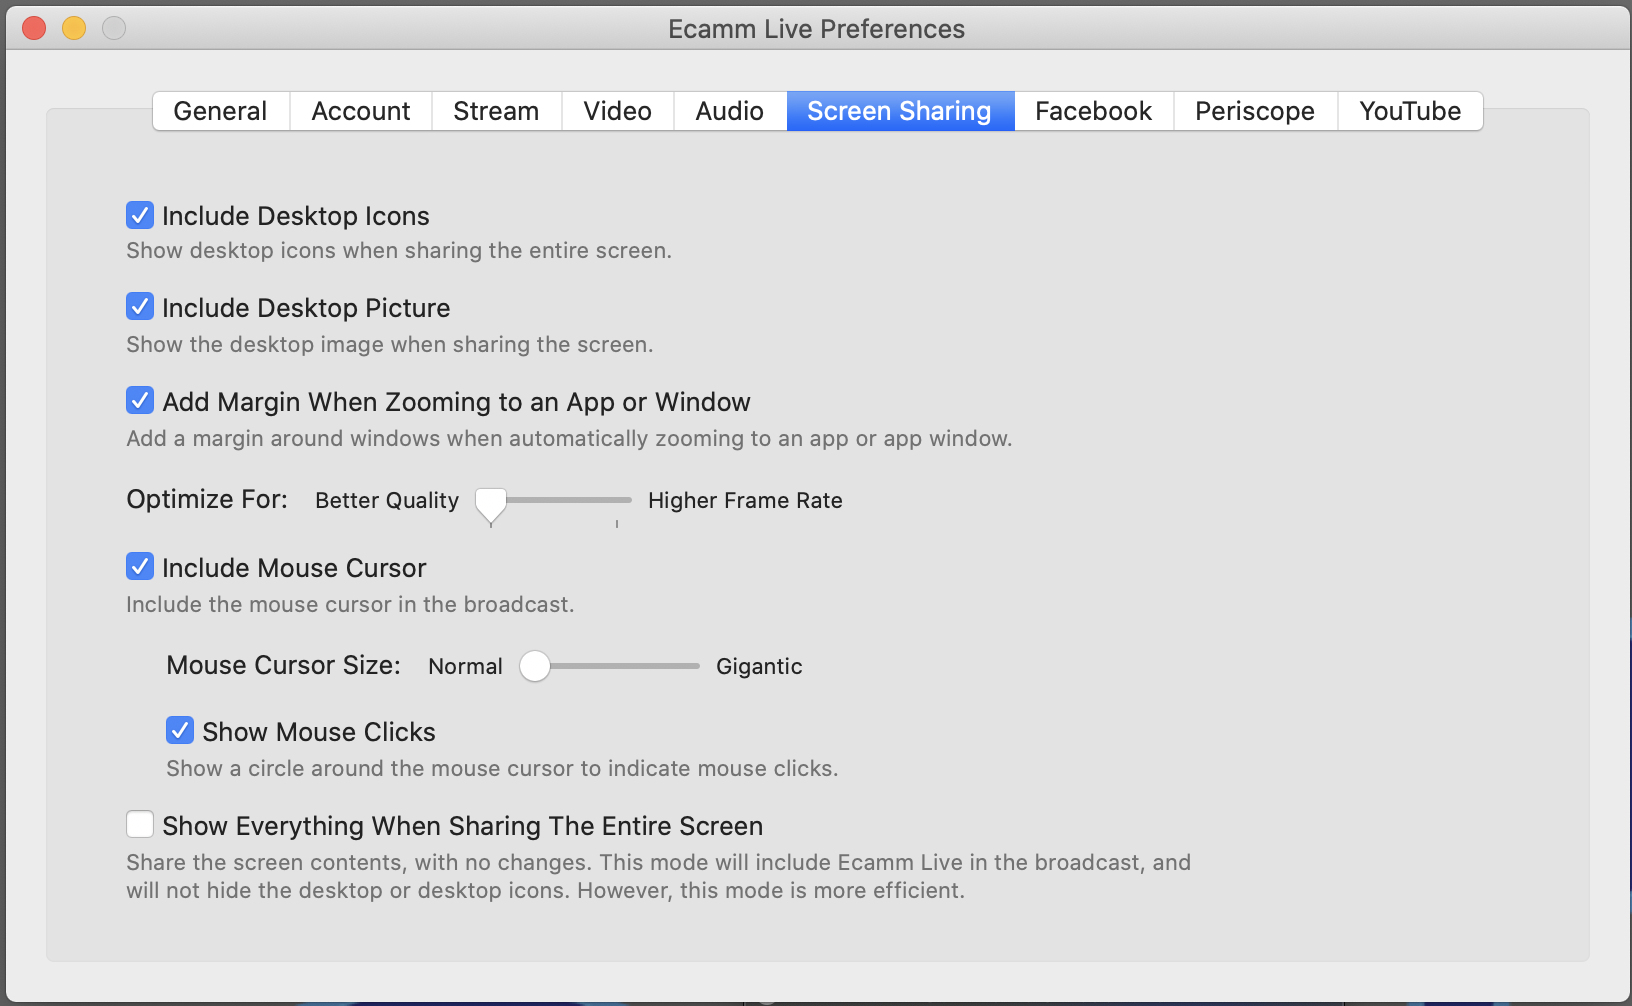
Since I’m only broadcasting my desktop and microphone (it’s a webinar, after all), my settings are very simple. But, let’s walk through some of your options, even the many I don’t use.
On the right-hand side of Ecamm Live are icons to open or close windows for settings.
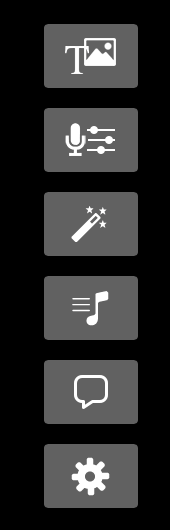
The first opens a window for overlays. You can add an image, text, or countdown clock.

You can also adjust sound levels and choose where your sound comes from. In the example below, I’ve selected my Blue Yeti microphone and have allowed for sound effects (I don’t use them). I’ve turned off Movie and System Audio.
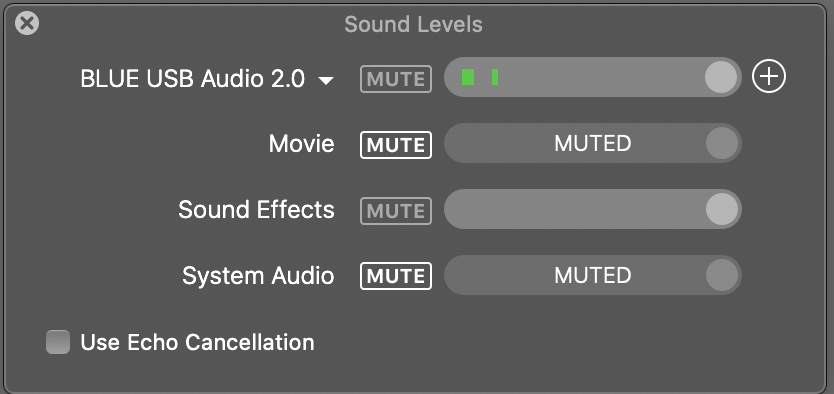
If you’re not wearing earbuds (you should), you may want to turn on Echo Cancellation.
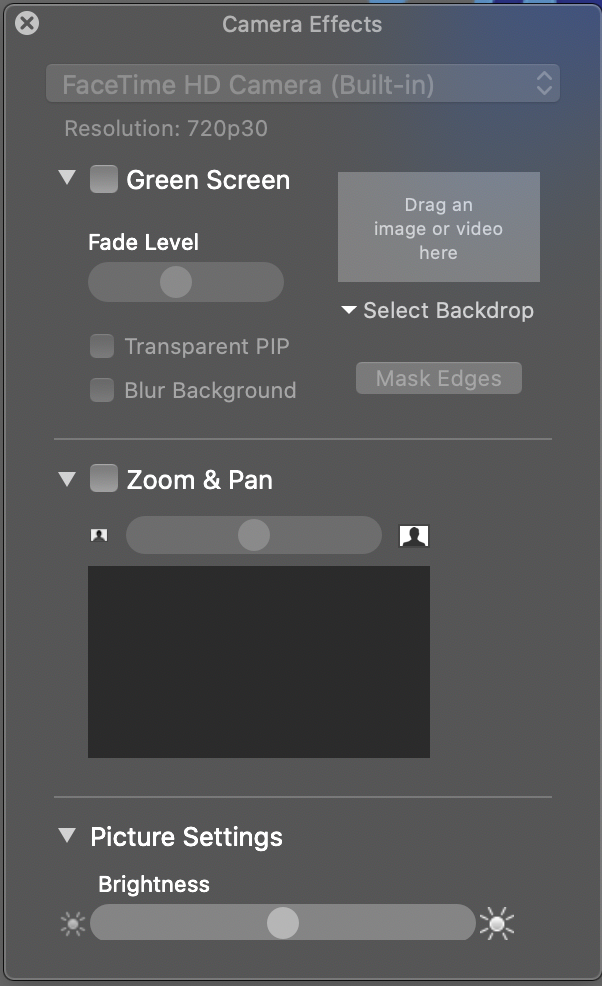
You can also turn on various camera effects. I don’t have my camera on, so this isn’t something I use. But you can choose a green screen, blur the background, zoom/pan, and adjust the brightness and picture quality.
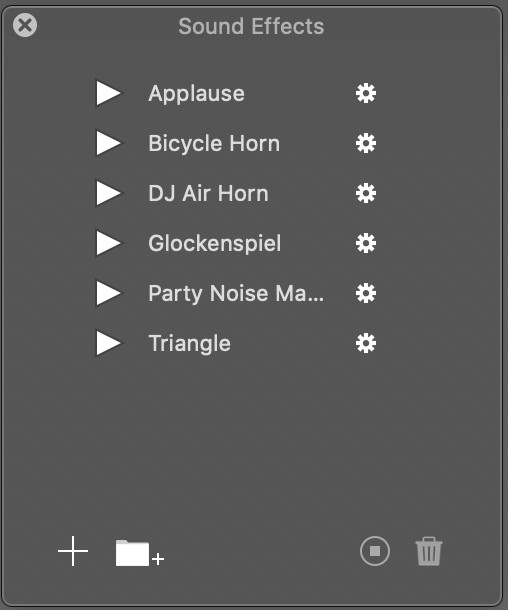
Ecamm Live also allows you to add sound effects. There are six built-in, and you can also add your own. I don’t use this, but I might need to in the future!
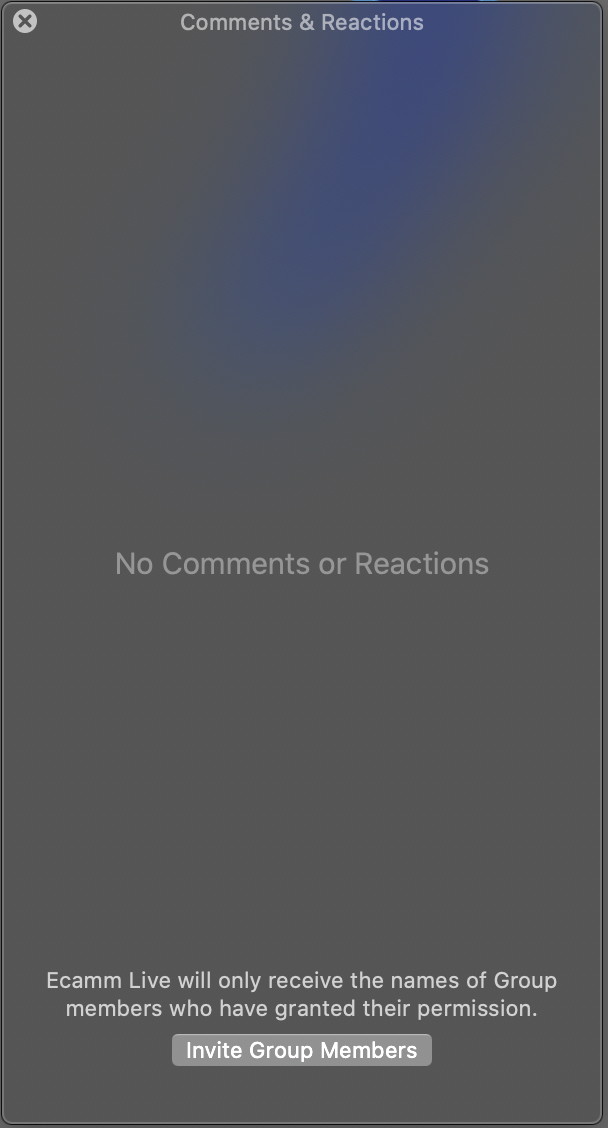
Finally, there’s a Comments & Reactions window. This is useful if you don’t want to have a separate window open to monitor the comments from the Facebook post itself. Personally, I like to monitor the post itself, but it could just be personal preference.
The last icon is for your advanced settings. Truthfully, I rarely touch this, but there are additional features available (like bringing in a co-host via Skype) if you do some digging.
Screen Recording
Something I’ve gotten in the habit of doing is recording my screen and microphone separately. While most streaming apps allow the option to record your broadcast, the quality is often not great. By recording separately, it also gives me backup.
I use ScreenFlow, which is a mac application. Once I export the file, I upload it to Vimeo. I then use my Vimeo settings to embed the video on a private page — not publish to the Vimeo community.
There’s more to this, including an audio player, but we don’t need to go into that here.
Your Turn
While I could use BeLive for streaming webinars to my Facebook page and groups, I’ve enjoyed using Ecamm Live for this individual purpose. It’s very straight-forward and easy to use.
Have any questions? Let me know in the comments below!


