In Lesson 1, you learned all about Conversion Tracking and why you need to start using it. Today you’re going to learn how!
Ready? Let’s go!
What You Are Going to Learn Today
Today’s lesson is Conversion Tracking: How to Set it Up. We’re going to focus on the following:
- Creating an Offsite Pixel
- Pasting it to your Success Page
- Using it With Ads
- Tracking Conversions with Ads Manager
The Lesson
Setting up Conversion Tracking isn’t particularly difficult, but there are a few steps involved to pull it off.
Creating an Offsite Pixel
Within Power Editor, click on “Conversion Tracking” at the top left.
Then at the top right, click the green “Create Conversion Pixel” button.
A pop-over will appear, prompting you to name your pixel and select a category.
Give it a name that will be recognizable later. Hopefully you’ll have several Conversion Pixels to choose from when you are advertising, and you’ll want to be sure to pick the right one!
As mentioned in the last lesson, it’s important to pick the conversion that most accurately fits your needs for optimization purposes.
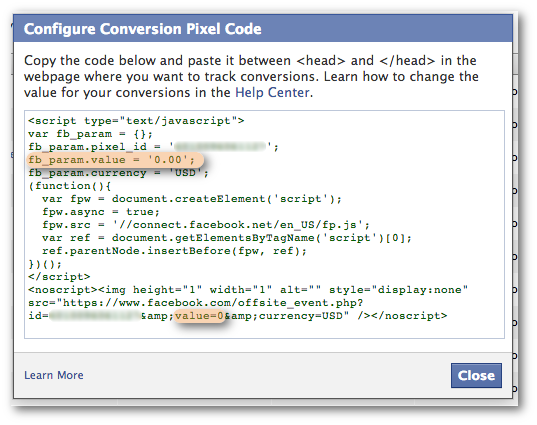
After you click the “Create Pixel” button, you’ll be presented with the pixel. It will look something like this:
Now it’s time to place this code on your website!
Pasting it to your Success Page
As Facebook says in that pop-over that gives you your pixel…
Copy the code below and paste it between < head > and < /head > in the webpage where you want to track conversions.
It’s important that you do this on the proper page. It should not go on the product landing page but on the success page. Otherwise, you will only track the number of people who landed on that landing page, not those who completed a conversion.
Hopefully you redirect users after a conversion is completed — usually to a “Thank you for your purchase” type of page. This is where your Conversion Pixel needs to go!
Now, how you place that code between the HEAD tags will depend on your CMS. But within WordPress (I use Genesis, if that makes a difference), I have a text box for “Custom Tracking/Conversion Code” when editing my page.
If you can’t find something like this, there are certainly plugins for your CMS that would help. Based on a simple search, I was able to find “Facebook Pixel Conversions for WordPress.” I’m not linking to it since I can’t vouch for it, but there are plenty of options!
When you paste in your code, you now have the ability to enter a Conversion Value. This will come in very handy later when you monitor results.
Think about what the value is of each related conversion. If it’s a sale, that’s easy. This is the value of that sale. If it’s a lead or registration, this is something you will need to determine. You can leave it at 0 if necessary.
When you paste in the code, you’ll need to edit the areas highlighted below so that Conversion Value is reflected in your Ads Manager results.
After publishing the change to this website page, make sure to view the live page itself and refresh. This sends a signal to Facebook.
Go back to Conversion Tracking within Power Editor and find your pixel. The status of your pixel will be in the final column and will read either Active, Inactive or Unverified.
You can use your pixel when the status reads “Active.” If it’s “Unverified,” that could mean that you set up your pixel wrong. Or you may just need to refresh that success page. Something else you may want to try is refreshing Power Editor or performing a Download (make sure that nothing needs to be uploaded first!).
Pixels will only appear as Inactive if they were once Active but received no activity for 24 hours.
Using it With Ads
When you create or edit an ad within Power Editor, you can now select the related pixel to track conversions. This is within the Creative & Placement step.
When you do that, Facebook will then automatically optimize for your desired conversion. Take a look in the Pricing & Status section…
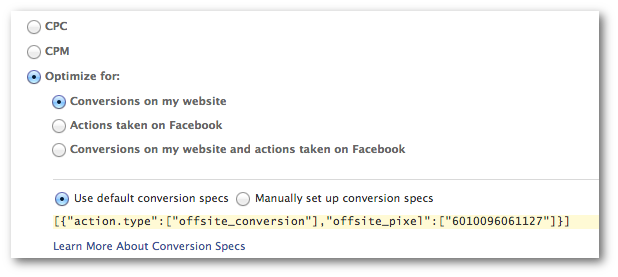
As you can see, this ad is being optimized for an “Offsite Conversion!”
Tracking Conversions with Ads Manager
Now when you go into your Ads Manager, you’ll notice a few changes. First, “Conversions” are now displayed at the top and given a column to monitor which ads generated your conversions.
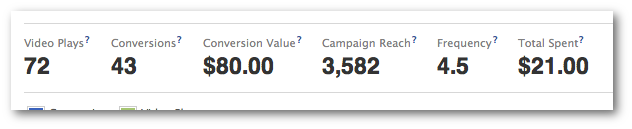
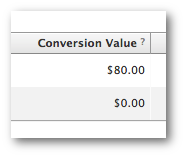
Second, there is now a metric for “Conversion Value” based on the value you entered when you pasted your code. This is shown again both at the top and as a column for each ad.
In the bonus section we’ll also discuss monitoring conversions with the Facebook ads reports. Stay tuned!
Your Assignment
Action Items:
- Create a conversion pixel for a simple conversion
- Paste a pixel, including Conversion Value
- Create or edit an ad and monitor conversion results