One of the reasons I love Power Editor is for this simple little feature that makes creation of multiple, highly-targeted ads infinitely faster than with the self-serve ad tool. After this lesson, you’ll use it too!
Ready? Let’s go!
What You Are Going to Learn Today
Today’s lesson is Saved Target Group. We’re going to focus on the following:
- What a Saved Target Group Is
- How to Create a Saved Target Group
- How to Use a Saved Target Group
The Lesson
What a Saved Target Group Is
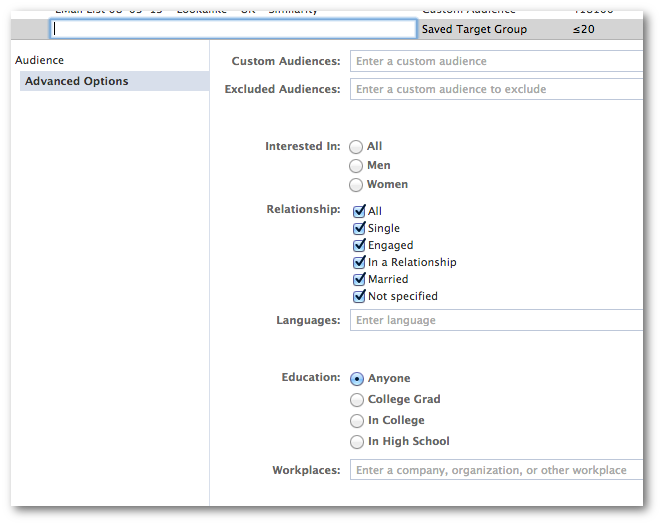
When you create an individual ad, you have loads of fields that you can complete in the Audience and Advanced Options sections:
- Country
- Age
- Gender
- Precise Interests
- Broad Categories
- Partner Categories
- Connections
- Custom Audiences
- Excluded Audiences
- Interested In
- Relationship
- Languages
- Education
- Workplaces
That’s a lot of info! And if you are very aggressive with your targeting, this can take a great deal of time.
With Saved Target Groups, however, you can create multiple saved segments that you regularly use so that you can easily select one when creating an ad and save yourself a lot of time!
How to Create a Saved Target Group
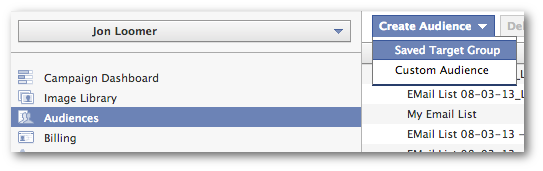
Click on “Audiences” on the left and then the “Create Audience” button. Then select “Saved Target Group.”
You are then presented with a view that looks just like ad creation, except that it includes only “Audience” and “Advanced Options.”
First, think about the way you split test your targeting. You should start a list of the types of ways you segment this. Then create your first Saved Target Group.
You’ll need to name it something descriptive, as always. If you create multiple Saved Target Groups, you’ll need to be able to quickly and easily pick the right one for your ad.
Then start filling out the targeting that fits that particular target.
How to Use a Saved Target Group
Once you’ve created your Saved Target Group, you can use it in an ad!
When creating an ad, go to the “Audience” section. Then click the button for “Use Existing Target Group.”
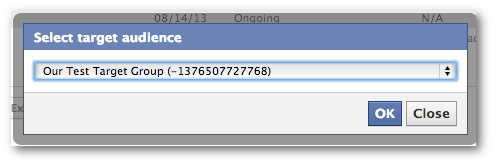
Then select the group that you want to use. Power Editor then fills everything in the way you created the group!
This is going to be very helpful in the next lesson as you start split testing…
Your Assignment
Action Items:
- Create two Saved Target Groups
- Use your Target Groups in separate ads