

Last week, I told you everything to know about the new Facebook Ads Manager. Now let’s take a closer look at Power Editor.


Like any other big change, the new Power Editor will take some getting used to. As you poke around you’ll find…
- Some things work differently now
- Some features are in different places
- The design is often different, but functions the same
- Some things are relatively or completely unchanged
- Some features are brand new
If you have the new Facebook Power Editor, here’s what it looks like…
Let’s dive in!
Top Navigation

Previously, the navigation items were buried within one of a couple of drop-downs at the top. Now they all remain uncovered for easy access.
Manage Ads: This is the default view, allowing you to manage your campaigns, ad sets and ads.
Audiences: This aggregates all of your Custom Audiences, Lookalike Audiences and Saved Audiences. Nothing new here.
Image Library: This is a central place where all of the images you have uploaded to Power Editor live. Nothing new here.
Reporting: A list of your saved reports lives here. More later in this post.
Page Posts: Previously known as “Manage Pages,” a collection of page posts. Nothing new here.
Tools: A dropdown with access to the following:
- Campaign Dashboard
- Pixels
- Billing
- Account Settings
- Account Groups
The Pixels page is relatively new, but not to this design. It is found within the new Ads Manager and provides an overview of the performance of your Website Custom Audience and conversion pixels.
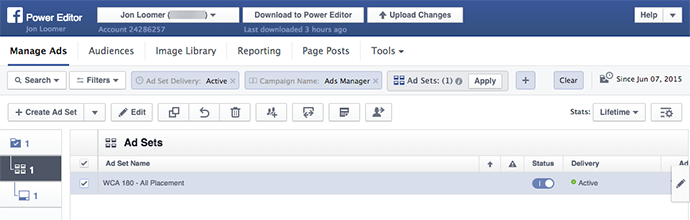
Side Navigation

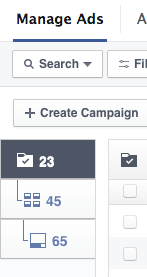
The previous side navigation allowed you to drill down by campaign, ad set, ad and labels. It confused many advertisers because you were asked to click on campaign, ad set and ad names on the left only to get campaigns, ad sets and ads on the right.
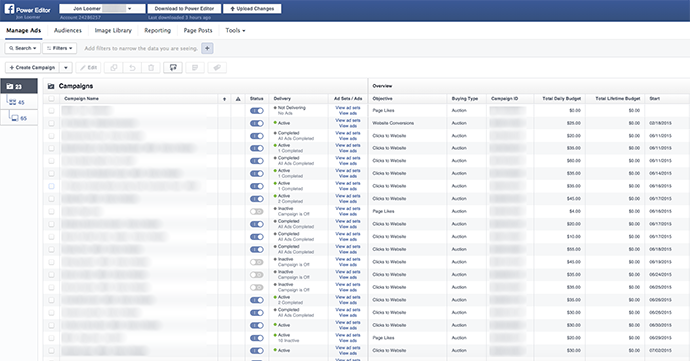
The new side navigation has icons only representing the campaign, ad sets and ad groups. When you click on any of those three levels, you’ll get that information on the right.
Since there is no longer a list of campaigns, ad sets and ads on the left, the use of filtering becomes more important.
More Room for Lists
One of the biggest cosmetic changes is that there is now far more room for lists of your campaigns, ad sets and ads. The prior Power Editor had a dual pane: The top was a list of campaigns, ad sets or ads; the bottom was the editing pane.
This was a “pain,” to say the least. I know my routine was grabbing the bar separating the two and moving it up to get a better view of what I am creating or editing.
Now there is no separator. The list takes up the real estate, making this design much cleaner.
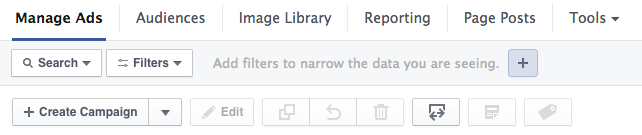
Editing

If you’re going to create a campaign, ad set or ad, you simply click the “Create” button at the top left. By default, you’ll create based on your current view (if viewing ad sets, you’ll create a new ad set). But there’s a drop-down to create whatever you want.
To edit a campaign, ad set or ad, simply click on the pencil icon at the far right. Whether creating or editing, the next view will look the same.
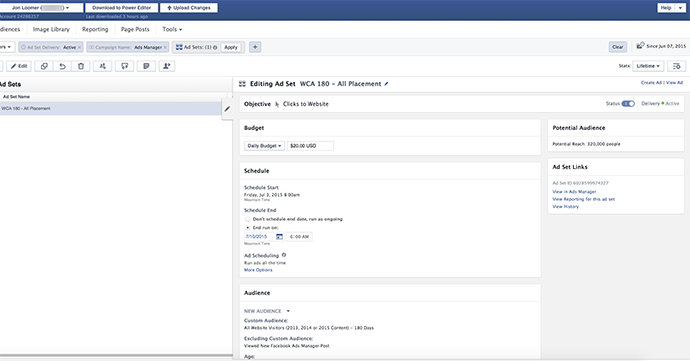
The editing pane then flies out from right to left, taking over the majority of the screen. When you’re done editing, click the pencil icon again and the pane will collapse to the right.
Search

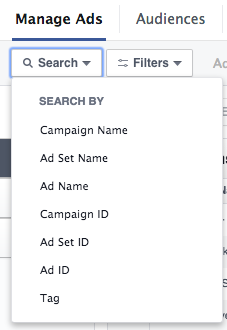
The search at the top left is actually no more than a shortcut to filters by name, ID or tag (we’ll get to those next).
Here are your search options:
- Campaign Name
- Ad Set Name
- Ad Name
- Campaign ID
- Ad Set ID
- Ad ID
- Tag
Filters


If you’ve created hundreds or thousands of ads — particularly if for different pages or clients — it can be very difficult finding what you want. That’s where these filters come into play, allowing you to narrow dow the results.
Following are the filtering options, by category…
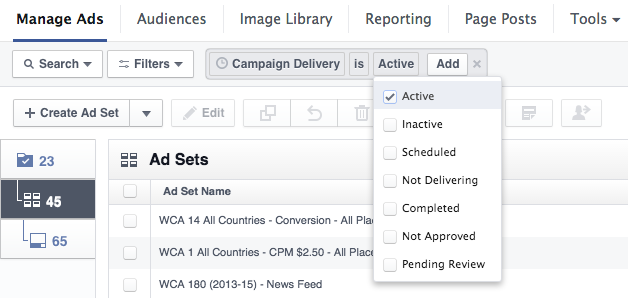
Campaign Delivery:
- Active
- Inactive
- Scheduled
- Not Delivering
- Completed
- Pending Review
- Not Approved
Ad Set Delivery:
- Active
- Inactive
- Scheduled
- Not Delivering
- Completed
- Pending Review
- Not Approved
Ad Delivery:
- Active
- Inactive
- Not Approved
- Pending Review
Objectives:
- Clicks to Website
- Product Catalog Sales
- Website Conversions
- Page Post Engagement
- Page Likes
- Mobile App Installs
- Mobile App Engagement
- Desktop App Installs
- Desktop App Engagement
- Local Awareness
- Offer Claims
- Event Responses
- Video Views
Recent Campaign Changes:
- Recently Edited
- Recently Uploaded
- Not Uploaded
Recent Ad Set Changes:
- Recently Edited
- Recently Uploaded
- Not Uploaded
Recent Ad Changes:
- Recently Edited
- Recently Uploaded
- Not Uploaded
When one of these is selected, the selected filter will then appear to the right…

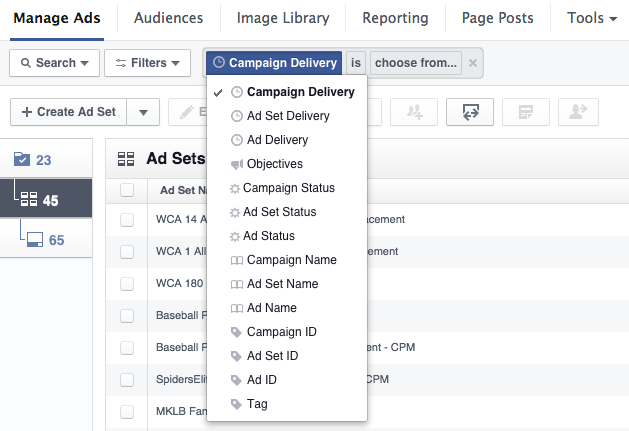
You’ll be able to change your filter by clicking on it.
Depending on the filter, you will also need to provide a variable. For example, if you choose “Campaign Delivery,” you’ll need to select from variables like Active, Inactive, Scheduled, etc.

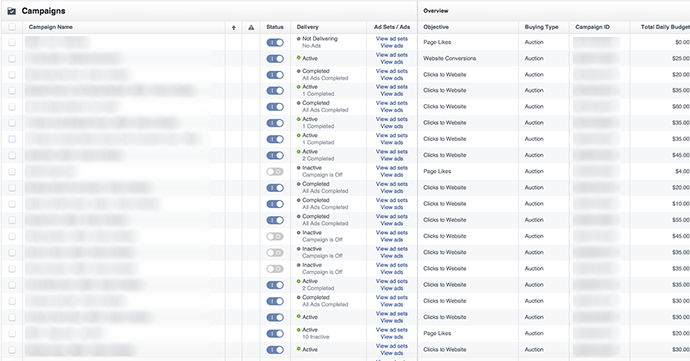
Reporting
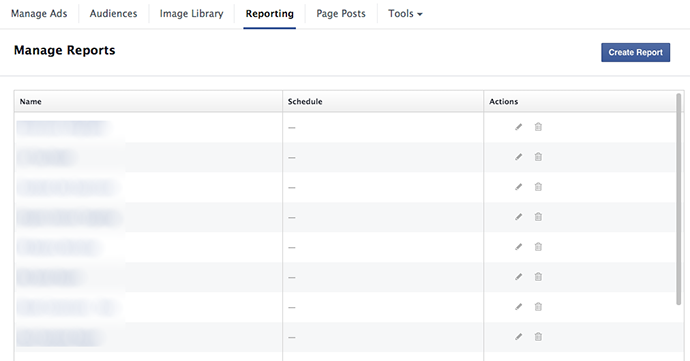
If you click on the “Reporting” link within the top navigation, you’ll get a list of your scheduled reports as shown above. This will be a collection of both the sample reports that Facebook gives you and the custom reports you have previously created.
You can create a new report from here by clicking the “Create Report” button at the far right. You will then be able to apply filters to view only what you want and save it for easy access later.
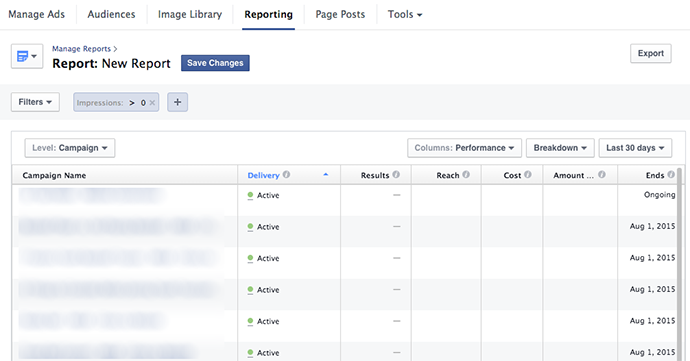
If you click on one of the reports, you’ll be able to view the results like below…
You can also generate a report while viewing a filtered list of campaigns within the Manage Ads view…


Just click the “Create Report” icon!
Your Turn
This is an overview of most of the changes you need to be aware of within the new Power Editor. Some things didn’t change, or changed very little.
What do you think about this update? Let me know in the comments below!