

Watch a video walkthrough of Facebook Canvas here…

Facebook Canvas is a pretty amazing way to provide users an immersive, mobile experience through ads. How do I describe what these things are for people who haven’t seen them before?
Well, they’re similar to Instant Articles, which allow publishers to share their content in an instantaneous fashion, bypassing slow load times. However, that’s not the same here. This isn’t a special feed from your website.
TechCrunch has described Facebook Canvas as “Instant Ads.” Canvas allows you to build a unique experience with the combination of text, images, videos, carousels, product feeds and more.
Here are some screen grabs from that TechCrunch article of a Facebook Canvas created by Wendy’s…

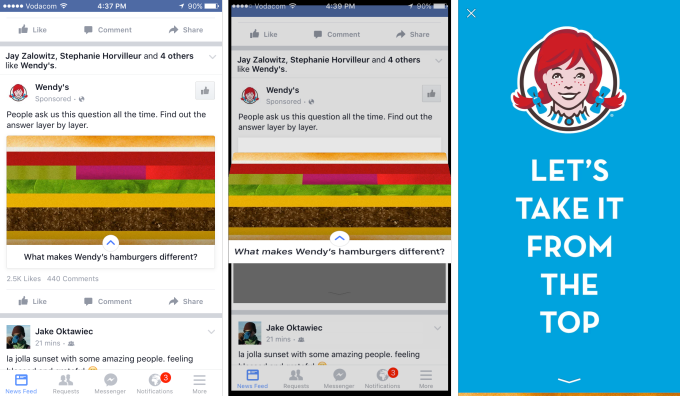
After clicking, you will keep scrolling to see more of this content…
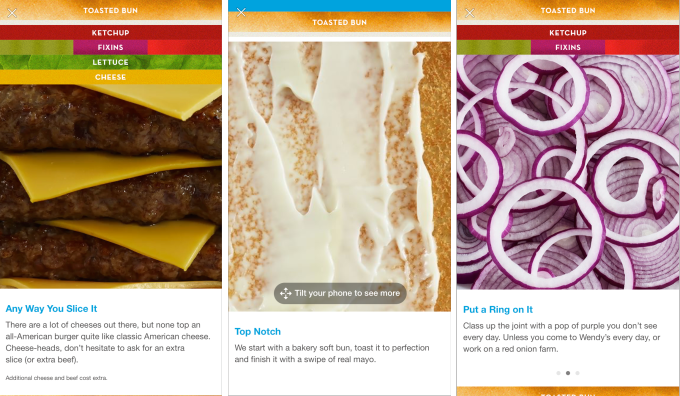
And scrolling…

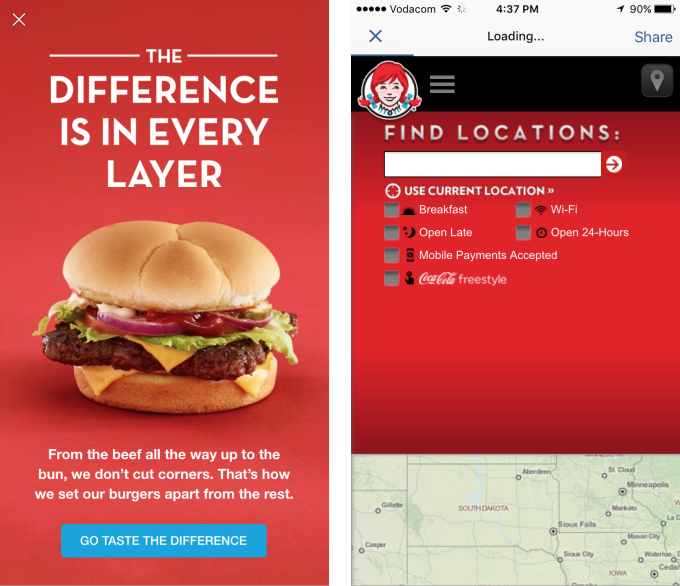
You can see some more examples here.
Creating Canvas ads is incredibly easy — or at least far easier than you’d expect. Facebook provides the tools that help you create them.
How can you create your own Facebook Canvas ad? Let me step you through it, from start to finish…
Access Canvas Through Your Page
To access Canvas, click on “Publishing Tools” from within your page…

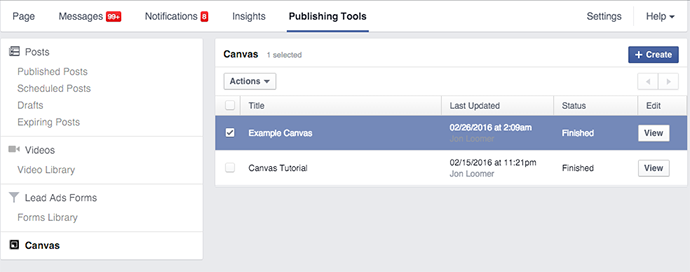
On the left hand side, you should see an option for Canvas.
From here, you can view a Canvas you’ve created before (you can’t edit them) or create a new one.
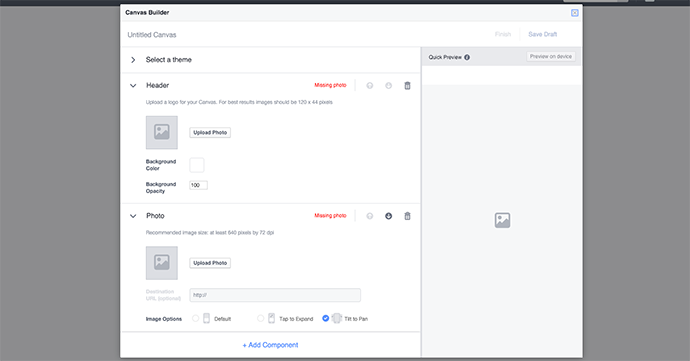
Create Your Canvas: Basics
Let’s create a new one! Click that “Create” button at the top. You’ll then see the following…

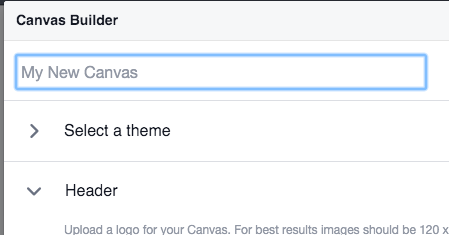
First, name that new canvas at the top…

On the left hand side, you will be adding components to build your canvas. On the right, you can preview what it will look like.
By default, Facebook will ask you to provide a theme, header, photo and button. But you can add, delete and move any items that you want.
At the very bottom, click the “Add Component” button.
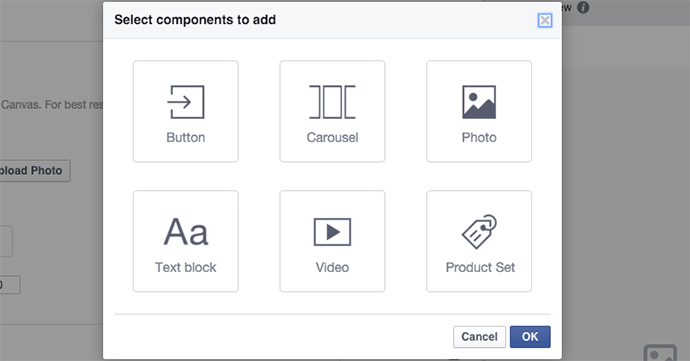
As you can see, you can add any of the following:
- Button
- Carousel
- Photo
- Text Block
- Video
- Product Set
You can select one or several of these and click “OK” to add them to your canvas. You can also add multiples of each if you want. You decide!
Create Your Canvas: Select a Theme
The theme is essentially the background color for any empty space (mainly text blocks). You have the options of White, Black or Custom. If you select Custom, click the color box next to it.
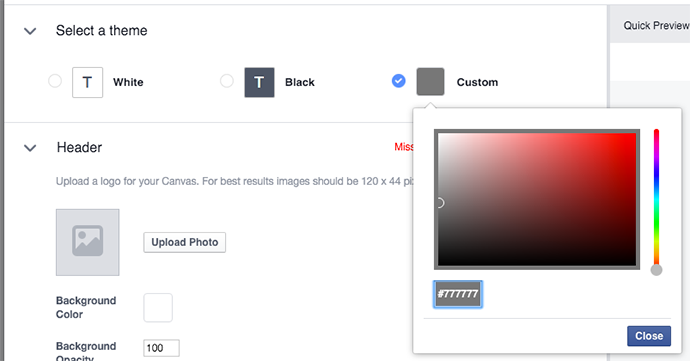
Then you can choose the color for your theme by entering the hex code or clicking it within the color guide.
Create Your Canvas: Header
You can insert a fixed header that will always sit at the top of your canvas.
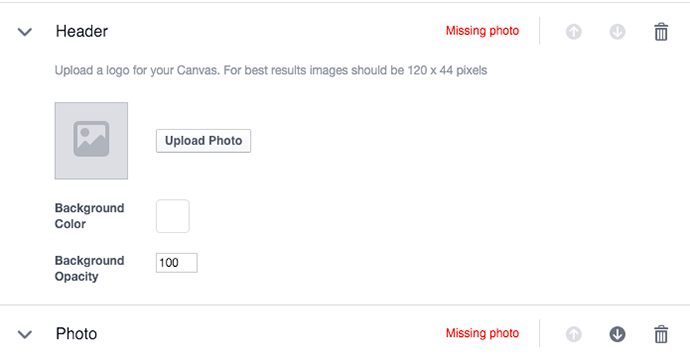
For whatever reason, Facebook recommends an image of 120x44px. That’s a really small image. Within Facebook’s canvas specs, they say that the maximum size of a header is 882x66px.
If your header is transparent, you can also select a background color as well as opacity.

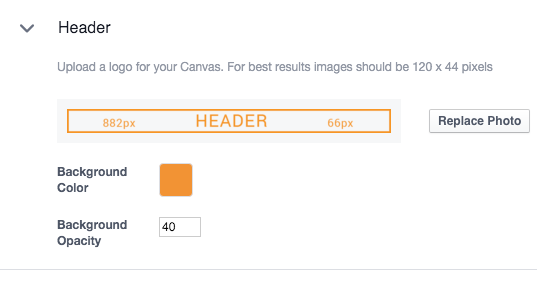
Keep in mind that this actually sits on top of the first item that goes below the header, so you may need to adjust accordingly.
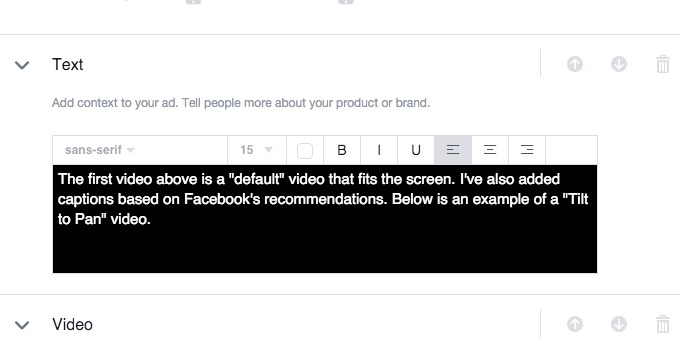
Create Your Canvas: Video
If you’re going to add a video, Facebook makes a few suggestions…
1. Minimum resolution of 720p.
2. Portrait orientation is recommended (landscape videos will automatically resize).
3. Avoid full screen videos.
4. Total video length can’t exceed two minutes. You can have more than one video in the canvas, but the total time of all videos can’t be greater than two minutes.
5. Use MP4 or MOV format.
6. The first frame will be the thumbnail (you can’t change this). This really doesn’t matter since the video will autoplay once you scroll to it anyway.
Something that surprised me was that the videos within a canvas autoplay with sound and replay on a loop. As soon as you scroll by them, of course, they will stop.

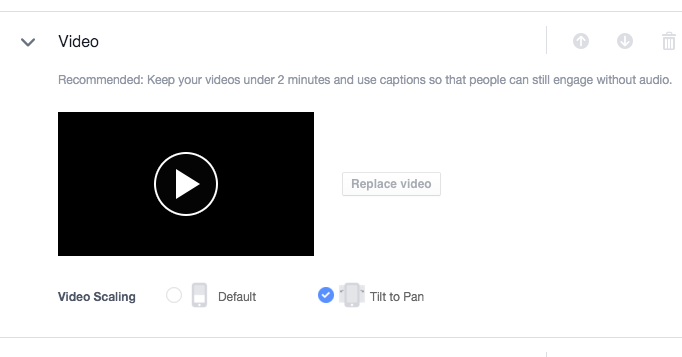
For video scaling, you have options of either default or “tilt to pan.”
If you choose the default, the video will fit the screen.
If you choose “tilt to pan,” the video will zoom in, and you can tilt your phone to see other areas of the video. This is most ideal for high resolution video tours.
Create Your Canvas: Photo

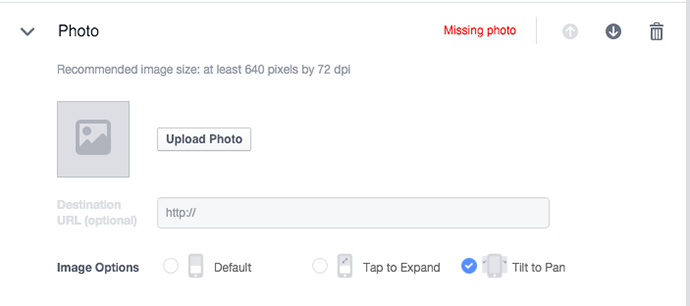
When adding a photo to your canvas, Facebook provides three options:
- Default
- Tap to Expand
- Tilt to Pan
Once again, it’s kind of strange that within the canvas creation process, Facebook recommends a 640 pixel image with a minimum of 72 dpi. However, that’s not consistent with their specs.
Here are photo design requirements, according to Facebook:
- Images will use the full width of the screen by default
- A full width image is 1,080 pixels wide
- You can use wider images for the tilt to pan option
- A full-height image is 1,920 pixels high
- You can use a taller image for the tap to expand option
- Use PNG or JPG file types
You can use up to 20 photos within your canvas.
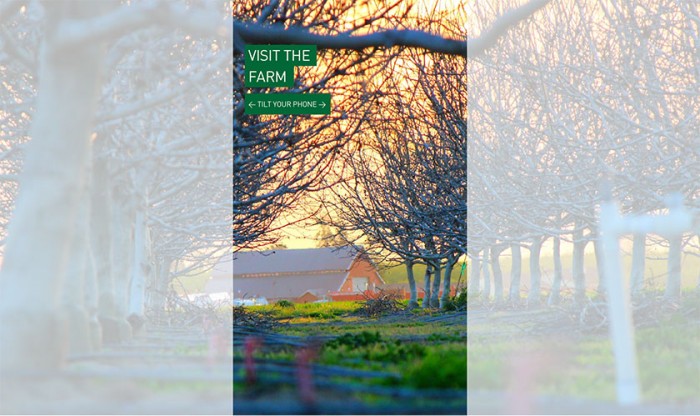
If you use the tilt to pan option, Facebook will focus on the middle portion of the image. Here’s an example…

Create Your Canvas: Carousel
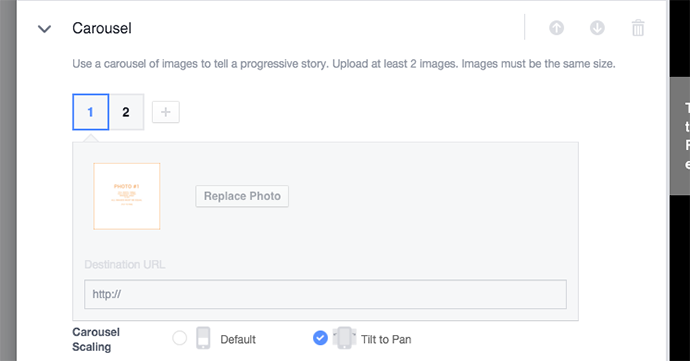
You can also add a carousel to your canvas, including a minimum of two images. While this is similar to creating a carousel ad, understand that these are images only (a link can be included in the default option) and they don’t need to be square.
Scaling options are default and tilt to pan. If you choose default, you can include a link. Otherwise, the tilt to pan option includes images only.
Here are the specs for canvas carousel from Facebook:
- There is no requirement on image ratio, but all images need to be the same size
- Maximum width is 1,080 pixels
- Maximum height is 1,920 pixels
- Use PNG or JPG file type
- Use up to 10 images per carousel
Create Your Canvas: Text Block

Text blocks are a good way to break up your canvas with information.
You can adjust the following:
- Font face
- Font size
- Color
- Bold, italics, underline
- Alignment
You are allowed no more than 500 characters in a single text block.
Create Your Canvas: Product Set

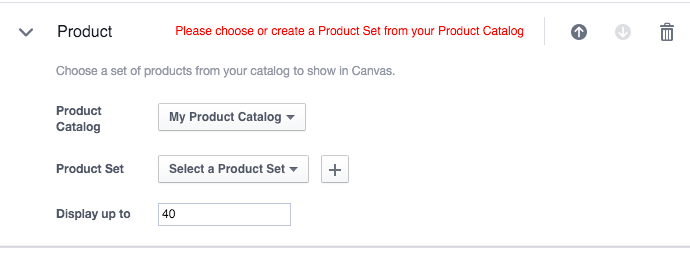
If you have a product feed, you can display it here. This is what you otherwise use for Dynamic Product Ads (more details on the product feed here).
You can’t determine the order of the products, and Facebook will dynamically display up to 40 at a time.
Create Your Canvas: Button


The final option is a button. This is another opportunity to send users to an external link. Your button will allow for a max of 30 characters, and you should allow for 48px of padding above and below.
One nice option is that you can show the button either inline or fixed to the bottom of the canvas (similar to the fixed header at the top).
Create Your Canvas: Save, Preview and Finish

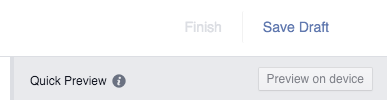
When you’re done, be sure to save the canvas at the top left. Before you click “finish,” you absolutely need to preview. After clicking on “Preview on Device,” Facebook will send an alert to your phone so that you can view it there.
The reason the preview is so important is that once you finish the canvas, you can’t edit it.

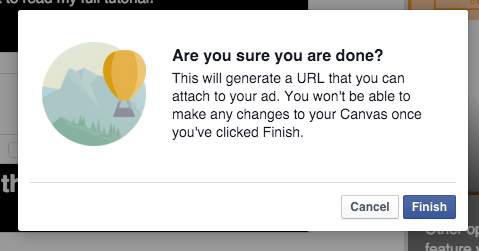
Make sure it’s the way you want it first!
Create Your Campaign, Ad Set and Ad
First, create a campaign with either the Clicks to Website or Website Conversions objective.

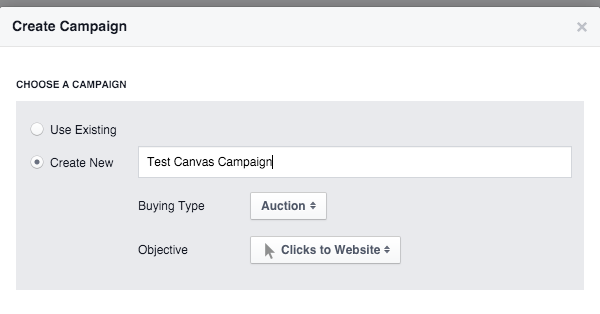
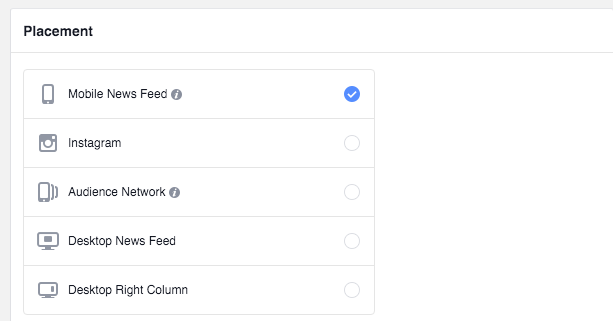
On the ad set level, it’s important that you only select Mobile News Feed for placement.

Within the destination while creating the ad, choose “Canvas” and select the canvas that you previously finished.

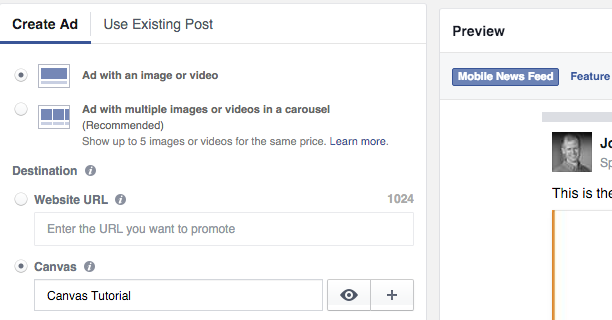
You’ll need to provide the following…
- Text: The text that goes above the ad
- Headline: The headline that goes below the thumbnail
- Thumbnail Image
Facebook has not been clear about the dimensions of the thumbnail image. Until you hear otherwise, use the 1200×628 image size (1.91:1 aspect ratio) that is required for the typical link ad.
My Canvas
I created a canvas that acts as a tutorial on some of the basics of creating one. It includes images, videos, text boxes and carousels that assemble all of the basic guidelines that I’ve discussed here. Maybe you’ll see it on Facebook?
Your Turn
Have you started experimenting with canvas yet? What types of things are you thinking about doing?
Let me know in the comments below!