

Facebook updated their advertising campaign structure to better organize your efforts. With the addition of Ad Sets, there are now three levels instead of two.
For more information on Ad Sets and the new structure, make sure you read my blog post here.
Today I will take you step-by-step through the new structure within Power Editor.
[Tweet “Here’s a tour of Facebook’s new campaign structure, complete with a real-world example…”]
1. Create Campaign
Click “Campaigns” at the top left and then the “Create Campaign” button.

That will bring up a dialog that looks like this…
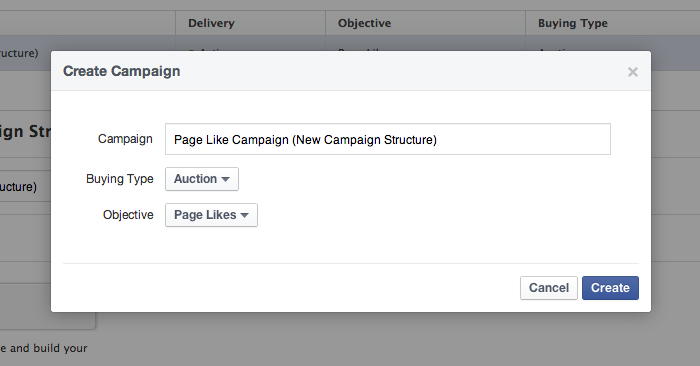
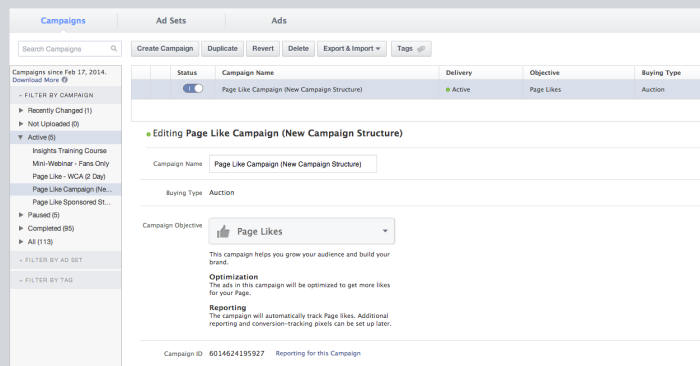
Name your campaign and set a Campaign Objective. Consider the Campaign Objective the ultimate goal of all of the ads within your campaign. Examples are:
- Page Likes
- Clicks to Website
- Website Conversions
- Page Post Engagement
- Desktop App Installs
- Mobile App Installs
- Desktop App Engagement
- Mobile App Engagement
- Offer Claims
- Event Responses
If any ad has a different goal, it shouldn’t be in this campaign.
The name of your campaign should add a bit more detail. For example, I may have a Campaign Objective of Website Conversions, but all ads within the campaign have the goal of selling my Insights Training Course. In that case, the name of the campaign may be “Insights Training Course Conversions.”
2. Create Ad Sets
As discussed in my first blog post on this topic, Ad Sets should be created to separate your ads by target audience. Ad Sets allow you to set separate budgets and start/end dates depending on your target audience.
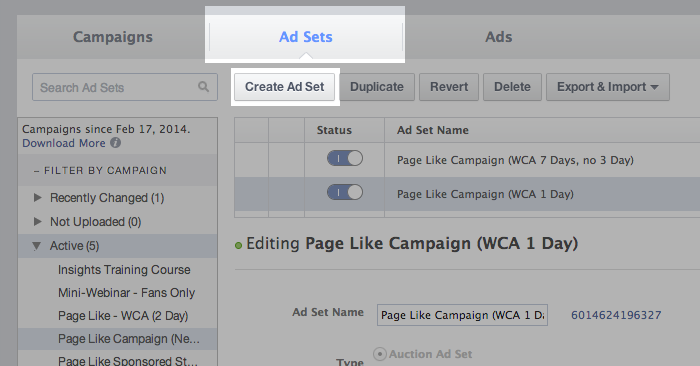
While your campaign remains selected on the left, click “Ad Sets” at the top. Then click the “Create Ad Set” button.
Your Ad Set will function exactly the way campaigns did before. Here you’ll set the daily or lifetime budget as well as the start and end dates.
I have created a campaign with the objective of Page Likes and created several Ad Sets that are targeting different audiences to accomplish that goal. Below, I’ve created an Ad Set with the target audience of people who have visited my website during the past day using Website Custom Audiences.
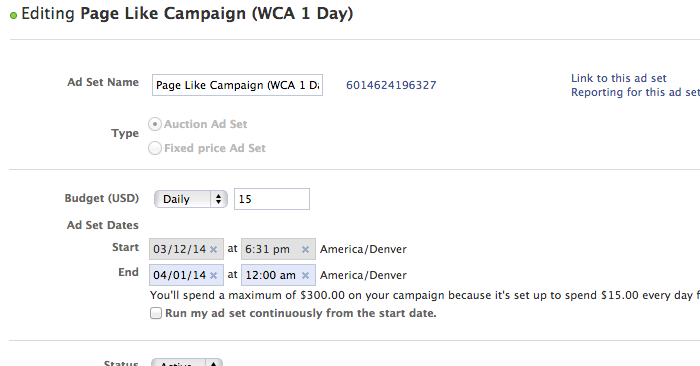
Make sure that the name of your Ad Set is descriptive. Since Ad Sets are created for different audiences, you’ll need to make sure that the name is clear about the people you are targeting. My Ad Set above is called “Page Like Campaign (WCA 1 Day).”
Over time, I have found this to be my most effective audience, so I have increased the budget of this Ad Set while dedicating less budget to other audiences.
3. Create Ads
While your Campaign remains selected on the left, click “Ads” at the top and click the “Create Ad” button.

That will bring up a dialog that looks like this…
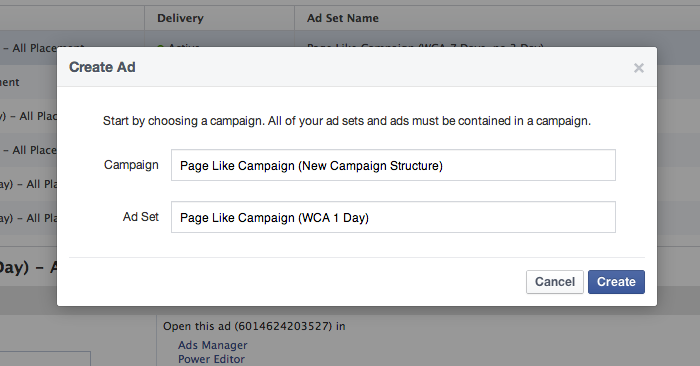
As you type into each text field, you’ll be given options for Campaigns and Ad Sets that you previously created. When you’re done, click the “Create” button.
The process of creating your ad will remain the same as before. Make sure to name your ads something descriptive so that you understand precisely what the ad is doing and where (placement).
An Example
I created a campaign with the objective of Page Likes called “Page Like Campaign (New Campaign Structure).”
That campaign consists of 13 different Ad Sets, each with a different target audience.
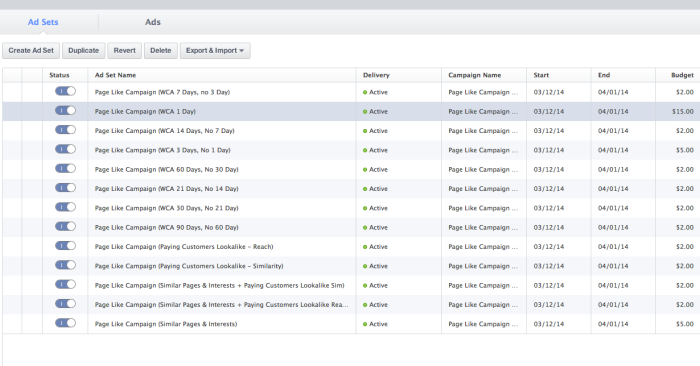
For insight into the people I’m targeting in each of these Ad Sets, here is a list of the titles:
- Page Like Campaign (WCA 1 Day)
- Page Like Campaign (WCA 3 Days, No 1 Day)
- Page Like Campaign (WCA 7 Days, no 3 Day)
- Page Like Campaign (WCA 14 Days, No 7 Day)
- Page Like Campaign (WCA 21 Days, No 14 Day)
- Page Like Campaign (WCA 30 Days, No 21 Day)
- Page Like Campaign (WCA 60 Days, No 30 Day)
- Page Like Campaign (WCA 90 Days, No 60 Day)
- Page Like Campaign (Similar Pages & Interests)
- Page Like Campaign (Paying Customers Lookalike – Similarity)
- Page Like Campaign (Paying Customers Lookalike – Reach)
- Page Like Campaign (Similar Pages & Interests + Paying Customers Lookalike Sim)
- Page Like Campaign (Similar Pages & Interests + Paying Customers Lookalike Reach)
As you can see, I created nine different Ad Sets for Website Custom Audiences. I did this to test the effectiveness based on how long ago someone visited my website.
While I had ceased using Interests and Lookalike Audience targeting once WCAs became available, this was once central to my non-fan targeting strategy. I decided to test the results of these audiences as well.
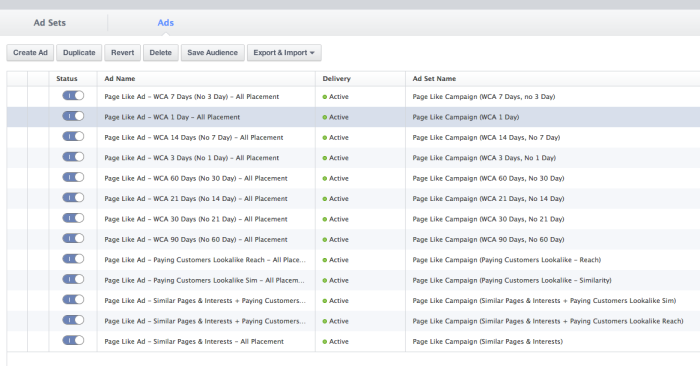
I created one ad per Ad Set, but know that you can create variations based on copy, creative and ad type here if you prefer.
Here’s an example of how my Page Like ads like that are targeted at WCAs…

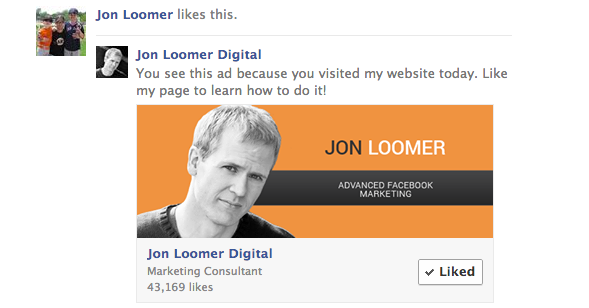
I change the copy based on how recently the target audience has visited my website.
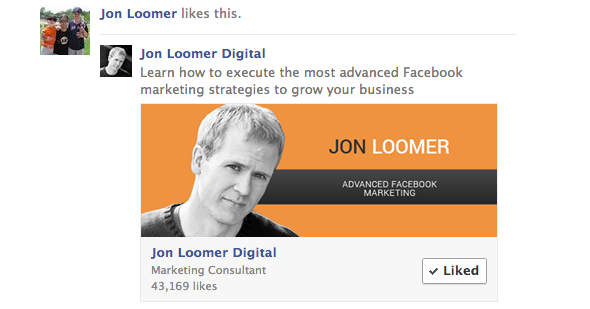
Of course, I can’t do this when targeting people based on Interests and Lookalike Audiences. Here’s what those ads look like…

Watch the Video
Here’s a video tutorial I also created…
